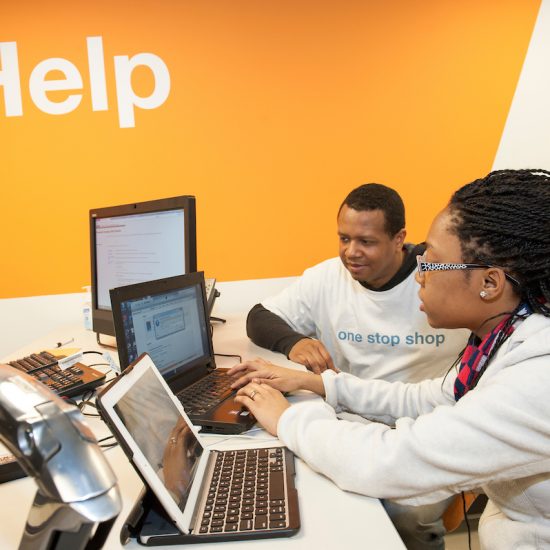
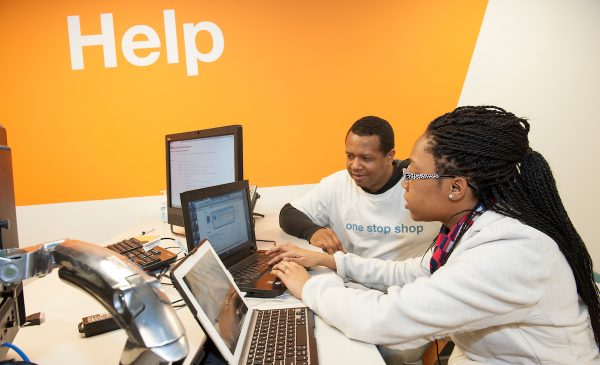
UIC ADN Computer Center Document #5615006 247 Pages Personal REXX User's Guide, Version 3.0 August 1991 For the IBM Personal Computer, PC XT, PC AT, or IBM Personal System 2. with DOS Quercus Systems P. O. Box 2157 Saratoga, CA 95070 (408) 867-REXX (c) 1985-1991 Quercus Systems All Rights Reserved. Information in this document is subject to change without notice and does not represent a commitment on the part of Quercus Systems. The software described in this document is furnished under a license agree- ment. It may be used and copied only in accordance with the terms of the agreement. No part of this manual may be reproduced or transmitted in any form or by any means, electronic or mechanical, including photocopy- ing and recording, for any purpose other than the purchaser's personal use without the written permission of Quercus Systems. Personal REXX and REXXTERM are trademarks of Quercus Systems. KEDIT is a trademark of Mansfield Software Group, Inc. PCED is a trademark of The Cove Software Group. LIMSIM is a trademark of Larson Computing. QEMM and DESQview are trademarks of Quarterdeck Office Systems. 386MAX is a trademark of Qualitas, Inc. MS-DOS and Windows are trademarks of Microsoft Corporation. OS/2 is a trademark of IBM. Sidekick is a trademark of Borland International, Inc. All other brand and product names are trademarks or registered trademarks of their respective compa- nies. Personal REXX User's Guide, Version 3.0 page ii ======================================================================== Contents ________ Chapter 1: Introduction . . . . . . . . . . . . . . . . . . . . . 1.1 Chapter 2: Installing Personal REXX . . . . . . . . . . . . . . . 2.1 System Requirements . . . . . . . . . . . . . . . . . . . . . . 2.1 The Installation Process . . . . . . . . . . . . . . . . . . . . 2.1 Overview of REXX Components . . . . . . . . . . . . . . . . . . 2.3 Basic Components . . . . . . . . . . . . . . . . . . . . . . 2.4 Optional Components . . . . . . . . . . . . . . . . . . . . . 2.4 Chapter 3: Running Personal REXX . . . . . . . . . . . . . . . . . 3.1 The RXINTMGR Command . . . . . . . . . . . . . . . . . . . . . . 3.1 The REXX Command . . . . . . . . . . . . . . . . . . . . . . . . 3.2 Making REXX Resident . . . . . . . . . . . . . . . . . . . . . . 3.2 REXX Command Options . . . . . . . . . . . . . . . . . . . . . . 3.3 REXX Environment Variables . . . . . . . . . . . . . . . . . . . 3.5 The REXX Interrupt . . . . . . . . . . . . . . . . . . . . . . . 3.7 The DOS Environment and RXNEWCOM . . . . . . . . . . . . . . . . 3.7 The RXNEWCOM Switch . . . . . . . . . . . . . . . . . . . . . 3.7 Accessing the DOS Environment . . . . . . . . . . . . . . . . 3.9 Invoking Personal Rexx from Batch Files . . . . . . . . . . . 3.10 REXX Memory Usage . . . . . . . . . . . . . . . . . . . . . . . 3.11 Typical Memory Requirements of Personal REXX . . . . . . . . 3.12 Examples of Personal REXX Configurations . . . . . . . . . . . . 3.13 Swapping REXX to Run Larger Programs . . . . . . . . . . . . . . 3.16 RXUNLOAD . . . . . . . . . . . . . . . . . . . . . . . . . . . . 3.17 Issuing DOS Commands from REXX Programs . . . . . . . . . . . . 3.18 Calling External REXX Functions . . . . . . . . . . . . . . . . 3.21 The REXX Batch Manager . . . . . . . . . . . . . . . . . . . . . 3.22 Optimizing Performance and Memory Use . . . . . . . . . . . . . 3.25 REXX Object Code . . . . . . . . . . . . . . . . . . . . . . 3.25 Performance Tradeoffs . . . . . . . . . . . . . . . . . . . . 3.26 Performance Hints and Tips . . . . . . . . . . . . . . . . . 3.28 Miscellaneous Usage Hints and Tips . . . . . . . . . . . . . . . 3.28 Personal REXX and Resident Programs . . . . . . . . . . . . . 3.28 Using REXX for AUTOEXEC Files . . . . . . . . . . . . . . . . 3.29 Using Expanded Memory (EMS) . . . . . . . . . . . . . . . . . 3.30 Using Personal REXX with REXXTERM and KEDIT . . . . . . . . . 3.31 Chapter 4: REXX Language Compatibility . . . . . . . . . . . . . . 4.1 Implementation Limits . . . . . . . . . . . . . . . . . . . . . 4.2 Differences from IBM OS/2 REXX . . . . . . . . . . . . . . . . . 4.3 Personal REXX User's Guide, Version 3.0 page iii ======================================================================== Differences from CMS REXX . . . . . . . . . . . . . . . . . . . 4.3 Differences from REXX 4.0 . . . . . . . . . . . . . . . . . . . 4.4 Differences in Source Program Handling . . . . . . . . . . . . . 4.5 Additional Language Features . . . . . . . . . . . . . . . . . . 4.5 Chapter 5: Learning REXX . . . . . . . . . . . . . . . . . . . . . 5.1 Purpose . . . . . . . . . . . . . . . . . . . . . . . . . . . . 5.1 About REXX . . . . . . . . . . . . . . . . . . . . . . . . . . . 5.1 Other References . . . . . . . . . . . . . . . . . . . . . . 5.1 Why Learn REXX? . . . . . . . . . . . . . . . . . . . . . . . 5.2 First Principles . . . . . . . . . . . . . . . . . . . . . . 5.2 Getting Started . . . . . . . . . . . . . . . . . . . . . . . . 5.3 Running Personal REXX . . . . . . . . . . . . . . . . . . . . 5.3 A First Program . . . . . . . . . . . . . . . . . . . . . . . 5.3 REXX Structure and Syntax . . . . . . . . . . . . . . . . . . . 5.4 Clauses . . . . . . . . . . . . . . . . . . . . . . . . . . . 5.4 Tokens . . . . . . . . . . . . . . . . . . . . . . . . . . . 5.4 Simple Variables, SAY, and PULL . . . . . . . . . . . . . . . . 5.5 Simple Variables . . . . . . . . . . . . . . . . . . . . . . 5.5 SAY and PULL Instructions . . . . . . . . . . . . . . . . . . 5.6 Initial Variable Values . . . . . . . . . . . . . . . . . . . 5.7 Expressions, Operators, and Assignments . . . . . . . . . . . . 5.7 Concatenation Operators . . . . . . . . . . . . . . . . . . . 5.8 Assignment . . . . . . . . . . . . . . . . . . . . . . . . . 5.8 Arithmetic Operators . . . . . . . . . . . . . . . . . . . . 5.9 PARSE Instruction . . . . . . . . . . . . . . . . . . . . . . . 5.9 Compound Variables . . . . . . . . . . . . . . . . . . . . . . . 5.11 More Operators, Program Flow, Grouping Clauses . . . . . . . . . 5.13 Comparison Operators . . . . . . . . . . . . . . . . . . . . 5.13 Logical Operators . . . . . . . . . . . . . . . . . . . . . . 5.14 Control Structures and DO Groups . . . . . . . . . . . . . . 5.15 Conditional Instructions . . . . . . . . . . . . . . . . . . . . 5.15 IF Instruction . . . . . . . . . . . . . . . . . . . . . . . 5.16 IF/THEN/ELSE . . . . . . . . . . . . . . . . . . . . . . . . 5.16 SELECT Instruction . . . . . . . . . . . . . . . . . . . . . 5.17 DO Loops . . . . . . . . . . . . . . . . . . . . . . . . . . . . 5.19 Simple Loops . . . . . . . . . . . . . . . . . . . . . . . . 5.19 Controlled Loops . . . . . . . . . . . . . . . . . . . . . . 5.20 Conditional Loops . . . . . . . . . . . . . . . . . . . . . . 5.21 Exiting Loops . . . . . . . . . . . . . . . . . . . . . . . . 5.22 More about PARSE . . . . . . . . . . . . . . . . . . . . . . . . 5.24 Parsing a Variable . . . . . . . . . . . . . . . . . . . . . 5.24 Parsing with Blank-delimited Words . . . . . . . . . . . . . 5.25 Parsing with Literal Patterns . . . . . . . . . . . . . . . . 5.26 Parsing with Column Numbers . . . . . . . . . . . . . . . . . 5.27 Parsing an Expression . . . . . . . . . . . . . . . . . . . . 5.27 Using Built-in Functions . . . . . . . . . . . . . . . . . . . . 5.28 Invoking Functions . . . . . . . . . . . . . . . . . . . . . 5.28 String Functions . . . . . . . . . . . . . . . . . . . . . . 5.29 Personal REXX User's Guide, Version 3.0 page iv ======================================================================== Conversion Functions . . . . . . . . . . . . . . . . . . . . 5.31 Information Functions . . . . . . . . . . . . . . . . . . . . 5.32 User-defined Subroutines and Functions . . . . . . . . . . . . . 5.32 Invoking Subroutines and Functions . . . . . . . . . . . . . 5.33 Defining Subroutines and Functions . . . . . . . . . . . . . 5.34 Subroutines Versus Functions . . . . . . . . . . . . . . . . 5.34 EXIT Instruction . . . . . . . . . . . . . . . . . . . . . . 5.35 Arguments . . . . . . . . . . . . . . . . . . . . . . . . . . 5.35 Variable Scope . . . . . . . . . . . . . . . . . . . . . . . 5.37 Commands to External Environments . . . . . . . . . . . . . . . 5.39 Advanced Features of REXX . . . . . . . . . . . . . . . . . . . 5.41 Numerics and Math . . . . . . . . . . . . . . . . . . . . . . 5.41 NUMERIC Instruction . . . . . . . . . . . . . . . . . . . . . 5.42 Debugging with the TRACE Instruction . . . . . . . . . . . . 5.42 INTERPRET Instruction . . . . . . . . . . . . . . . . . . . . 5.46 Personal REXX File Input and Output . . . . . . . . . . . . . . 5.46 Default I/O Streams . . . . . . . . . . . . . . . . . . . . . 5.47 I/O Routines . . . . . . . . . . . . . . . . . . . . . . . . 5.47 Personal REXX Utility Functions . . . . . . . . . . . . . . . . 5.51 Hardware Information Functions . . . . . . . . . . . . . . . 5.52 Hardware Access Functions . . . . . . . . . . . . . . . . . . 5.52 Miscellaneous Functions . . . . . . . . . . . . . . . . . . . 5.54 DOS Functions . . . . . . . . . . . . . . . . . . . . . . . . 5.54 What Next? . . . . . . . . . . . . . . . . . . . . . . . . . . . 5.56 Chapter 6: Input and Output in Personal REXX . . . . . . . . . . . 6.1 Introduction . . . . . . . . . . . . . . . . . . . . . . . . . . 6.1 I/O Built-in Functions . . . . . . . . . . . . . . . . . . . . . 6.3 The STREAM Built-in Function . . . . . . . . . . . . . . . . . . 6.5 I/O Examples . . . . . . . . . . . . . . . . . . . . . . . . . . 6.7 I/O Redirection and REXX Filters . . . . . . . . . . . . . . . . 6.8 Chapter 7: Tracing and Interactive Debugging . . . . . . . . . . . 7.1 The TRACE Instruction . . . . . . . . . . . . . . . . . . . . . 7.1 Interactive Debugging . . . . . . . . . . . . . . . . . . . . . 7.2 The /TR Option . . . . . . . . . . . . . . . . . . . . . . . . . 7.3 Tracing and REXX Command Options . . . . . . . . . . . . . . . . 7.3 Chapter 8: Personal REXX Utility Functions . . . . . . . . . . . . 8.1 Hardware Information Group . . . . . . . . . . . . . . . . . . . 8.1 DOS Function Group . . . . . . . . . . . . . . . . . . . . . . . 8.4 Hardware Access Group . . . . . . . . . . . . . . . . . . . . . 8.11 Miscellaneous Group . . . . . . . . . . . . . . . . . . . . . . 8.16 Personal REXX User's Guide, Version 3.0 page v ======================================================================== Chapter 9: Console Stack and Related Utilities . . . . . . . . . . 9.1 Installing the Console Stack . . . . . . . . . . . . . . . . . . 9.1 Using the Console Stack . . . . . . . . . . . . . . . . . . . . 9.2 PRESS . . . . . . . . . . . . . . . . . . . . . . . . . . . . . 9.3 STACKDRV, the Stack Device Driver . . . . . . . . . . . . . . . 9.5 DISABLE and ENABLE . . . . . . . . . . . . . . . . . . . . . . . 9.6 MAKEBUF, DROPBUF, SENTRIES, DESBUF, and CONWAIT . . . . . . . . 9.6 Chapter 10: LISTFILE, EXECIO, and GLOBALV . . . . . . . . . . . . 10.1 LISTFILE . . . . . . . . . . . . . . . . . . . . . . . . . . . . 10.1 EXECIO . . . . . . . . . . . . . . . . . . . . . . . . . . . . . 10.5 GLOBALV . . . . . . . . . . . . . . . . . . . . . . . . . . . 10.10 Chapter 11: RXWINDOW Function Package . . . . . . . . . . . . . . 11.1 Loading the Function Package . . . . . . . . . . . . . . . . . . 11.1 Windowing Functions . . . . . . . . . . . . . . . . . . . . . . 11.3 Brief Descriptions . . . . . . . . . . . . . . . . . . . . . 11.3 Window Control Functions . . . . . . . . . . . . . . . . . 11.3 Field-Oriented Functions . . . . . . . . . . . . . . . . . 11.3 Other Window I/O Functions . . . . . . . . . . . . . . . . 11.3 Full Descriptions . . . . . . . . . . . . . . . . . . . . . . 11.4 Specifying Field Names . . . . . . . . . . . . . . . . . . . . 11.14 Usage Notes . . . . . . . . . . . . . . . . . . . . . . . . . 11.15 Appendix A: Personal REXX Application Program Interfaces . . . . . A.1 Types of Application Program Interfaces . . . . . . . . . . . . A.1 Running a REXX Program as a Macro . . . . . . . . . . . . . . A.1 Function Package Interfaces . . . . . . . . . . . . . . . . . A.2 Resident Environments . . . . . . . . . . . . . . . . . . . . A.2 Shared Variable Interface . . . . . . . . . . . . . . . . . . A.2 Accessing the Console Stack . . . . . . . . . . . . . . . . . A.2 Examples of Application Program Interfaces . . . . . . . . . . . A.2 Personal REXX Calls to Application Environments . . . . . . . A.2 Function Packages . . . . . . . . . . . . . . . . . . . . . . A.3 Shared Variable Interface . . . . . . . . . . . . . . . . . . A.3 Personal REXX Control Block Overview . . . . . . . . . . . . . . A.4 Notes on Using Program Interfaces . . . . . . . . . . . . . . . A.5 General Rules . . . . . . . . . . . . . . . . . . . . . . . . A.5 Expanded Memory Usage . . . . . . . . . . . . . . . . . . . . A.6 Calling REXX from an Application Program . . . . . . . . . . A.6 Application Handling of Commands Passed from REXX . . . . . . A.7 Function Package Processing . . . . . . . . . . . . . . . . . A.7 Resident Environment Processing . . . . . . . . . . . . . . . A.9 Using REXX Service Calls in an Application . . . . . . . . . A.10 Personal REXX User's Guide, Version 3.0 page vi ======================================================================== Personal REXX Interrupt Functions . . . . . . . . . . . . . . . A.12 Personal REXX Control Blocks . . . . . . . . . . . . . . . . . . A.15 arg_block (Argument Block) . . . . . . . . . . . . . . . . . A.15 break_block (Break Block) . . . . . . . . . . . . . . . . . . A.16 call_block (Call Block) . . . . . . . . . . . . . . . . . . . A.16 env_block (Environment Block) . . . . . . . . . . . . . . . . A.17 shvblock (Shared Variable Request Block) . . . . . . . . . . A.19 Appendix B: Personal REXX Language Summary . . . . . . . . . . . . B.1 Basic Concepts . . . . . . . . . . . . . . . . . . . . . . . . . B.1 Language Statements . . . . . . . . . . . . . . . . . . . . . . B.2 Built-in Functions . . . . . . . . . . . . . . . . . . . . . . . B.6 Appendix C: Summary of Personal REXX Utility Functions . . . . . . C.1 Hardware Information Group . . . . . . . . . . . . . . . . . . . C.1 DOS Function Group . . . . . . . . . . . . . . . . . . . . . . . C.2 Hardware Access Group . . . . . . . . . . . . . . . . . . . . . C.4 Miscellaneous Group . . . . . . . . . . . . . . . . . . . . . . C.6 Windowing Functions . . . . . . . . . . . . . . . . . . . . . . C.7 Appendix D: Commands and Environment Variables . . . . . . . . . . D.1 Personal REXX Commands . . . . . . . . . . . . . . . . . . . . . D.1 Personal REXX Environment Variables . . . . . . . . . . . . . . D.4 Appendix E: Error Messages and Return Codes . . . . . . . . . . . E.1 Messages 1 through 51 . . . . . . . . . . . . . . . . . . . . . E.1 Messages 101 through 170 . . . . . . . . . . . . . . . . . . . . E.4 Return Codes . . . . . . . . . . . . . . . . . . . . . . . . . . E.10 Return Codes from REXX Programs . . . . . . . . . . . . . . . E.11 Return Codes from Other Components of Personal REXX . . . . . E.12 Index . . . . . . . . . . . . . . . . . . . . . . . . . . . . . . . . 1 Personal REXX User's Guide, Version 3.0 1. Introduction page 1.1 ======================================================================== Chapter 1 Introduction ____________ REXX is a high-level language designed to support personal programming, operating system command files, macros, and prototyping. REXX was orig- inally provided by IBM as a component of the mainframe VM/CMS system, but is now available in many additional environments. Personal REXX provides a processor for the REXX programming language that runs under MS-DOS and OS/2 on the IBM PC, PS/2, and compatible computers. Personal REXX also includes related operating system extensions, convenient tools and utilities, and a simple but powerful menu and window building func- tion package. The objective in assembling this diverse collection of tools is to facilitate your personal programming activities: to let you develop shortcuts and time-savers for routine tasks you do frequently, to remove some of the drudgery from writing programs to solve both unique and gen- eral problems encountered while using your computer, and to shorten as much as possible the gap between an idea you have for a new use of your computer and its successful realization. Examples of this kind of personal programming include: * Writing one-of-a-kind, throw-away utilities for such tasks as cleaning out files in multiple directories, making repetitive formatting chang- es to a number of related text files, or displaying internal informa- tion from specialized application files. * Creating systems of interrelated menus that provide access in a more convenient way to other applications and tools you use frequently, and that also set up the proper DOS files, directories, and environment information as required. * Assembling help systems that offer, in a structured fashion, access to online documentation and information needed to use your various appli- cation software packages. * Building new applications out of existing tools, such as a personal- ized electronic mail handling facility that combines a word processor to create messages, a communication program to send the messages, and a database system to archive the messages. * Constructing special-purpose database systems that provide for conven- ient data entry, permanent data storage, and customized reports with- out using expensive, complex database software. Data from such systems can easily be passed to other relevant applications, such as a spread- sheet or graphics program. Personal REXX User's Guide, Version 3.0 1. Introduction page 1.2 ======================================================================== * Prototyping, with a minimum of effort, new ideas you have for useful applications. The ease of changing REXX code makes it feasible to experiment with a variety of possible application functions, program- ming approaches, and user interfaces in the same time that would be required to try many fewer alternatives in a lower-level language. Just as with any good tool, the applications of Personal REXX are as diverse and varied as its users. You may have decided to look at REXX for some specific purpose, such as writing REXXTERM scripts, KEDIT mac- ros, or sophisticated 'batch' procedures. But we hope that, asyou work with REXX, you will continue to discover new and unexpected applications for it. Using Personal REXX will often save you a lot in programming time. Pro- gram development, debugging, and maintenance is often easier and faster with REXX than with lower-level languages like C and assembler language. Quercus Systems encourages comments about Personal REXX and suggestions for improvements. You can contact us by telephone at (408) 867-REXX. We also support a bulletin board system, where you can make comments, ask questions about Personal REXX, and exchange REXX programs with other users. The bulletin board can be reached at (408) 867-7488, and is usu- ally available 24 hours a day, 7 days a week. Registered users can also contact us about problems encountered while using Personal REXX. In most cases, the best approach would be to call us to see if your problem has a known solution. If the problem can't be solved over the phone, you should mail us a floppy disk containing the REXX program involved. Note: We are not able to provide instruction in ___ the REXX language itself, or to provide assistance with individual pro- gramming projects. The documentation for Personal REXX comes in two parts. One part of the documentation is this User's Guide. The other part is the book The REXX Language: A Practical Approach to Programming, Second Edition by M. F. Cowlishaw (Prentice-Hall, 1990).¶ The First Edition of The REXX Language was distributed with earlier versions of Personal REXX. All page number and section references in this manual to The REXX Language apply to the Second Edition. The REXX Language is a complete reference for the REXX language. This User's Guide gives installation and usage information specific to Per- sonal REXX. Chapter 5, "Learning REXX" provides an introduction to the REXX language for programmers who have not yet been exposed to REXX. ========================= ¶ The REXX Language is included with Personal REXX through an agreement with Prentice-Hall. Its inclusion does not imply any endorsement of Personal REXX by Prentice-Hall or by the book's author. Personal REXX User's Guide, Version 3.0 1. Introduction page 1.3 ======================================================================== Quercus Systems makes a version of Personal REXX for OS/2 which is fully compatible with the DOS version (except for the application programming interface and various external utility programs). It is also compatible with IBM's OS/2 REXX but offers superior performance, documentation, and functionality. Although much of the information here applies to the OS/2 version as well, an OS/2 Supplement is included with the OS/2 version to document differences and extensions. Quercus Systems intends to offer a full line of REXX-related products for MS-DOS and OS/2. The REXXTERM asynchronous communication package is already available. A number of additional products are under considera- tion. Please let us know if there are REXX-related products or exten- sions to Personal REXX that you would like to see. Personal REXX User's Guide, Version 3.0 2. Installing Personal REXX page 2.1 ======================================================================== Chapter 2 Installing Personal REXX ________________________ 2.1. System Requirements Before attempting to install Personal REXX, you should first be sure that your system is capable of supporting it. To use Personal REXX you will need an IBM PC, PS/2, or fully compatible computer running DOS ver- sion 2.0 through 5.0 or fully compatible operating system. (The DOS version of Personal REXX runs only under DOS or the DOS compatibility mode of OS/2. The OS/2 version of Personal REXX is required for the protected mode of OS/2.) You must also have enough memory to support Personal REXX. When loaded, the Personal REXX processor occupies approx- imately 160K of memory. The size of your REXX programs and the vari- ables that they use determine the size of additional work areas used by Personal REXX. The optional Stack Manager, Batch Manager, and Global Variable Manager, and the RXWINDOW Function Package also use additional memory. You must have enough additional memory to allow for DOS itself, any memory- resident device drivers and utilities that you use, and any applications that will be used with Personal REXX. If your system has EMS memory (Lotus-Intel-Microsoft expanded memory), Personal REXX can use it for many of its buffers and work areas, reduc- ing its usage of conventional DOS memory. Personal REXX supports EMS version 3.2 or later.¶ 2.2. The Installation Process Personal REXX is supplied on two 5.25" disks or on one 3.5" disk. With the 5.25" version, most of the files used in the Personal REXX installa- tion are on the disk labeled Program Disk. These files are in the root directory of the disk for the 3.5" version. The files include: * README, documenting any changes made to Personal REXX since this manu- al was printed * CONTENTS.DOC, listing all files supplied with Personal REXX * WHATSNEW.30 with notes for users updating from earlier versions of Personal REXX to Personal REXX 3.0 * the executable modules necessary to run Personal REXX * a number of optional utility modules ========================= ¶ Personal REXX's EMS support requires four contiguous EMS page frames. Four contiguous page frames are always provided under EMS 3.2, and are almost always provided under EMS 4.0, although some EMS 4.0 drivers support other configurations in special circumstances. Personal REXX User's Guide, Version 3.0 2. Installing Personal REXX page 2.2 ======================================================================== Additional files are supplied as subdirectories of the 5.25" disk labeled Auxiliary Disk, or of the single 3.5" disk. These subdirecto- ries are: * \SAMPLES, containing a number of sample REXX programs * \HELP, containing files with summaries of Personal REXX commands, syn- tax, and functions * \LEARN, containing all of the REXX programs used in Chapter 5, "Learn- ing REXX" * \API, with sample files for use by software developers interfacing their programs to Personal REXX, as discussed in Appendix A, "Personal REXX Application Interfaces". These files will not be of interest to most users of Personal REXX. To install Personal REXX, you should be familiar with the DOS commands that are used to copy files and disks, such as the COPY and DISKCOPY commands, and with the concept of DOS directories. (If you are not familiar with these aspects of DOS, then you should review the appropri- ate sections of your DOS manual.) Installing Personal REXX involves the following steps: * Read the Personal REXX license agreement. Open the Personal REXX disk package only if you agree to the terms of the agreement. If you do not agree to the terms of the license agreement, you can return the unopened disk package, along with all Personal REXX documentation, for a full refund. * Your Personal REXX registration form is inside the disk envelope. Fill out and mail in the registration form. Postage is prepaid for users within the United States. Users outside the United States should enclose the registration form in an envelope with the proper postage affixed. As a further record of your serial number, you may want to take a min- ute to record your number in the space below: Personal REXX Serial # _______________________________________________ Registered users of Personal REXX can contact Quercus Systems with questions about Personal REXX, can make use of the Quercus Systems bulletin board, will receive news about future versions of Personal REXX and related products, and are eligible for low cost upgrades to later releases of Personal REXX. * Using the DISKCOPY command, make working copies of the Personal REXX distribution disks and then keep the originals in a safe place. * Use the DOS TYPE command to view the contents of the README file on the Program Disk. This file contains any information on Personal REXX usage that has become available since this manual was printed. If you Personal REXX User's Guide, Version 3.0 2. Installing Personal REXX page 2.3 ======================================================================== are upgrading from an earlier version, you should also read the file UPGRADE.DOC. * If you are currently using an earlier version of Personal REXX, remove all earlier versions from the directory that will hold Personal REXX Version 3.0 and also remove any files supplied with earlier versions from directories in your DOS path. If files from different versions are used together, results can be unpredictable. * To install Personal REXX on your hard disk, we recommend that you make a directory called REXX30 on your disk. Copy all Personal REXX files that you need (as described below) to this directory. For simplicity you may copy all files from the root directory of the distribution disk (Program Disk if 5.25" media) to the REXX30 directory. * Copy the RXINTMGR.COM and REXX.EXE files from the Program Disk to the disk that you use for your daily work. If you want to use the resi- dent version of Personal REXX, you will also need the file RX.EXE. * The other files in the root directory of the Program Disk are utility programs that you may want to use. They are listed in Section "REXX Components". If you have enough room on your hard disk, you should copy all of these files to a subdirectory of your hard disk. You will probably also want to copy the files from the \SAMPLES and \HELP directories. If you will be working with Chapter 5, "Learning REXX", you will also want to copy the programs discussed in that chapter from the \LEARN directory. * Edit your AUTOEXEC.BAT file so that the RXINTMGR command is invoked every time that DOS is loaded. RXINTMGR is a small (2000 bytes) resi- dent program. Although it is optional for REXX itself, it is required for use of the stack and many of the utilities supplied with Personal REXX. 2.3. Overview of REXX Components The complete Personal REXX system includes more than just the REXX lan- guage processor. There are also a number of utility programs which are designed to provide some of the function of the CMS utilities of the same name.ý In addition, there are some optional extensions to DOS itself, such as the Stack Manager, that provide a richer and more con- venient environment for running REXX programs. In this section we will describe these components briefly. ========================= ý CMS (Conversational Monitor System), sometimes referred to in this User's Guide as VM/CMS, is an IBM operating system usually run on IBM mainframe computers, and is the system for which IBM first made REXX available. Personal REXX User's Guide, Version 3.0 2. Installing Personal REXX page 2.4 ======================================================================== 2.3.1. Basic Components * RXINTMGR.COM * REXX.EXE * RX.EXE To run Personal REXX you need the files RXINTMGR.COM and REXX.EXE. RXINTMGR should be resident and REXX can be either resident or nonresi- dent. RXINTMGR.COM is the "Interrupt Manager" for the Personal REXX package. Most communication between the different components of Personal REXX goes through RXINTMGR. Therefore, it must be resident in memory before any other parts of the package can be used. Add the line rxintmgr to your AUTOEXEC.BAT file to be sure it is loaded. The file REXX.EXE is the Personal REXX language processor. It is "installed" by simply copying it to any convenient disk. Chapter 3, "Running Personal REXX" describes how to make the Personal REXX language processor resident in your PC's memory. RX.EXE is used to invoke the REXX processor if it has been made resident. 2.3.2. Optional Components The Stack Manager The "program stack" is a useful system facility familiar to users of VM/CMS. (For complete information about the stack, see Chapter 9, "Console Stack and Related Utilities".) The REXX instructions QUEUE and PUSH require the presence of the program stack. Since the stack is not a standard part of DOS or the PC BIOS, Personal REXX has pro- vided a system extension to implement it called STACKMGR.COM. If you decide to make use of it, this file should be copied to the disk or disks on which you keep your AUTOEXEC.BAT, and the line stackmgr should be added to AUTOEXEC.BAT. In addition to STACKMGR.COM, several other stack-related utilities, all discussed in Chapter 9, "Console Stack and Related Utilities", are included with Personal REXX: * CONWAIT.COM * DESBUF.COM * DISABLE.COM * DROPBUF.COM Personal REXX User's Guide, Version 3.0 2. Installing Personal REXX page 2.5 ======================================================================== * ENABLE.COM * MAKEBUF.COM * PRESS.EXE * SENTRIES.COM * STACKDRV.SYS The CMS-Like Utilities Several utilities that provide some of the function of commands often used in VM/CMS REXX programs are provided. They are documented in Chapter 10, "LISTFILE, EXECIO, and GLOBALV": * EXECIO.EXE * GLOBALV.EXE * GLVMGR.COM * LISTFILE.EXE REXX Batch Manager The REXX Batch Manager, discussed in Section "REXX Batch Manager", is a memory-resident utility that allows REXX programs to be called from the DOS command line much as batch files are called, without preced- ing the name of the REXX program with REXX or RX. The files involved are: * RXBATMGR.COM * RXBATUTL.COM * RXBATIN.BAT RXWINDOW Function Package RXWINDOW.EXE, discussed in Chapter 11, "RXWINDOW Function Package", is an optionally-loadable module that provides window and menu han- dling functions for REXX programs. Miscellaneous Other modules supplied with Personal REXX: * RXUNLOAD.EXE is a utility that can remove certain memory-resident components of Personal REXX from memory. It is discussed in Chap- ter 3, "Running Personal REXX". * RXINFO.EXE is a utility that displays information about REXX pro- grams to which REXX object code has been appended. It is also dis- cussed in Chapter 3, "Running Personal REXX". Personal REXX User's Guide, Version 3.0 3. Running Personal REXX page 3.1 ======================================================================== Chapter 3 Running Personal REXX _____________________ This chapter discusses the commands, options, and parameters involved in running Personal REXX and adapting it to your hardware and software con- figuration. If you are a new user of Personal REXX you should read "The RXINTMGR Command" and "The REXX Command" on page 3.2 now, and can return to the rest of the chapter after gaining some experience with the prod- uct. 3.1. The RXINTMGR Command The REXX Interrupt Manager (RXINTMGR) provides interprogram communica- tion services between various independent parts of the Personal REXX package. It is required if you will be using features like the stack, global variables, or utilities like LISTFILE that can set REXX vari- ables. It is also required in order for other applications like REXXTERM and KEDIT to use REXX. If you do not need any of these features, the REXX command (REXX.EXE) can be used without RXINTMGR. We strongly recommend loading RXINTMGR in your AUTOEXEC.BAT, since it is necessary to exploit all the capabilities of Personal REXX, and it requires only about 2K of memory. This is usually done by placing in your AUTOEXEC.BAT file the line RXINTMGR If you accidentally run RXINTMGR twice, you will get a message telling you that the REXX Interrupt Manager has already been loaded. If you run RXINTMGR and get a message saying that the REXX Interrupt is already in use by some other program, you may need to change the REXX Interrupt to some other value. The REXX Interrupt Manager takes control of the REXX Interrupt. The REXX Interrupt is normally interrupt 60 but can be changed via the RXINT environment variable described later in this chap- ter. You will need to change the REXX Interrupt only if you have other programs that also use interrupt 60.¶ RXINTMGR (as well as all of the other Personal REXX resident programs) can be loaded into high DOS memory above 640K by memory managers such as 386MAX, QEMM, and LIMSIM, or with the DOS 5.0 LOADHIGH command. Consult the documentation of your memory manager product for information on how ========================= ¶ On the IBM PCjr, and possibly on some other machines, RXINTMGR will always think that the REXX Interrupt is in use by some other program even if it is not. This is due to the way the PCjr initializes its memory. You can force RXINTMGR to take over the interrupt by using the /F option of RXINTMGR. So on a PCjr, your AUTOEXEC.BAT file should use RXINTMGR /F. Personal REXX User's Guide, Version 3.0 3. Running Personal REXX page 3.2 ======================================================================== to do this. 3.2. The REXX Command Personal REXX programs are simply ASCII files with a file extension of REX, for example PROGRAM.REX. They are executed by the REXX command. Thus, REXX PROGRAM runs the file called PROGRAM.REX.ý A path can also be included, for example REXX C:\UTIL\PROGRAM If you don't specify a path, Personal REXX will look for your program in the current directory of the current drive, and if the program can't be found, will look in each of the directories specified in the current DOS PATH setting. The REXX command has no other required parameters, except for what is to be passed to the REXX program. For example, REXX XYZ ONE TWO THREE passes the string ONE TWO THREE to the program XYZ.REX. This string is passed literally, including any quotation marks or extra blanks. It can be accessed in your program by using REXX's ARG() built-in function, or the ARG or PARSE ARG instructions. 3.3. Making REXX Resident It is possible to make the REXX processor resident in your PC's memory. In this situation REXX is loaded into memory once, at the start of your session. The advantage of making REXX permanently resident is that DOS doesn't have to reload REXX into memory every time you want to run a REXX program. The disadvantage is that REXX occupies approximately 160K of memory whenever it is loaded. (More information on REXX memory use is given later in "REXX Memory Usage" on page 3.11.) If REXX is not permanently resident, the memory is tied up only while you are running a REXX program. If REXX is permanently resident, the memory is tied up until you reboot your machine or explicitly unload REXX. When you are first getting started with REXX, we recommend that you do not make REXX resident. ========================= ý Although an extension of REX is assumed, in fact any extension can be used if it is specified explicitly, for example REXX PROGRAM.XYZ. Personal REXX User's Guide, Version 3.0 3. Running Personal REXX page 3.3 ======================================================================== To make Personal REXX resident, issue the REXX command with the /R option: REXX /R Once REXX has been made resident you use the RX command to run REXX pro- grams, much as you would use the REXX command if REXX were not perma- nently resident. For example, RX PROGRAM or RX C:\UTIL\PROGRAM or RX PROGRAM.XYZ RX.EXE is much smaller than REXX.EXE. When you invoke the RX command, it locates the copy of REXX that you have made resident and passes con- trol to it. RX.EXE is small enough to load very quickly and to be con- veniently stored on a RAM disk. Once you have made REXX resident you should always use the RX command to run your REXX programs. If you accidentally use the REXX command at this point, an extra copy of REXX is loaded in, occupying an additional 160K of your PC's memory. REXX can normally be unloaded, and the memory it uses freed up, after it has been made resident. This is done with the /U option of the RX com- mand: RX /U You should generally avoid using RX /U if resident programs are loaded higher in memory (but below the 640K line) than REXX, so that you will not leave a "hole" in memory. (RXUNLOAD, discussed in "RXUNLOAD" on page 3.17, can also be used to unload REXX). 3.4. REXX Command Options There are a number of options that can be specified with the REXX and RX commands to control the operation of the program. When used, the options must precede the name of your REXX program on the command line. Thus the full format of the REXX command is: REXX [options] program-name [argument-string] For example, Personal REXX User's Guide, Version 3.0 3. Running Personal REXX page 3.4 ======================================================================== REXX /TRA /NX PROGRAM ABC DEF Note that the defaults used by Personal REXX are appropriate for most situations, so that most of these options are rarely used. The options are: /O Process the source file into internal format ("object code"), and save it on disk for future execution by appending it to the source file. Discussed in "REXX Object Code" on page 3.25. /S Retain source code in memory during program execution. This is the default unless you are running a program pre-converted to object code via the /O option. Discussed in "Performance Trade- offs" on page 3.26. /NS Do not retain the source code in memory after processing. Saves memory but prevents use of REXX source tracing facilities and the SOURCELINE built-in function. /NS is always in effect when you run programs that have been pre-converted to object code via /O. Discussed in "Performance Tradeoffs" on page 3.26. /T Include extra object code to enable tracing of results and labels. This is the default except when /O is used. Discussed in "Performance Tradeoffs" on page 3.26. /NT Do not include extra object code for tracing results and labels. This slightly decreases space and execution time overhead, but prevents use of TRACE R or TRACE L. /NT is the default when /O is used. Discussed in "Performance Tradeoffs" on page 3.26. /M Retain the statement mapping tables in memory for program execu- tion. This is necessary in order to use the REXX tracing facili- ties, to report statement numbers in the event of an error, and to maintain the SIGL variable. Keeping the tables increases the storage requirements of the program. It is the default. Dis- cussed in "Performance Tradeoffs" on page 3.26. /NM Do not retain statement mapping tables in memory after process- ing. When this option is used, line numbers are not available during execution, so the SIGL variable is not maintained, and line numbers will not be shown in the event of an error. This option should be used only with debugged programs. Discussed in "Performance Tradeoffs" on page 3.26. /X Use Lotus-Intel-Microsoft "expanded memory" (EMS), if it is installed, for storing source code, object code, and program variables in memory. This is the default, and leaves convention- al DOS memory below 640K available for other purposes. Dis- cussed in "Using Expanded Memory (EMS)" on page 3.30. Personal REXX User's Guide, Version 3.0 3. Running Personal REXX page 3.5 ======================================================================== /NX Do not use EMS for storing code and data. This increases the conventional memory requirements but may improve performance with certain software EMS emulators. Discussed in "Using Expanded Memory (EMS)" on page 3.30. /TR cc The specified trace setting cc (any valid value accepted by the TRACE instruction) is in effect when the program begins execu- tion. For instance, /TR?A starts the program in interactive debug mode. This option overrides any RXTRACE variable in the DOS environment. Discussed in Chapter 7, "Tracing and Interac- tive Debugging". As an alternative to specifying these option flags on the command line, they can be assigned to a DOS environment variable called RXFLAGS. For instance, the DOS command SET RXFLAGS=/NX replaces the default of /X with /NX. No other defaults are changed. Options specified in RXFLAGS are overridden by options specified on the REXX or RX command line. 3.5. REXX Environment Variables There are several DOS environment variables that you can use to tailor Personal REXX to your needs or to turn on or off certain Personal REXX options. You usually do not need to set any of the environment vari- ables, since they have default values that are reasonable in most cir- cumstances. If you do set any environment variables, you would normally do so from within your AUTOEXEC.BAT. You use the DOS SET command to set the values of these variables. For example, to set the RXISA environment variable to 25, you would issue the following DOS command: SET RXISA=25 Note: unless otherwise indicated, REXX environment variables are checked only when REXX.EXE is loaded. Therefore, in such cases, although you may change these variables in a REXX program, the changes do not take effect until the next time REXX is loaded. Here is an overview of the variables involved: SET RXCMD=YES or NO (Defaults to NO) Controls whether the REXX command, when it cannot locate a REXX pro- gram with the name you request in a particular directory, will then look in the same directory for COM, EXE, or BAT files with that name. RXCMD=YES will allow the REXX command to run COM, EXE, and BAT files as well as REX files. For example, you could say REXX RXT somefile Personal REXX User's Guide, Version 3.0 3. Running Personal REXX page 3.6 ======================================================================== and RXT.EXE would be invoked (assuming there is no RXT.REX file). This is useful if you do not keep REXX resident, since it ensures that the REXX processor will be present for use by programs like REXXTERM without having to start such programs from a REXX file. This feature is of no use if the REXX processor is resident, so the RX command does not support it. SET RXFLAGS=flags As an alternative to specifying the options discussed in "REXX Com- mand Options" on page 3.3 on the REXX or RX command line, options can be specified in the RXFLAGS environment variable. For example, if you want the /NX option to always be in effect, you could specify it via RXFLAGS: SET RXFLAGS=/NX SET RXINT=nn (Defaults to 60) Where nn specifies the REXX Interrupt, normally in the range 60-67. Should be set before you run RXINTMGR. See "The REXX Interrupt" on page 3.7 for further discussion. SET RXISA=mm (Defaults to 20) Where mm specifies the size of REXX's Internal Storage Area. mm is expressed in 1K units, and should be in the range 10-40. Should be set before the Personal REXX processor is loaded into memory. See "REXX Memory Usage" on page 3.11 for further discussion. SET RXNEWCOM=YES or NO Controls whether a new copy of the command shell (COMMAND.COM in MS-DOS)· is loaded to execute internal commands like COPY, ERASE, RENAME, etc. and to handle I/O redirection. RXNEWCOM=YES is the default in MS-DOS 4.0 and later. When RXNEWCOM=NO, REXX uses certain undocumented features of DOS that are faster than loading a new copy of COMMAND.COM but which do not work properly in some situations, such as DOS 4.x. RXNEWCOM should be set before the Personal REXX processor is loaded into memory. See "The RXNEWCOM Switch" on page 3.7 for further discussion. SET RXSWAP=type[,drive] Provides default settings for the PRXSWAP built-in function, which controls swapping of the REXX language processor. Type is D (swap to disk), E (swap to EMS), or N (don't swap). If type is D, drive is the disk drive to use for swapping. This variable is checked every time PRXSWAP is called. See "Swapping REXX to Run Larger Programs" on page 3.16 for more information. ========================= · Whenever COMMAND.COM is referred to here the command processor speci- fied on the SHELL statement of your CONFIG.SYS file and identified by the COMSPEC environment variable is meant. In particular, REXX will load whatever command processor is named in COMSPEC when RXNEWCOM=YES. Personal REXX User's Guide, Version 3.0 3. Running Personal REXX page 3.7 ======================================================================== SET RXTRACE=cc (Defaults to N) Where cc controls the trace setting that will be in effect whenever you start to run a REXX program. The default, N, traces only host commands resulting in failure. SET RXTRACE=?a would start all REXX programs in interactive debug mode. Alternatively, you can control the initial trace setting with the /TR option discussed in "REXX Com- mand Options" on page 3.3. 3.6. The REXX Interrupt For Personal REXX to run properly, it must take over one of the PC's interrupt vectors. IBM has provided for this, setting aside interrupts 60 through 67 for user programs, and by default Personal REXX uses interrupt 60. (Note that all references here to interrupt numbers are hexadecimal.) You need to worry about this only if you have some other program which also uses interrupt 60. Most other programs that use such an interrupt will talk about it in their documentation. If Personal REXX clashes with some other program that you are using, you can tell Person- al REXX to use a different interrupt number. When it is loaded, the REXX interrupt manager RXINTMGR.COM will take over the REXX interrupt (normally interrupt 60) if it is not already in use. REXX must control this interrupt. If at anytime another applica- tion takes over control of the interrupt, the results are unpredictable. You can specify which interrupt REXX will use by setting a value for the environment variable RXINT. For example, SET RXINT=63 would cause Personal REXX to use interrupt 63. The SET must be done before you call RXINTMGR from your AUTOEXEC.BAT. REXX uses the default of 60 if RXINT is not present in the environment when RXINTMGR is load- ed. 3.7. The DOS Environment and RXNEWCOM 3.7.1. The RXNEWCOM Switch DOS keeps multiple copies of system "environment" variables. Each set of variables is associated with a copy of the command shell. This is usual- ly COMMAND.COM. It is specified in the SHELL statement of the CONFIG.SYS file and in the COMSPEC environment variable. The command shell that is loaded by CONFIG.SYS is the "master" copy, and its environment is called the "master" environment. Each time a new copy of COMMAND.COM is loaded, a new copy of the environment is created. New copies of COMMAND.COM are usually invoked when an application program "shells" to DOS. The new copy of the associated environment is called the "active" environment. Personal REXX User's Guide, Version 3.0 3. Running Personal REXX page 3.8 ======================================================================== Additional copies of the environment are made every time a program is run from COMMAND.COM, from Personal REXX, or from application programs that are able to run other programs. These copies are duplicates of the active environment. The DOS SET command is used to display and update the active environment. The PATH and PROMPT commands also work with the active environment. Personal REXX runs most commands without going through COMMAND.COM. In this case, the commands get a copy of the active environment to work with. But sometimes Personal REXX must go through COMMAND.COM. This is true for "internal" commands that are actually implemented in COMMAND.COM, such as COPY, ERASE, and RENAME. It is also true whenever redirection or piping is used on the command line. When Personal REXX does go through COMMAND.COM, it can do so in one of two ways. If the environment variable RXNEWCOM=YES, then a new copy of COMMAND.COM will be loaded when REXX needs to issue a command to it. If the command is SET, PATH, or PROMPT, then the environment will be changed only in this new, temporary copy of COMMAND.COM. The changes are lost immediately after the command is executed, so it is just a waste of time. Other commands run from the same REXX program will not see or be affected by changes made to the environment in this way. To get around this problem, Personal REXX can in certain circumstances issue commands directly to the master copy of COMMAND.COM, so that SET, PATH, and PROMPT can work with the master environment. This option is invoked by setting RXNEWCOM=NO. It is the default for MS-DOS version 3.3 and earlier, unless MS Windows is in use. It is not supported in MS-DOS version 4.x, with versions of DOS not derived from a supported version of MS-DOS, with command shells other than COMMAND.COM, or when MS Windows is in use. In order to use RXNEWCOM=NO, Personal REXX relies on some undocumented DOS features and makes some assumptions about how DOS manages memory. Attempting to use RXNEWCOM=NO in situations where it is not supported may cause unpredictable results or system failures. You can always tell REXX to be more conservative, using standard inter- faces to DOS with RXNEWCOM=YES. REXX always looks for the value of RXNEWCOM in the active copy of the environment when it is loaded rather than in the master copy (if they are different). RXNEWCOM affects the execution of all REXX programs, but it is checked only when the REXX language processor is loaded. There- fore, changing it from a REXX program has no immediate effect. Within a particular REXX program, you can override its setting by using the REXX instructions OPTIONS NEWCOM to tell Personal REXX to load a new copy of COMMAND.COM when required and OPTIONS NONEWCOM Personal REXX User's Guide, Version 3.0 3. Running Personal REXX page 3.9 ======================================================================== to tell Personal REXX to use the master copy of COMMAND.COM. You may use these commands anywhere in the REXX program, and from that point on they will override whatever setting was previously in effect. Like many REXX program state values, they may be changed in a subprocedure, and the previous value will be restored when the procedure returns to its cal- ler. 3.7.2. Accessing the DOS Environment Because we cannot guarantee support for RXNEWCOM=NO, it is recommended that you do not use the SET, PATH, or PROMPT commands to update the environment. Instead, use the VALUE built-in function. This function is documented in The REXX Language, page 112. Its usage is VALUE(name, newvalue, group) where name is the name of the environment variable, newvalue is an optional new value, and group is environment. (This may also be speci- fied as dosenvironment or os2environment, but Personal REXX currently does not support any other value for group. Note, in particular, that the value shared used in the example in The REXX Language is not sup- ported.) VALUE always returns the value of the variable before any changes. If newvalue is specified, the variable is updated with it. For instance, call value 'prompt', '$p$g', 'environment' updates the PROMPT environment variable. The VALUE function has another advantage over the SET command. Like all DOS commands, SET is limited to having a parameter string of no more than 127 characters. This means that the total size of the environment variable's name and its value cannot exceed this when SET is used. VALUE, on the other hand, is limited only by the size of a REXX variable value (more than 32K) and the amount of memory unused in the environment area. You can use the DOSENVSIZE built-in function to determine both the size of the environment area and the amount of free space in it. The func- tion returns these values as two numbers, separated by a space. Both quantities are expressed as a number of bytes. An error will result if you attempt to set an environment variable to a value for which there is insufficient space. This capability of VALUE is especially useful for the DOS PATH variable. Many indirect tricks and circumventions customarily used to have a PATH that is longer than 122 characters can be avoided by using the VALUE function. You should be aware, however, that some applications that refer to the PATH are not prepared to work with a value longer than 122 characters or so, and hence in those cases a longer path may not work as intended. Personal REXX User's Guide, Version 3.0 3. Running Personal REXX page 3.10 ======================================================================== When the VALUE function is used and RXNEWCOM=YES, the copy of the envi- ronment belonging to the active COMMAND.COM is updated. This copy will be used for subsequent calls to the VALUE and DOSENV functions. It will also be duplicated for all commands invoked from the REXX program. If you change the PATH variable, you can change the search order for subse- quent commands in the REXX program. Changes made to the environment will remain in effect after the REXX program terminates, as long as the same copy of COMMAND.COM is active. If RXNEWCOM=NO, VALUE and DOSENV will work with the master copy of the environment, which may be different from the active copy. A secondary copy of COMMAND.COM is used when applications like REXXTERM and KEDIT "shell" to DOS. Use of RXNEWCOM=NO allows changes to the environment to persist even after the application terminates, because the master copy of the environment is the one that is updated. However, other programs running under the secondary command processor (e. g. in a batch file) may not see the changes to the environment. If you wish to change the environment only for the duration of the REXX program, you can use the SETLOCAL and ENDLOCAL functions described in Chapter 8, "Personal REXX Utility Functions". These functions provide a way of bracketing alterations to the environment in such a way that the state in effect before a call to SETLOCAL can be restored after arbi- trary changes have been made. To summarize, the DOS environment is used or referred to for a number of purposes by REXX and by programs called from REXX. These usages include: * The DOS internal commands SET, PATH, and PROMPT * The copy of the environment passed to a command * Environment variables used internally by REXX, such as PATH and RXSWAP * Built-in functions that access or change the environment, such as DOSENV, DOSENVSIZE, DOSPATHFIND, VALUE, SETLOCAL, ENDLOCAL, and USERID It is generally true that the copy of the environment used in each of these cases will be determined by the current NEWCOM setting. Specifi- cally, RXNEWCOM=YES or OPTIONS NEWCOM will select the active environ- ment, and RXNEWCOM=NO or OPTIONS NONEWCOM will select the master envi- ronment. 3.7.3. Invoking Personal Rexx from Batch Files With RXNEWCOM=NO, you may run into a problem invoking REXX programs from a DOS BAT file. Commands that come later in your BAT file (after your invocation of REXX) may be executed out of order. There are three ways around this problem: Personal REXX User's Guide, Version 3.0 3. Running Personal REXX page 3.11 ======================================================================== * If you invoke REXX only from the last line of a BAT file, you will avoid the problem. This is because the problem occurs only with com- mands issued later in the batch file. * You can set RXNEWCOM=YES in your DOS environment. This causes Personal REXX to use standard interfaces to COMMAND.COM for all REXX programs. * The REXX program to be called from a BAT file can start with the line OPTIONS NEWCOM. This will cause Personal REXX to use only standard interfaces to COMMAND.COM when this particular REXX program is execut- ed. 3.8. REXX Memory Usage Normally, you do not need to know the details of how REXX uses available memory. However, since REXX can have fairly large memory requirements, it may be helpful for you to be aware of the options that are available for managing memory. Besides the memory needed for the language processor itself, Personal REXX will use up to three separate pools of memory for the REXX program that is running. The first, called the Internal Storage Area (ISA), is internal to the REXX processor. The second is regular DOS memory below 640K. The third is expanded memory storage, which is used only if your computer has a driver installed that supports the Lotus-Intel-Microsoft "Expanded Memory Specification" (EMS). Internal memory (the ISA) is allocated whenever the REXX processor is loaded and is not freed until the REXX processor is unloaded. External memory (that is, EMS memory and DOS memory below 640K) is allocated when needed for any given program and then released when the program is fin- ished. Personal REXX uses external memory to store your source program, the REXX object code into which your program is converted, and the variables used by your program. Personal REXX obtains external memory from DOS or from EMS as needed while your REXX programs are being processed, freeing the external memory used by a REXX program when the program completes. Some external DOS memory (about 12K) will always be used when a program is running, even if EMS memory is available. The ISA is used for certain internal tables and work areas. The default amount of ISA memory is 20K. With this default, which is suitable for most applications, the amount of memory occupied whenever the REXX pro- cessor is loaded will be about 160K bytes. You can change the ISA size by setting (before loading the REXX processor) the environment variable RXISA: SET RXISA=nn Personal REXX User's Guide, Version 3.0 3. Running Personal REXX page 3.12 ======================================================================== If you have EMS memory in your system, REXX will use it for most exter- nal memory allocation before using DOS memory below the 640K line. If you do not have EMS memory in your system, REXX will obtain all of its external memory from DOS. See "Using Expanded Memory (EMS)" on page 3.30 for more information on using EMS with Personal REXX. In the following memory diagrams, all resident programs like the REXX Interrupt Manager, the Stack Manager, and the Batch Manager are depicted as being loaded below 640K. These are, however, ideal candidates for being loaded into high DOS memory with memory managers such as 386MAX, QEMM, LIMSIM or the DOS 5.0 LOADHIGH command, since they are relatively small. The REXX processor itself is usually too large to be loaded above 640K. When swapping is used to run large programs from REXX (see "Swapping REXX to Run Larger Programs" on page 3.16) all of the memory owned by the REXX processor below 640K, except for about 2K, is copied to EMS or disk and then released for use by the application. 3.8.1. Typical Memory Requirements of Personal REXX ======================================================================== Figure 3.1: Typical Memory Requirements (non-EMS System) 2K REXX Interrupt Manager (always resident) 10K Stack Manager (optional) =Stack Manager code =default stack size of 8K bytes 3K Global Variable Manager (optional) =Global Variable Manager code =default Global Variable area of 2K bytes 2K REXX Batch Manager (optional) 160K REXX Processor (optionally resident) =REXX Processor code =default ISA of 20K Remaining Allocated as needed by REXX memory when processing REXX programs; below 640K freed as soon as not needed ======================================================================== Personal REXX User's Guide, Version 3.0 3. Running Personal REXX page 3.13 ======================================================================== ======================================================================== Figure 3.2: Typical Memory Requirements (EMS System) DOS Memory 2K REXX Interrupt Manager (always resident) 2K Stack Manager (optional) =Stack Manager code 1K Global Variable Manager (optional) =Global Variable Manager code 2K REXX Batch Manager (optional) 160K REXX Processor (optionally resident) =REXX Processor code =default ISA of 20K remaining Allocated as needed by REXX memory when processing REXX programs; below 640K freed as soon as not needed EMS Memory 16K Default Stack size (optional) 16K Default Global Variable data size (optional) Remaining Allocated as needed by REXX when processing EMS memory REXX programs; freed as soon as not needed ======================================================================== 3.9. Examples of Personal REXX Configurations This section gives examples of some typical Personal REXX configura- tions. Note that the REXX processor, the Stack Manager, the Global Variable Manager, and the RXWINDOW Function Package will all automatically take advantage of EMS memory for buffers and work areas if it is available. * You can run REXX programs from the command line with just the REXX command, as long as you do not need to use the stack, global variables (the GLOBALV command), utilities like LISTFILE that can access REXX variables, or applications that use REXX, such as REXXTERM and KEDIT. No environment variables need to be set and no programs need to be preloaded in this case. Personal REXX User's Guide, Version 3.0 3. Running Personal REXX page 3.14 ======================================================================== * For all other uses of Personal REXX, you must at the very least load the REXX Interrupt Manager. So an AUTOEXEC.BAT file would contain the line: RXINTMGR In this situation, the REXX processor would not be memory resident. Global variables and the console stack would not be available. To run a program called ABC.REX, you would enter REXX ABC RXINTMGR would use 2K until you reboot. The Personal REXX processor would occupy memory only when you were running a REXX program. * Suppose you want to use nonresident REXX and the console stack. Your AUTOEXEC.BAT file might then contain the lines: RXINTMGR STACKMGR Here REXX programs would still be invoked with a command like REXX ABC RXINTMGR would use 2K until you reboot. The Stack Manager program itself would use about 2K of memory. If no EMS memory is available, the stack would occupy the default of 8K of conventional memory. If EMS memory is available, the stack would occupy 16K of EMS memory, since the stack size is rounded up to a 16K multiple when the stack is in EMS. The REXX processor would still occupy memory only when a REXX program was actually running. * Suppose you want to use the resident version of REXX, plus the Stack Manager and the Global Variable Manager. Your AUTOEXEC.BAT file might contain: RXINTMGR STACKMGR GLVMGR REXX /R You would normally want the Personal REXX processor to be the last program made resident, so that you have the option of making it nonre- sident later with RX /U or RXUNLOAD REXX without leaving a hole in memory. After you've used this configuration for a while, you might actually want your AUTOEXEC.BAT file to contain the following: RXINTMGR >NUL STACKMGR >NUL GLVMGR >NUL REXX /R >NUL Personal REXX User's Guide, Version 3.0 3. Running Personal REXX page 3.15 ======================================================================== By redirecting the output to the null device when loading the compo- nents of Personal REXX, you can avoid having their start-up messages cluttering your screen. Any error messages they generate will still be displayed. Since Personal REXX is resident, you would run your REXX programs with the RX command. For example, RX ABC In this configuration, if no EMS memory is available, the REXX Inter- rupt Manager occupies 2K, the Stack Manager 10K (including 8K for the default stack), the global variable area 3K (including code and the default 2K for variables), and the Personal REXX processor 160K (including the default 20K ISA), for a total of 175K of DOS memory. If EMS memory is available, the REXX Interrupt Manager occupies 2K of DOS memory, the Stack Manager 2K of DOS memory and 16K of EMS memory (since the default stack size is rounded up to 16K in EMS), the global variable area 1K of DOS memory for code and 16K of EMS memory for variables (since the default of 2K is rounded up to 16K in EMS), and the Personal REXX processor 160K of DOS memory. This gives a total of 165K of DOS memory and 32K of EMS memory. This much memory remains occupied until you reboot (or unload the Per- sonal REXX processor with RX /U or RXUNLOAD REXX). Additional memory would be used for work areas when REXX programs are actually running. Most of the work areas come from EMS memory if EMS is available. * Suppose you want to use nonresident REXX and the REXX Batch Manager (which is discussed in "The REXX Batch Manager" on page 3.22). Your AUTOEXEC.BAT file might include: RXINTMGR RXBATMGR You could then run ABC.REX by simply entering ABC Since REXX is nonresident, the REXX Batch Manager would internally pass the command REXX ABC to DOS. In this configuration, the REXX Interrupt Manager would occupy 2K, and the REXX Batch Manager would occupy 2K, for a total of 4K. The REXX processor would use memory only while a REXX program is actually run- ning. Personal REXX User's Guide, Version 3.0 3. Running Personal REXX page 3.16 ======================================================================== 3.10. Swapping REXX to Run Larger Programs The REXX language processor requires a minimum of about 160K to run REXX programs. While this ordinarily leaves enough room on most systems to run commands and applications of normal size, it can be a problem with very large applications or on systems with limited available memory. Personal REXX offers a swapping option to circumvent this problem. Under the proper circumstances, all but about 2K of the REXX language proces- sor and the DOS memory it is using will be swapped out automatically when any command or application program is run. Swapping can be done to either EMS or disk. Although the overhead of this swapping operation is minimal (at least when EMS or a RAM disk is used), it is usually desirable to avoid it when possible. The PRXSWAP built-in function is provided to control exactly when and how swapping should be done. We recommend that PRXSWAP be called to enable swapping only before applications where this is required and that it be called afterwards to disable swapping. The DOSMEM function can be used to determine the size of the largest avail- able block of DOS memory in order to decide whether swapping is desira- ble. PRXSWAP has the syntax PRXSWAP([type],[location],[fail-on-error]) Type is D (swap to disk), E (swap to EMS), or N (disable swapping). Location is the drive letter of the disk where the swap file is to be written if disk swapping is used. The default is the first ramdisk, if one exists, otherwise C. The swap file will be written to the root directory of the disk. Fail-on-error should be 0 (the default) if an attempt should be made to run commands anyway if there is a swap failure, such as insufficient swap space. The value should be 1 if a command should not be attempted in case of a swap failure. PRXSWAP returns 0 if it cannot access the requested swap disk or there is an error using EMS, otherwise it returns 1. The function may be called as many times as neccessary to enable and disable swapping. It is possible to define defaults for the arguments of PRXSWAP by set- ting the RXSWAP environment variable described in "REXX Environment Variables" on page 3.5. If this is done, then the type and location arguments will default to values obtained from RXSWAP if the arguments are omitted. Use of this technique allows you to write programs that can use different swapping strategies in different circumstances. For instance, if you put the command SET RXSWAP=D,E Personal REXX User's Guide, Version 3.0 3. Running Personal REXX page 3.17 ======================================================================== in your AUTOEXEC.BAT file on a system where you want to swap to disk E:, then you can enable swapping in a REXX program with the line call prxswap and disable it with call prxswap 'n' You could also disable swapping by changing the RXSWAP variable with the command SET RXSWAP=N The RXSWAP variable is checked every time PRXSWAP is called. Therefore, you can also change it in a REXX program by using the VALUE function in order to control swapping. However, such changes don't take effect until PRXSWAP is called. Whenever the REXX processor is swapped out to run an application, it is unavailable for processing REXX programs or communicating with the application. So applications like REXXTERM or KEDIT which know how to start REXX programs and exchange data with them will behave as if REXX is not loaded. Other Personal REXX services like the stack and global variables will continue to be available, if the proper resident programs have been loaded, since only the language processor (REXX.EXE) is swapped out. However, the STEM option of the LISTFILE, EXECIO, and GLOBALV commands cannot be used to set REXX variables. Swapping will not always be able to provide a large block of contiguous DOS memory. If any programs have been loaded in memory after REXX.EXE, swapping temporarily frees only the space occupied by REXX.EXE itself. DOS storage is then fragmented, and you may be unable to run large applications. This will often happen if you make REXX resident with the /R command line option and then invoke REXX programs with the RX command (even indirectly by means of the Batch Manager). It will also happen if you use REXX to start an application like REXXTERM or KEDIT and then run another REXX program from there which invokes swapping. 3.11. RXUNLOAD The RXUNLOAD command is used to remove any utility programs supplied with Personal REXX from memory after they have been made resident. It also provides an alternative to the RX /U method for unloading the REXX processor itself. RXUNLOAD requires DOS 3.0 or later. The format of the command is: RXUNLOAD name where Personal REXX User's Guide, Version 3.0 3. Running Personal REXX page 3.18 ======================================================================== name is the name of the resident program. Currently this may be one of the following: REXX = the REXX processor RXINTMGR = the REXX interrupt mangager STACKMGR = the stack mangager RXBATMGR = the batch mangager GLVMGR = the global variable manager RXWINDOW = the REXX window function package Note: There are various commercial, shareware, and public domain utili- ties which claim to be able to unload resident software. In general, they will not work with Personal REXX utilities because of the numerous interdependencies among the utilities (unless, perhaps, all are unloaded at the same time). Similarly, RXUNLOAD is not supported as a utility to unload any resident programs other than those listed above. You should always unload programs with RXUNLOAD in the reverse order from that in which they were loaded. In particular, RXINTMGR must be unloaded last. RXUNLOAD cannot be used to unload resident programs that have been load- ed into high DOS memory above 640K with memory managers like 386MAX, QEMM, LIMSIM, and the DOS 5.0 LOADHIGH command. Some of the REXX resident programs (STACKMGR and RXBATMGR) process cer- tain DOS/BIOS software interrupts. Other programs loaded later may pro- cess the same interrupts and hence keep pointers to the REXX resident programs in order to pass the interrupts along. When this happens RXUNLOAD will be not be able to unload the REXX resident programs, since other programs will have pointers into them. Even if programs loaded later do not cause this problem, using RXUNLOAD may leave small areas of unallocated DOS memory ('holes'). Such holes are not harmful, but they represent memory that may not be easily usable by other programs. This problem is called memory fragmentation. 3.12. Issuing DOS Commands from REXX Programs The most common use of Personal REXX is to control the execution of a sequence of DOS commands. This section describes how DOS commands are issued from Personal REXX programs and the rules that Personal REXX uses to handle them. Any clause of a REXX program that isn't recognized as a REXX instruction or an assignment is treated as a "command" (see page 37 of The REXX Lan- guage). By default, commands are passed to the currently active envi- ronment for execution.¸ If a REXX program is run with the REXX or RX ========================= ¸ Note that this usage of "environment" differs from the DOS terminology Personal REXX User's Guide, Version 3.0 3. Running Personal REXX page 3.19 ======================================================================== command, the active environment is DOS. (REXX programs can be run in other environments. For example, with a REXX program run from REXXTERM as a REXXTERM macro, the active environment is REXXTERM.) You can override the default environment to which a command is passed with the REXX ADDRESS instruction (page 40 of The REXX Language). ADDRESS can also be used to change the default. For instance, Personal REXX supports both ADDRESS DOS and ADDRESS COMMAND for executing DOS commands from other environments. Passing commands to an environment like REXXTERM is usually very straightforward. However, when the environment is DOS, there are many alternative ways of handling the command. One possibility is that the command is internal, which means that it is built into COMMAND.COM. Oth- erwise, the command is external, in which case it is a file with an extension of REX, COM, EXE, or BAT and it may be found in the current directory or one or more directories in the current PATH. These different possibilities mean that the REXX processor must make a systematic search in order to handle the command in the proper way. For the most part, this search is done in exactly the same way that DOS itself does it. However, the fact that files with an extension of REX are also considered as commands makes it necessary to expand the search somewhat. You can provide extra information with the command in order to take shortcuts in this search procedure. For instance, you can use path pre- fixes on the command name, file extensions (REX, COM, EXE, or BAT), or ADDRESS COMMAND. Doing this will generally speed up the search and pos- sibly avoid executing the "wrong" form of the command. But on the other hand, it may reduce the portability of your program and cause problems if you move files between directories. Here are the steps that REXX goes through to handle a DOS command: * After all substitutions have been performed on the line, the first word (delimited by blanks) is taken as the name of the DOS command. * If the command does not have a disk/path prefix (such as B: or \SAMPLE) and it does not have one of the four allowed extensions (REX, COM, EXE, and BAT), then a check is made to see whether it is a DOS internal command. If so, it is handled by COMMAND.COM. * If the command has a prefix or explicit extension, or if it isn't an internal command, a file directory search is done. If no disk/path prefix is present, the current directory is searched first, followed by each directory in the current DOS PATH. The search stops as soon as an appropriate match is found. If there is a prefix, only the indicated directory or the default directory on the indicated drive is ========================= which deals with an "environment" in connection with the SET command. Personal REXX User's Guide, Version 3.0 3. Running Personal REXX page 3.20 ======================================================================== searched. * If an explicit extension is given, that alone will be searched for. Otherwise, each directory will be checked for REX, COM, EXE, or BAT files of the correct name, in that order. The command will be consid- ered found as soon as one of these types is encountered in a directo- ry. * The command will be executed in a manner appropriate to its extension. If the extension is REX, the REXX processor calls itself recursively. COM and EXE files are executed with a DOS function call. BAT files are handled by COMMAND.COM. Some things to keep in mind about this search procedure: * Within each directory, the order of precedence of extensions is REX, COM, EXE, and BAT. For example, if a directory contains both PROGRAM.REX and PROGRAM.COM, it is the REX file which will be execut- ed. However, if the COM file is found in a directory earlier in the PATH, it will be executed, even if there is a REX file later in the PATH. * If you explicitly specified an extension other than REX when you started your main REXX program with the REXX or RX command, then that extension will be used in place of REX in this search procedure. * You can force Personal REXX to bypass the search for files with an extension REX by issuing the command via ADDRESS COMMAND. Personal REXX will then only look for files with an extension of COM, EXE, or BAT. * Even if you do not use ADDRESS COMMAND, if you invoke a command with the same name as the REXX program that is running the search will ignore files with an extension of REX. This allows you to, for exam- ple, use the LINK command from within LINK.REX to invoke the DOS link- er. If REXX did not do this, you might enter your LINK.REX file recursively, which probably isn't what you intended. * REXX will normally not invoke a REXX program with the same name as the one currently executing, in order to avoid unintended recursion. This is accomplished by excluding files having the same name from the search. You may override this by explicitly specifying a file exten- sion (e. g. REX). * You can override these precedence rules by supplying the extension explicitly. * If you have a long PATH defined, you can bypass a lot of searching by specifying explicitly which path to use, at the cost of a loss of gen- erality. Personal REXX User's Guide, Version 3.0 3. Running Personal REXX page 3.21 ======================================================================== * If the command uses piping or redirection (as indicated by the pres- ence of the '|', '<', '>' symbols), it will be passed directly to COMMAND.COM. In this case, REX files won't be considered or pro- cessed. * COMMAND.COM is also used with BAT files and DOS internal commands. After a DOS command is run, its return code is placed in the REXX vari- able RC. (When a command is not run directly, but is instead passed to COMMAND.COM because it uses piping or redirection, COMMAND.COM passes back a return code of 0, regardless of the return code set by the com- mand.) If there is insufficient storage available to run a command from REXX, a return code of -8 will be generated. A return code of -3 generally means that the requested program could not be found. A return code of -3 also is generated when a function name is used, incorrectly, as a REXX instruction. 3.13. Calling External REXX Functions The above procedure should be carefully distinguished from the search order used with the CALL instruction and function calls. As described in The REXX Language (page 79), an internal function (defined by a label in the program) is searched for first (unless the name is contained in quotes). Next, a check is made for a built-in function. Then, a check is made for the special Personal REXX functions described in Chapter 8, "Personal REXX Utility Functions", and for functions that have been loaded via the function package mechanism described in Appendix A, "Per- sonal REXX Application Interfaces". If the function or subroutine is not found in any of these ways, REXX attempts to load an external REXX program from disk. You may specify a file extension explicitly. Otherwise, the extension searched for will be the same as the main program (usually REX, unless you specified some- thing else explicitly or have a default environment like REXXTERM, which uses the extension RXT). Here again, you can either give the drive/path prefix explicitly, or let REXX search the current directory followed by all directories in the PATH. Both paths and extensions may be speci- fied. Thus, a statement like ABC = "D:\MATH\BESSEL.FCN"(X,Y,Z) is valid. Personal REXX User's Guide, Version 3.0 3. Running Personal REXX page 3.22 ======================================================================== 3.14. The REXX Batch Manager When you run a Personal REXX program, you will normally invoke it by issuing either the RX command or the REXX command, depending on whether REXX has or has not been made resident. To run ABC.REX with parameters 1 2 3 you enter REXX ABC 1 2 3 or RX ABC 1 2 3 Personal REXX includes a facility that instead allows you to run a REXX program by simply giving its name and any parameters, without the need to precede it with REXX or RX. For example, to run ABC.REX with parame- ters 1 2 3, you simply enter ABC 1 2 3 This facility lets you invoke Personal REXX programs from the DOS com- mand line much as you would invoke DOS batch programs. It is enabled by loading what is known as the "REXX Batch Manager". You use the RXBATMGR command to load the REXX Batch Manager. The REXX Batch Manager works by making itself resident in memory, taking over DOS interrupt 21, watching for calls from COMMAND.COM's command processor, and modifying the way that these calls are handled. Because of this it is highly dependent on the way COMMAND.COM works and the way that DOS handles interrupt 21. Because of the complexities involved, the REXX Batch Manager may not work in your environment. Your version of DOS, your system's BIOS, or your other memory-resident programs may conflict with the REXX Batch Manager, and you may not be able to use it. We have successfully used the facility on IBM PC's, XT's, AT's, and PS/2's running DOS versions 2.0 through 5.0 and the DOS compatibility box of OS/2, and we expect that it will work successfully for most Per- sonal REXX users. However, we also expect that there will be some con- figurations in which the facility will not work. Since the REXX Batch Manager interacts so closely with COMMAND.COM, the Batch Manager must be tailored for your version of DOS before you can use it.¹ This is done only once, and needs to be repeated only if you switch to a different version of DOS or COMMAND.COM. To tailor the REXX Batch Manager, you must do the following: ========================= ¹ No changes are made to COMMAND.COM itself, or to any file other than RXBATMGR.COM. Personal REXX User's Guide, Version 3.0 3. Running Personal REXX page 3.23 ======================================================================== * Copy the files RXBATMGR.COM, RXBATUTL.COM, and RXBATIN.BAT from the Personal REXX distribution diskette into your current directory. * Run RXBATUTL.COM by issuing the command RXBATUTL RXBATUTL will have COMMAND.COM run RXBATIN.BAT, will "watch" what COMMAND.COM does, and will use the information it gets to update the file RXBATMGR.COM. * At this point, your copy of RXBATMGR.COM should be properly initial- ized. You need to run the modified RXBATMGR.COM, probably from your AUTOEXEC.BAT file, whenever you want to load the REXX Batch Manager. RXBATUTL.COM and RXBATIN.BAT are used only while tailoring RXBATMGR.COM, and need not be kept on the disks you use for your daily work. When you want to start using the REXX Batch Manager, load it into memory by using the RXBATMGR command. It will remain resident until you reboot your machine, and uses about 2K of your memory. If you decide to use the REXX Batch Manager on a regular basis, you will probably want to put the following line into your AUTOEXEC.BAT: RXBATMGR You should run RXBATMGR after you have loaded the REXX Interrupt Manager with the RXINTMGR command. The REXX Batch Manager must also be the last program loaded that takes over interrupt 21. In particular, it must be loaded after Borland's SideKick. (If you do load some program that takes over interrupt 21 after you load RXBATMGR, the normal symptom is that the Batch Manager will stop functioning, and until you reboot you will need to use RX or REXX to run REXX programs.) Once the REXX Batch Manager is loaded, if you type in the command ABC 1 2 3 it will be processed like this: * DOS looks for a file called ABC.COM in the current directory. If ABC.COM is found, it is executed in the normal way. * If ABC.COM is not found, DOS looks for ABC.EXE in the current directo- ry. If ABC.EXE is found it is executed in the normal way. * If ABC.COM and ABC.EXE are not found, the Batch Manager looks in the current directory for ABC.REX. If ABC.REX is found, the Batch Manager determines whether REXX is or is not resident, and then passes the appropriate command (either REXX ABC 1 2 3 or RX ABC 1 2 3) to DOS for execution. Personal REXX will then run your REXX program, ABC.REX. * If ABC.COM, ABC.EXE, and ABC.REX are not found, DOS looks in the cur- rent directory for ABC.BAT. If ABC.BAT is found, ABC.BAT is processed by the DOS batch processor in the normal way. Personal REXX User's Guide, Version 3.0 3. Running Personal REXX page 3.24 ======================================================================== * If DOS has still not found a file to execute, it repeats the above steps in each of the directories in your PATH, giving you an error message if it still can't find a file to execute. Notes: * Even when you use the REXX Batch Manager, DOS is told (via a command issued internally by the Batch Manager) to run either REXX or RX. REXX.EXE or RX.EXE must still be in your current directory or in one of the directories in your PATH; otherwise, DOS will not be able to locate them. * In the search process described above, a file called ABC.REX will always be found before a file in the same directory called ABC.BAT. In fact, with the REXX Batch Manager loaded, if ABC.REX and ABC.BAT are in the same directory, there is no way to tell DOS to run ABC.BAT. * The search process described above is different from the search pro- cess followed when you issue the REXX or RX commands explicitly with the default of RXCMD=NO, the default.æ REXX and RX would look first for ABC.REX in the current directory and in each of the directories in your PATH. As an example of the difference, assume that RXCMD=NO, that you have a file called ABC.EXE in the current directory and a file called ABC.REX in one of the directories in your PATH, and that you have the REXX Batch Manager loaded. Entering ABC 1 2 3 would cause ABC.EXE to be executed, while entering REXX ABC 1 2 3 would cause REXX to run ABC.REX. * You cannot redirect standard input or standard output when running REXX programs with the Batch Manager. If you experience any difficulty using the REXX Batch Manager, there are a number of good alternatives available which will allow you to execute REXX commmands just by typing their names on the command line. * You can create BAT files corresponding to each REX file to be executed from the command line. Such a batch file would consist of just the line @REXX ABC 1 2 3 ========================= æ The search process described above is used by the REXX command when RXCMD=YES. Personal REXX User's Guide, Version 3.0 3. Running Personal REXX page 3.25 ======================================================================== to run ABC.REX. The @ at the beginning of the line tells DOS not to echo the command to the screen (valid only in DOS versions 3.3 and later). * Command line enhancement utilities like PCED from the Cove Software Group allow you to define "aliases" for commands. For example the command CED SYN ABC 'REXX ABC %1 %2 %3' makes ABC a synonym of REXX ABC and allows up to three command line parameters. PCED also includes an even more powerful facility called RXRUN. RXRUN effectively works much like the REXX Batch Manager in that it causes PCED to search for files with an extension of REX to satisfy commands entered on the command line. RXRUN takes advantage of PCED and may work in situations where the REXX Batch Manager can't. * MS-DOS starting with release 5.0 has a command called DOSKEY which creates keyboard "macros". These are very similar to PCED synonyms and can be used in the same way. The command DOSKEY ABC=REXX ABC $1 $2 $3 defines ABC as a synonym just like the CED example above. 3.15. Optimizing Performance and Memory Use This section gives some details on how Personal REXX processes your REXX programs and discusses options that you can use to control the process to obtain the best combination of performance and flexibility for your REXX applications. 3.15.1. REXX Object Code Personal REXX processes a REXX program in two phases. First, a REXX pro- gram in source form is converted to a more efficient internal form, known as REXX object code.» Then, Personal REXX executes the program by "interpreting" the REXX object code. For most REXX programs the conversion from source code to object code is fairly rapid, but there can be a noticeable delay in how quickly large programs get started. To avoid this delay you can have Personal REXX save the object code for your program on disk with the source code. Then Personal REXX can load the REXX object code directly into memory, bypassing the conversion phase, whenever your program is run. ========================= » This is similar to the conversion process done by a traditional lan- guage compiler. However, a compiler normally converts a program to machine language, which is directly executed by the hardware, while the REXX object code is a higher level interpretable "p-code". Personal REXX User's Guide, Version 3.0 3. Running Personal REXX page 3.26 ======================================================================== The /O option tells Personal REXX that you want to save the object code on disk. For example, REXX /O PROGRAM causes Personal REXX to convert the source program in PROGRAM.REX to REXX object code, and to write this object code to disk. When /O is used, REXX does not execute your REXX program; it writes the object code to disk for future execution. Personal REXX appends the REXX object code to the end of your source file, after an end-of-file character (ASCII 26). Most utilities that process files in ASCII format will stop processing a file after they encounter an end-of-file character, so this technique will not generally interfere with their operation. You should be sure that the text editor that you use to edit REXX pro- grams with appended REXX object code will also stop processing your file after an end-of-file character, as Mansfield Software Group's KEDIT text editor does by default. Note that if you use your text editor to make changes to your program, the file will be written back to disk with the REXX object code "stripped off". This is desirable because, since your program has changed, the existing REXX object code is now out of date. Note that the DOS COPY command will normally not stop processing a file after the end-of-file character, but you can force it to by using the /A option of the COPY command. So COPY with /A provides another method of stripping REXX object code from a REXX program. A utility called RXINFO can be used to determine if a particular REXX file has had REXX object code appended to it. If object code is present, RXINFO also displays some statistics about it, such as the size of the object code, the number of symbols, and the number of literals. 3.15.2. Performance Tradeoffs Tradeoffs between speed, memory use, and flexibility must be made when your REXX source code and REXX object code are processed. Personal REXX's default actions are normally appropriate, but options that give you control over the process are provided. The areas involved are: Source Code Retention (/S and /NS options) Since Personal REXX always converts your REXX source code to REXX object code before running your program, the source code is generally not used while your program is running, and need not be kept in memo- ry. Exceptions come when you use the REXX TRACE facilities to trace program source, and when you use the SOURCELINE function. When you run a REXX program which has not been pre-converted to REXX object code via the /O option, Personal REXX must read in the source code to convert it to object code, and this source code is normally Personal REXX User's Guide, Version 3.0 3. Running Personal REXX page 3.27 ======================================================================== retained in memory so that you can do source tracing and use the SOURCELINE function.¼ You can use the /NS option to override this, freeing up the memory required to hold the source. (The /S option, which is usually not specified since it is the default, tells Person- al REXX to retain the source.) When you run a REXX program to which REXX object code has been appended via the /O option, Personal REXX loads the REXX object code but not the REXX source into memory, so in this case source is never available. Statement Mapping Table (/M and /NM) options When Personal REXX converts your REXX source code to REXX object code, it creates a Statement Mapping Table to keep track of which portions of the object code correspond to particular lines of the source code. This is necessary to give line numbers in error messag- es, for tracing, and for handling of the SIGL variable. You can use the /NM option to tell Personal REXX to save some memory by not using the Statement Mapping Table when your program is run.½ Since without the Statement Mapping Table line numbers will not be available in error messages, this option should be used only with well-debugged programs. The /M option, which is usually not specified since it is the default, tells Personal REXX to use the Statement Mapping Table. Result and Label Tracing (/T and /NT options) When Personal REXX converts your REXX source code to REXX object code, extra instructions must be inserted into the object code to properly handle tracing of results and labels. By omitting these instructions you can save a small amount of memory and make your pro- gram run slightly faster, but you are then unable to use the TRACE facility to trace results and labels. The /T option tells Personal REXX to include the extra result and label tracing instructions in your object code; it is the default except when you are using the /O option. ========================= ¼ When source is not available, SOURCELINE with no arguments always returns 0 and SOURCELINE with an argument gives you an error. A pro- gram can call SOURCELINE with no arguments and then check for a nonze- ro result to determine whether source is available and if it is safe to call SOURCELINE with an argument. ½ /NM used in combination with the /O option tells Personal REXX not to include the Statement Mapping Table with the REXX object code written to disk; no Statement Mapping Table will be available when the program is subsequently run. Personal REXX User's Guide, Version 3.0 3. Running Personal REXX page 3.28 ======================================================================== The /NT option tells Personal REXX not to include the extra instruc- tions; it is the default when you use the /O option. 3.15.3. Performance Hints and Tips Here are a few hints that may help your REXX programs use less memory or run a bit faster. * Use the /O option with debugged REXX programs that will be run fre- quently. Whenever you run the program, it will then begin execution immediately, without the need for conversion of the source code to object code. Less memory will be needed when the program runs, because program source is not kept in memory. /NT is the default when /O is used, and this also leads to slightly smaller and more efficient object code. * There are several steps you can take in the event that REXX does run out of storage when processing and gives you its 'Machine resources exhausted' error. The message is usually accompanied by an indication of the type of memory involved, which may give you an idea of how to resolve the problem. For example, if ISA memory is full, you can use the RXISA environment variable to increase the size of the REXX ISA. It generally helps to use the /O option. You can also reduce storage requirements with the /NS /NM options. /NM will help even if EMS mem- ory is available, though /NS will not. * You can often save memory by breaking a single large REXX program into several smaller subprograms, each kept in separate source files. * Use the DROP instruction to free up storage used by arrays of data kept in compound variables that are no longer needed by your programs. 3.16. Miscellaneous Usage Hints and Tips 3.16.1. Personal REXX and Resident Programs Many DOS programs can be loaded once and will remain loaded to provide a variety of services. Such programs are often called TSRs, because they Terminate but Stay Resident. Some of these programs can be activated with a "hot key" once they have been loaded. Such programs include spelling checkers, phone dialers, note takers, and the like. Other TSRs simply remain loaded after establishing "hooks" so that they can be called by other programs. REXX's RXINTMGR, STACKMGR, RXBATMGR, and RXGLVMGR are in this category along with many others. In general, such programs should not be invoked from a REXX program. The reason is that the REXX language processor (REXX.EXE) will already be loaded. Unless it has been loaded as a TSR itself, it will be unloaded when the REXX program terminates. Although this is not a fatal problem, it is usually undesirable, since DOS memory will then be "fragmented", Personal REXX User's Guide, Version 3.0 3. Running Personal REXX page 3.29 ======================================================================== and it will be difficult to run large programs. Instead, TSRs should be loaded from an ordinary DOS batch file, usually AUTOEXEC.BAT. Under DOS 4.0 and later, you can also start TSRs from the CONFIG.SYS file with the INSTALL command. Many standard DOS commands always or sometimes are TSRs themselves. This category includes APPEND, DOSKEY, FASTOPEN, GRAFTABL, GRAPHICS, KEYB, MIRROR, NLSFUNC, PRINT, and SHARE. Like other TSRs, these should not be invoked from REXX programs. Typically, you would want to run most of these programs from your AUTOEXEC.BAT file anyway (see the next sec- tion). 3.16.2. Using REXX for AUTOEXEC Files The AUTOEXEC.BAT file is used primarily in two ways to customize one's DOS working environment. One is to load TSR programs and the other is to set DOS environment variables. AUTOEXEC.BAT is used in conjunction with the CONFIG.SYS file, which loads device drivers, allows for selection of configuration options, and may also load TSRs. With the increasing complexity of application program requirements, many users have found a need to have several alternate pairs of AUTOEXEC.BAT and CONFIG.SYS files to satisfy differing requirements. For instance, one set might be most appropriate for running MS Windows, a different set for running DESQview, and yet another set when attached to a net- work. Still, there are many options which will be used in common to all of the different setups. It is difficult to keep all of the necessary files updated consistently when changes are made. Therefore, it is a good idea to separate the options into two classes: those which are different for each configuration, and those which are (mostly) the same. An AUTOEXEC.REX file is a good way to manage the options which are to be the same for each configuration. The idea is to provide small AUTOEXEC.BAT files for each configuration. The function of these files is * to initialize options that are unique to each configuration * to load TSRs (which can't be done from a REXX program) * to set REXX environment variables, load required REXX TSRs, and invoke REXX to run AUTOEXEC.REX for the remainder of the configuration pro- cess Here is an example of an AUTOEXEC.BAT file that works this way: Personal REXX User's Guide, Version 3.0 3. Running Personal REXX page 3.30 ======================================================================== rem autoexec.bat for running database cls set comspec=c:\dos\command.com set path=c:\database set tmp=f: rem load tsr's before calling rexx c:\dos\append c:\database;c:\email rem prepare for rexx set rxisa=40 set rxnewcom=yes d:\rexx30\rxintmgr d:\rexx30\stackmgr d:\rexx30\rxbatmgr d:\rexx30\rexx d:\execs\autoexec.rex The AUTOEXEC.REX file will then consist primarily of calls to the VALUE function to set environment variables. It may modify variables which have already been assigned: PATH in particular. It can use certain Per- sonal REXX built-in functions to set variables or run initialization programs depending on the existing configuration. Some of the functions that may be useful for this include EMSMEM, DOSENVSIZE, and SCRSIZE. It can also select an initial default drive and directory with DOSDRIVE and DOSCHDIR. 3.16.3. Using Expanded Memory (EMS) Personal REXX automatically makes use of EMS expanded memory if it is available (see "Using Expanded Memory (EMS)"). Utilities such as the Stack Manager, the Global Variable Manager, and the RXWINDOW function package can also use EMS. In certain situations, you may not want Personal REXX to use expanded memory even though it is available on your system. For example, Personal REXX makes such heavy use of expanded memory that performance can be unacceptable with certain drivers that emulate EMS memory in software by swapping data to extended memory or to disk. You can tell Personal REXX not to use EMS memory by using the /NX option, "REXX Command Options" on page 3.3, either on the REXX command line or by setting the RXFLAGS environment variable. The STACKMGR, RXWINDOW, and GLVMGR commands also have a /NX option to avoid the use of EMS memory. Users occasionally have problems initially with the use of EMS. Most of these problems arise from EMS hardware or software installed with incor- rect switch settings or parameters. Personal REXX User's Guide, Version 3.0 3. Running Personal REXX page 3.31 ======================================================================== For EMS to work properly, a contiguous 64K portion of your PC's address space, located between 640K and 1 megabyte, must be dedicated to EMS. Unfortunately, the area that you select, or that is used by default by your EMS hardware or software, may clash with addresses already used for other purposes in your system, and resolving the conflict is not always straightforward. Because of the variety of possible hardware and software configurations, Quercus Systems cannot help you resolve problems with EMS address con- flicts; for assistance with this you should contact the vendor of your EMS hardware or software. We have, however, supplied a program called EMSCHECK.EXE that can help you detect whether problems exist. If you will be using Personal REXX on a system with EMS, we recommend that you run the EMSCHECK program to check for potential EMS conflicts. EMSCHECK performs simple tests of the EMS features used by Personal REXX and its associated utilities. Other EMS features are not tested. Suc- cessful operation of EMSCHECK does not guarantee that EMS problems won't arise, but if problems are reported by EMSCHECK, it is likely that you will run into EMS problems when you run Personal REXX or one of its utilities. EMSCHECK has no required operands. Two optional switches are supported: /V Verbose mode. Detailed progress messages are displayed while EMSCHECK is running. /A All free EMS pages are tested (written and read). This is the default unless EMSCHECK determines that expanded memory is being emulated by a software driver that swaps to extended memory or to disk, in which case a complete test could be time consuming. To resolve any questions about the validity of errors reported by EMSCHECK, we have made the C source code for EMSCHECK available on our bulletin board and on CompuServe. 3.16.4. Using Personal REXX with REXXTERM and KEDIT REXXTERM is Quercus Systems' asynchronous communication program. KEDIT is a text editor marketed by Mansfield Software Group. Both programs can use "scripts" or "macros" written with Personal REXX. Such REXX scripts are written in much the same way as REXX programs for DOS. The main consideration is that the REXX language processor must be loaded before REXXTERM or KEDIT is run. There are three ways to make this happen: * You can make REXX resident in memory with the command REXX /R. This should be done before you run REXXTERM or KEDIT. Personal REXX User's Guide, Version 3.0 3. Running Personal REXX page 3.32 ======================================================================== * You can use an optional feature of the REXX command, enabled by set- ting the DOS environment variable RXCMD=YES. This allows the REXX com- mand to search for and run .COM, .EXE, and .BAT files in addition to .REX files. You can then enter REXX REXXTERM REXX will be loaded and will in turn load and run REXXTERM. * You can run a REXX program that invokes REXXTERM or KEDIT. REXX will then be loaded (since it is running a REXX program) when REXXTERM or KEDIT is invoked. REXX scripts for use with REXXTERM or KEDIT are written generally the same way they are for DOS. There are a few points to keep in mind: * The default command environment is REXXTERM or KEDIT, which means that commands are passed there for execution rather than to DOS. You can still execute DOS commands directly from REXX by preceding them with ADDRESS COMMAND. This has some drawbacks, in that it does not allow REXXTERM and KEDIT to save their screens and other operational data. It is recommended that you use the facilities provided by REXXTERM and KEDIT for running DOS commands. * All REXX I/O involving the screen and keyboard, including SAY, PARSE PULL, the I/O built-in functions, and tracing can be done in REXXTERM scripts. Such I/O will be integrated smoothly with other REXXTERM usage of the screen and keyboard. KEDIT cannot do this, but you can use KEDIT's MSG command to display a line of output from your macro, and READV CMDLINE command to get a line of input from the keyboard. Personal REXX User's Guide, Version 3.0 4. REXX Language Compatibility page 4.1 ======================================================================== Chapter 4 REXX Language Compatibility ___________________________ There are several commonly used references for the REXX language. Cow- lishaw's The REXX Language (2nd Edition) is supplied with Personal REXX. The IBM manual System Product Interpreter Reference (SC24-5239) describes the VM/CMS version of REXX. The IBM manual Procedures Lan- guage 2/REXX (S01F-0271) describes the IBM OS/2 version. The IBM manual Common Programming Interface Procedures Language Reference (SC26-4358) gives the IBM SAA specification for the language. The versions of the REXX language described in these references are very similar, making it possible for Personal REXX to be highly compatible with all of them. The instructions and functions added in version 4.0 of REXX¶ (the version described in The REXX Language, 2nd Edition) have been implemented in Personal REXX. The instructions and functions present in the CMS, OS/2, and SAA versions of REXX, but not included in The REXX Language, have also been implemented. Whenever portability is of concern and you must use features of Personal REXX that are different from corresponding features in other implementa- tions or that are not available in other implementations, you can use the PARSE VERSION instruction to verify that the program is running with Personal REXX. For example, PARSE VERSION name version date will set name to "REXX/Personal", version to "4.0" (the language ver- sion, not the Personal REXX version), and date to the date of the cur- rent release of the Personal REXX language processor. There are some obvious ways in which REXX programs may be incompatible from one environment to the next. Some of the most common ways include: * System command names differ from one system to the next. This also applies to the names of available command environments and the default environment. * File naming conventions differ across file systems. * Most REXX implementations add built-in functions (always with differ- ent names) for working with the file system and other system features. ========================= ¶ Versions of the REXX language, such as 4.0, are currently assigned numbers by IBM. These version numbers are not directly related to ver- sion numbers of Personal REXX and should not be confused with them. Personal REXX User's Guide, Version 3.0 4. REXX Language Compatibility page 4.2 ======================================================================== * Many low-level details of how the I/O functions work are different, in particular how a file is regarded as a sequence of bytes or of lines. * Implementation limits such as the maximum length of a line, symbol, or string differ. * The underlying character set of the computer may be ASCII or EBCDIC. This affects binary and hexadecimal representations of characters and the standard collating sequence. * Binary data (i. e. numbers) are usually stored differently on differ- ent computers. It's clearly impossible to list all of the differences of Personal REXX from each of the other common implementations of REXX. The best this chapter can do is to point out the above general considerations and to give some important special cases. 4.1. Implementation Limits You will probably not be affected by any of the following limits except perhaps those on the size of programs and on space available for vari- able storage. Most REXX programs don't approach the other limits. * Size of a REXX program: varies greatly depending on your available memory and how you set Personal REXX's environment variables. Under the right conditions, REXX programs with up to about 64K in each source file can be run. * Total size of all variables: varies greatly depending on your avail- able memory and how you set Personal REXX's environment variables. Personal REXX can use up to 64K of EMS memory per program as well as available DOS memory below 640K to store each source program's vari- ables and the control blocks used to keep track of them. * Maximum number of open files: 15 * Maximum length of a single line of a program: 250 characters * Maximum length of a variable name: 250 characters * Maximum length of a symbol (before substitution): 250 characters * Maximum length of a literal string: 250 characters * Maximum length of a single "clause" (tokenized internal format): 1000 characters * Maximum number of tokens per clause: 250 Personal REXX User's Guide, Version 3.0 4. REXX Language Compatibility page 4.3 ======================================================================== * Maximum length of the value of a variable: theoretically 32000 char- acters, although it will be less in practice because of memory limita- tions and memory fragmentation. * Total static nesting of control structures (IF, SELECT, DO, etc.): 25 4.2. Differences from IBM OS/2 REXX This section lists the known incompatibilities between Personal REXX and IBM's OS/2 implementation of REXX (as of OS/2 1.3). * File read and write pointers as used by CHARIN, CHAROUT, LINEIN, and LINEOUT are maintained independently in Personal REXX, as required by The REXX Language. In IBM's OS/2 REXX the pointers are not indepen- dent, and both are updated whenever either a read or a write is done. * PULL and PARSE PULL display a prompt (currently "?") before reading keyboard input. Personal REXX does not. * IBM OS/2 REXX displays all commands passed to the system for execu- tion, unless the ECHO OFF command has first been issued. Personal REXX displays commands only if the TRACE C instruction is used. * IBM OS/2 REXX does not allow REXX programs to be executed as commands unless they are invoked with the system CALL command. Personal REXX automatically runs REXX programs as commands. 4.3. Differences from CMS REXX This section lists the known incompatibilities between Personal REXX and the CMS implementation of REXX (as of VM/SP Release 6). * In CMS REXX, quoted strings are allowed to cross line boundaries. The REXX Language, however, specifies that quoted strings must fit on one line, and Personal REXX enforces this rule. * Since ASCII does not have a character for logical negation, several alternatives are provided in Personal REXX. Wherever a logical not sign is allowed in CMS REXX, either a backslash (\), a tilde (~), or a caret (^) may be used in Personal REXX. A forward slash (/) is some- times used in CMS REXX for negation, so Personal REXX accepts it in the same cases, but its use is not recommended. Backslash (\) is the preferred character. * A Personal REXX program does not need to have a comment as its first line. (In certain contexts, such as in a KEDIT macro written in REXX, the comment line is required.) Personal REXX User's Guide, Version 3.0 4. REXX Language Compatibility page 4.4 ======================================================================== * The USERID built-in function returns the value of the USERID environ- ment value, or the null string if USERID is not found in the environ- ment. * The EXTERNALS built-in function always returns 0. * CMS REXX includes several options and functions related to Double Byte Character Set support, which are useful for working with languag- es like Japanese. These are not supported by Personal REXX. 4.4. Differences from REXX 4.0 This section lists the known incompatibilities between the current ver- sion of Personal REXX and version 4.0 of the REXX language specifica- tion, as described in The REXX Language, 2nd Edition. * The line and count arguments of the LINEIN function are not generally supported. LINEIN always attempts to read one line starting with the current read position in the specified character input stream. * The line argument of the LINEOUT function is not generally supported. LINEOUT always attempts to write a line at the current write position of the specified character output stream. * The LINES function returns either 1 or 0, depending on whether or not any lines remain in a file beyond the current read pointer. The CHARS function does return the number of characters remaining, unless used with a device or the standard input stream. * Trace output is not indented according to the logical level of nest- ing. * The special characters @, #, and $ are allowed in symbol names by Personal REXX for compatibility with earlier versions of the language. * Certain language features available in CMS REXX are now considered obsolete but are supported by Personal REXX for compatibility. The list includes the UPPER command, the C (Century) and J (Julian) options of the DATE function, and the EXTERNAL option of the PARSE instruction. * Likewise, various CMS built-in functions are still supported for com- patibility. This includes EXTERNALS, FIND, INDEX, JUSTIFY, LINESIZE, and USERID. Personal REXX User's Guide, Version 3.0 4. REXX Language Compatibility page 4.5 ======================================================================== 4.5. Differences in Source Program Handling As discussed in Section "REXX Object Code", before running REXX programs Personal REXX first converts the programs to a more efficient internal form known as REXX object code. This leads to some slight differences from other REXX implementations: * Syntax errors in REXX programs that go undetected in other REXX imple- mentations may be detected by Personal REXX. Other REXX implementa- tions may miss syntax errors in portions of programs that, because of the flow-of-control, are not actually executed. Personal REXX checks all portions of REXX programs for syntax errors before execution begins. * Personal REXX programs are checked for syntax errors while being con- verted to internal form. Most conditions that would normally be han- dled by SIGNAL ON SYNTAX are instead caught during the conversion, and the program never begins execution. * TRACE S is not supported by Personal REXX, and since programs are always scanned for syntax errors before they are run, is not neces- sary. * Certain statements which do not actually generate object code, such as THEN and SELECT, cannot be traced. Some of the options discussed in Section "REXX Command Options" disable certain features of the REXX language to improve performance or save memory: * /NS disables tracing of the source. It also causes the SOURCELINE function to give an error if called with an argument, and to return 0 if called with no arguments. * /NM inhibits source tracing, line numbers in error messages, and main- tenance of the SIGL variable. * /NT prevents tracing of results and labels. * /O forces /NS to be in effect when the program is subsequently run, and makes /NT the default. 4.6. Additional Language Features Two features have been added to the language in Personal REXX: * A new TRACE prefix, $, is provided. TRACE output goes to the PC's display by default. $ is a toggle that routes the output to the PC's printer or back to the PC's display. Personal REXX User's Guide, Version 3.0 4. REXX Language Compatibility page 4.6 ======================================================================== * Two operands for the OPTIONS instruction are provided to allow user control of Personal REXX interaction with COMMAND.COM on a program-by- program basis. The arguments are NEWCOM and NONEWCOM. In addition, all of the built-in functions described in Chapter 8, "Per- sonal REXX Utility Functions" are supported by Personal REXX but are not part of the language as such. Built-in functions implemented in IBM's OS/2 REXX are also supported. This includes BEEP, DIRECTORY, ENDLOCAL, FILESPEC, and SETLOCAL. Personal REXX User's Guide, Version 3.0 5. Learning REXX page 5.1 ======================================================================== Chapter 5 Learning REXX _____________ 5.1. Purpose This chapter is an introduction to REXX for programmers who are new to the language. It uses working programs to illustrate the essential ele- ments of REXX. Our goal is for you to be able to write useful REXX pro- grams as quickly as possible. Newcomers to REXX who take some time to browse through this introduction and try out the program examples will have built a firm foundation for mastering REXX. If you are already familiar with REXX, you can skip most of this chapter, but you should take a look at "Personal REXX Util- ity Functions" on page 5.51 We will concentrate on REXX fundamentals: variables, expressions, con- trol flow, functions, and I/O. To avoid getting bogged down in details, we will omit the special cases and formal definitions that may be found in other references. At the end of this introduction we will cover the most important advanced REXX and Personal REXX features. You will find that REXX's syntax, control structures, and functions are very understandable in terms of many other modern high-level languages. While this chapter does not assume a knowledge of REXX or any other pro- gramming language in particular, it does assume that you have done some programming. If you aren't able to relate REXX to a language that you already know, then you may find it easier to begin learning REXX from a source such as O'Hara and Gomberg's Modern Programming Using REXX (Prentice-Hall, revised edition, 1988). 5.2. About REXX 5.2.1. Other References REXX was designed by M. F. Cowlishaw of IBM. His very readable The REXX Language, A Practical Approach to Programming, Second Edition (included with Personal REXX) is the ultimate REXX language reference. If you want to learn more about REXX after this introduction, The REXX Language is the logical place to turn. If you want to learn more about using the special features of Personal REXX, you will want to continue reading in this User's Guide, particu- larly Chapter 8, "Personal REXX Utility Functions". Personal REXX User's Guide, Version 3.0 5. Learning REXX page 5.2 ======================================================================== 5.2.2. Why Learn REXX? REXX's standard features as defined in The REXX Language are very flexi- ble and powerful, making REXX useful for a host of applications: per- sonal programming, batch or shell programming, program macros, and pro- totype development. This introduction to REXX emphasizes the standard features of the lan- guage. Toward the end of this chapter we will introduce some of the implementation-specific aspects of Personal REXX. These added features are not necessary for writing many useful REXX programs, but they will allow you to get the most out of REXX in the DOS environment. When we discuss Personal REXX's features, we will make clear the distinction between them and standard REXX. 5.2.3. First Principles The primary design goal for REXX was ease of use by both professional programmers and every-day computer users. To help reach this goal, a set of principles were adopted. You may find it easier to learn REXX if you keep in mind the principles that shaped its design: * Readability: REXX supports modern structured programming concepts, and gives programmers great flexibility in the way they format programs. * Natural data typing: REXX assigns meaning to data according to its use, and does not require programmers to understand the underlying representation of data. * Symbolic manipulation: REXX's rich set of character manipulation oper- ators and functions make it well suited to processing the textual information that people use. * System independence: All of the features of REXX behave the same, regardless of the hardware or software environment. But because REXX lets you issue environment-specific commands, REXX can act in very close concert with both the environment it is in and with other pro- grams running alongside it. * Small size: Aside from its many built-in functions, REXX is a very compact language. This makes REXX easier to learn and master. For more about the design and history of REXX, see Part 1 "Background" in The REXX Language. Personal REXX User's Guide, Version 3.0 5. Learning REXX page 5.3 ======================================================================== 5.3. Getting Started 5.3.1. Running Personal REXX You will get the most out of this chapter by reading its sections in order, stopping to run those programs that interest you or that you don't understand completely from the text. All of the programs in this chapter are included on the Personal REXX distribution disk in the \LEARN subdirectory. The name for each program is given in a beginning comment, so you can easily find the corresponding file on disk. Instead of simply running the files in the \LEARN subdirectory, you might want to type in the example programs yourself and then run them. To experiment with the ideas discussed here, you might also want to mod- ify the programs from this chapter or create your own programs. Before you can run the REXX programs given here, you will need to be sure that REXX is installed as described in Chapter 2, "Installing Per- sonal REXX" of this User's Guide, and that you can run REXX and execute REXX source programs as described in Chapter 3, "Running Personal REXX". In particular, be sure that RXINTMGR has been loaded, that REXX.EXE is either in your path or in the current directory, and that the LEARNnn.REX programs are in your current directory. 5.3.2. A First Program The first example program, LEARN01.REX, simply displays on the screen the string Hello, world: /* LEARN01.REX -- write "hello" to screen */ SAY "Hello, world." /* END LEARN01.REX */ To make sure that you have Personal REXX properly installed and that you are able to run Personal REXX on your system, run LEARN01.REX. To do this, type rexx learn01 at the DOS prompt, and press the Enter key. If you have any problems with LEARN01.REX, you should review Chapter 2, "Installing Personal REXX" and Chapter 3, "Running Personal REXX" in this User's Guide. When you are confident that you can run REXX programs, you are ready to learn REXX. Personal REXX User's Guide, Version 3.0 5. Learning REXX page 5.4 ======================================================================== 5.4. REXX Structure and Syntax 5.4.1. Clauses A REXX program is made up of a series of clauses. Clauses are made up of a sequence of blanks and tokens. You can place multiple clauses on one line by separating them with semicolons (;). You can continue very long clauses on the next line by using a comma (). For example, REXX clauses to add two numbers and writes the result could be written in any of the following ways: /* LEARN02.REX -- show different clause formatting */ x = 4 + 5 /* (1) */ SAY "The answer is" x x = 4 + 5; SAY "The answer is" x /* (2) */ x = 4, /* (3) */ + 5; say, "The answer is" x /* END LEARN02.REX */ Usually you will find it easiest to place one clause on each line, as in the first sequence above. In this case, no special character is required to delimit the end of each clause. Clauses can begin with as many blanks as you want, allowing you to indent your program for readability. You can also use as many blanks as you want to separate the tokens in a clause. ________________________________________________________________________ Program Formatting: A clean, consistent style is a strong ally in writ- ing readable, reliable programs. One of REXX's strong points is that it allows users great flexibility in formatting program text. The programs in this chapter demonstrate one possible style for formatting REXX pro- grams. You may wish to modify this style to suit your own preferences. ________________________________________________________________________ 5.4.2. Tokens The tokens you will use most often for making up REXX clauses are: * Comments: REXX comments are delimited by /* and */ and can contain any sequence of characters on one or more lines. As the three comments in LEARN02.REX show, REXX comments can also share a line with executable clauses. You should begin all your REXX programs with a comment. This is good programming style, and may be necessary in order for oth- er software to recognize your file as a REXX program. Personal REXX User's Guide, Version 3.0 5. Learning REXX page 5.5 ======================================================================== * Literal strings: REXX literal strings, delimited with the single-quote (') or double-quote ("), can include any characters. You can include single-quotes in strings delimited with double-quotes, and double- quotes in strings delimited with single-quotes. In LEARN01.REX, "Hel- lo, world." is a literal string. Here are some others: "Enter client's name" '"No," he said.' "ABC" * Symbols: REXX symbols are identifiers made from alphanumeric charac- ters and a small set of special characters. REXX does not distinguish characters of different case in symbols: lowercase alphabetic charac- ters are converted to uppercase before REXX uses them. REXX symbols can stand for many things, depending on the context. Certain symbols such as IF and DO are keywords for special language instructions. Other symbols are the names of variables and functions that you or REXX define. * Numbers: REXX numbers are character strings of decimal digits. They may be preceded by a plus (+) or minus (-), and can include a period (.) to serve as decimal point. REXX numbers can also be expressed in exponential notation. Here are some valid REXX numbers: 123.654 -8.6 14 89e+64 * Operators: REXX has a set of special characters that serve as opera- tors for creating expressions. There are the standard numeric opera- tors such as plus (+), minus (-), multiply (*), and divide (/), as well as concatenation, comparison, and logical operators. 5.5. Simple Variables, SAY, and PULL 5.5.1. Simple Variables Let's look at a slightly more complicated REXX program that asks for the user's name and age, and then writes them out inside a message: /* LEARN03.REX -- get user's name and age into variables */ SAY "Please enter your name" PULL name SAY "Please enter your age" PULL age SAY name"," age "years is too long to be without REXX." /* END LEARN03.REX */ The symbols name and age are the names of simple REXX variables. Simple variable names are made up of one or more alphabetic, numeric, or spe- cial characters, and may not begin with a digit or period. REXX vari- able names, like all REXX symbols, are not case-sensitive. Some other simple REXX variable names could be: Personal REXX User's Guide, Version 3.0 5. Learning REXX page 5.6 ======================================================================== B INCREMENT1 top_of_file The values of all REXX variables, even integers and floating point num- bers, are stored as character strings. This makes manipulating and for- matting variables for display much easier, and it also means you don't have to worry about different variable "types". 5.5.2. SAY and PULL Instructions SAY and PULL are examples of REXX instructions -- keywords that are fixed elements of REXX. The syntax for SAY is: SAY [expression] REXX evaluates expression and writes the results to the screen, termi- nated by an end-of-line. If there is no expression then SAY just dis- plays a blank line. SAY is the simplest REXX mechanism for placing information on the screen, and you will probably use it often. In LEARN03.REX the first two SAY instructions write literal strings. The last SAY evaluates a string expression consisting of the concatena- tion of several strings and displays the result. ________________________________________________________________________ Syntax Notation: Whenever you first see a new REXX instruction in this chapter, there will be an accompanying summary of its syntax. The syn- tax diagrams presented here try to distill the various forms of a REXX instruction into the one form that is practical for most situations. The syntax diagrams here are neither formal nor complete. For the full syntax of a REXX instruction you should refer to The REXX Language, Part 2, Section 7 "Keyword Instructions", and Appendix A, "REXX Syntax Dia- grams". The full REXX syntax diagrams use several special symbols. We will make do with only one: square brackets ([,]). When part of an instruction appears in square brackets, that means it is normally optional. ________________________________________________________________________ PULL is REXX's simplest instruction for retrieving information from the user of a program via the keyboard. Its syntax is: PULL [template] PULL is actually an abbreviation for a variant of REXX's PARSE instruc- tion. Later in this chapter we'll see how to work with PARSE, and how to use a template to easily process the user's input. For now, you can get a lot of work out of PULL just by knowing that PULL variable Personal REXX User's Guide, Version 3.0 5. Learning REXX page 5.7 ======================================================================== reads the next input line from the user, changes it to uppercase, and places the result in variable. 5.5.3. Initial Variable Values REXX variables always have an initial value. If you use a variable before assigning it a value, then the value of the variable is just its name in uppercase. This can be good and bad. It means that a REXX clause like SAY ENTER NAME will behave as expected, displaying ENTER NAME. This is because ENTER and NAME are variables that are initialized by REXX to their own names. However, suppose your program has already assigned the string value Smith to the variable NAME. In this case the clause above would display ENTER Smith -- probably not what you intended! Also, certain characters may have special meanings that cause problems when they are not part of a literal string. For example, SAY CONTINUE (Y/N) ? will not work as expected, because REXX interprets the Y/N as an attempt to divide the variable Y by the variable N. What you can do here is enter SAY 'CONTINUE (Y/N) ?' so that the text enclosed in quotes will not be evaluated. 5.6. Expressions, Operators, and Assignments In the last clause of LEARN03.REX we saw an example of concatenation, a REXX operation that merges two string values into one. REXX has many operators, which help you form expressions -- program statements that combine data in various ways to produce a result. You have probably seen numeric expressions such as 2 * (4 + 5) REXX has numeric expressions and many other types of expressions. REXX expressions consist of terms -- the data that is operated on -- and operators -- instructions that tell REXX what you want done. Terms can consist of literal strings, variable names, numeric constants, function calls, or other expressions bracketed by parentheses. REXX has four classes of operators: concatenation, arithmetic, comparison, and logi- cal. Personal REXX User's Guide, Version 3.0 5. Learning REXX page 5.8 ======================================================================== 5.6.1. Concatenation Operators The REXX concatenation operators combine two strings to form one by appending the second string to the right-hand end of the first, with or without an intervening blank. The concatenation operators are notably easy to use. In REXX the blank (space) character can actually be interpreted as a concatenation operator. This makes clauses such as SAY name"," age "years is too long to be without REXX." extremely easy to write. The blank operator between the literal "," and the variable age combines these two strings into one, with an interven- ing blank. There are two ways available in REXX for concatenating values without any intervening blank. You can use the concatenation operator (||), or you can simply enter the two values right next to each other without any blanks between them ("abuttal"). In the statement above, name"," shows how you can concatenate two values by entering one immediately after the other, with no intervening spaces. What would you do if you wanted to concatenate two variables without an intervening blank? You couldn't put them one right after the other, because REXX would not be able to distinguish between the two separate variable names. That's where the concatenation operator comes into play. For example, /* LEARN04.REX -- concatenate two variables without space */ first_half = "Cow" last_half = "lishaw" SAY "REXX was designed by M. F." first_half || last_half"." /* END LEARN04.REX */ is able to put REXX's designer back together again, displaying: REXX was designed by M. F. Cowlishaw. 5.6.2. Assignment The first two lines of LEARN04.REX are examples of REXX assignments. A REXX assignment looks like this: variable = expression An assignment is the easiest way to change the value of a variable. REXX evaluates the expression and makes the result the new value of the variable to the left of the equal sign. You can assign the value of any expression -- string or numeric -- to any REXX variable. Personal REXX User's Guide, Version 3.0 5. Learning REXX page 5.9 ======================================================================== ________________________________________________________________________ Declaring Variables: Note that name and age in LEARN03.REX did not have to be declared. That is, we did not have to tell REXX anything about these variables before using them in the program. The variable declarations that are required by other languages can detract from the essential logic of smaller programs, and can make "throw-away" programs take longer to write. ________________________________________________________________________ 5.6.3. Arithmetic Operators REXX has the standard arithmetic operators -- add (+), subtract (-), multiply (*), and divide (/) -- as well as the integer divide (%), remainder (//), and exponentiate (**) operators. These operators can be applied to numeric constants, and to character strings, variables and expressions that evaluate to valid REXX numbers. /* LEARN05.REX -- calculate circle characteristics */ PI = 3.14159 SAY "Enter radius" PULL radius SAY "Area = " PI * (radius**2) SAY "Circumference = " 2 * PI * radius /* END LEARN05.REX */ Note that LEARN05.REX assigns a numeric constant to the variable PI for use in its calculations. Not only are the ensuing calculations clearer but, if the laws of the universe should suddenly change, the value of PI is easy to modify. The parentheses in the last clause make the order of expression evaluation obvious -- a good programming practice even if you have memorized the rules by which REXX evaluates numeric expressions. If you entered 5 for the radius, the program displays this: Area = 78.53975 Circumference = 31.41590 5.7. PARSE Instruction The PARSE instruction for assigning data to variables is one of the most powerful and unique aspects of REXX. PARSE can make short work of tasks that would otherwise require complex loops and string operations. PARSE has many variations and applications, but we'll look at just one here: PARSE [UPPER] PULL template Personal REXX User's Guide, Version 3.0 5. Learning REXX page 5.10 ======================================================================== /* LEARN06.REX -- get user's name into two variables */ SAY "Please enter your first and last name" PARSE PULL firstname lastname SAY "The name entered was" lastname"," firstname"." /* END LEARN06.REX */ If you run this program and enter Ann Smith it displays The name entered was Smith, Ann. The PARSE PULL instruction waits for the user to enter a response, then assigns it to the variables firstname and lastname, preserving the case of the letters. In this case, PARSE PULL uses blanks to determine how to split the user's entry. The logic for splitting apart the user's entry into two separate words and then assigning them to variables -- which would require several steps in many other languages -- is handled in one step by REXX's PARSE. ________________________________________________________________________ PULL: The PULL instruction, which we saw in LEARN03.REX, is actually an abbreviation for PARSE UPPER PULL. PARSE UPPER PULL and PULL behave identically to PARSE PULL, except that they uppercase any alphabetic characters the user enters. ________________________________________________________________________ The real power of the PARSE instruction becomes obvious as the template becomes more complex. In the next example, PARSE uses a template that specifies the character string / rather than blanks to break up the input: /* LEARN07.REX -- split birthday into month, day, and year */ SAY "Please enter your birth date in the form: mm/dd/yy" PARSE PULL month '/' day '/' year SAY "The month entered was" month /* END LEARN07.REX */ PARSE PULL assigns the keyboard input to the variables month, day, and year using the template: month '/' day '/' year to break up the entered information at the slashes. If you entered 07/15/60, the program would write to the screen The month entered was 07 Personal REXX User's Guide, Version 3.0 5. Learning REXX page 5.11 ======================================================================== Later in this chapter, we'll look at another example of templates that include this kind of "literal pattern". We'll also examine other useful applications of the REXX PARSE instruction. 5.8. Compound Variables In the LEARN03.REX program we saw an example of REXX's simple variables. Simple variables behave much the same as variables in other programming languages. Most programming languages also give you data types for building more complex structures such as arrays, records, and lists. REXX has one easy-to-use data type for building these higher-level data structures: the compound variable. The rules for building a compound variable name in REXX are identical to those for building a simple variable, except that a compound variable has two parts: a stem and a tail. A stem is like any other variable name except that it ends in a period. A tail is a string of one or more symbols; when the tail is made up of more than one symbol, each symbol is separated from the next by a period. Here are some examples of com- pound variable names: color.4 john.age array.i.j When REXX retrieves the value of a compound variable it first generates a derived variable name. The name is derived by replacing any simple variables in the tail name by their values. The value of the compound variable is then the value associated with the derived name. An example will make this much clearer: /* LEARN08.REX -- use compound variables as arrays */ array.1.1 = 5 array.1.2 = 10 i = 1; j = 2 SAY "array.1.1 =" array.1.1 SAY array.1.2 "=" array.i.j "Right?" /* END LEARN08.REX */ When you run this program, it writes these results to the screen: array.1.1 = 5 10 = 10 Right? In the variable array.i.j in the last line, array. is the stem and i.j is the tail. To generate the derived name of the variable, REXX replac- es the simple variables in the tail, i and j, by their values. So when Personal REXX User's Guide, Version 3.0 5. Learning REXX page 5.12 ======================================================================== REXX looks at the variable array.i.j, it sees array.1.2 because i has been set to 1 and j has been set to 2. Thus array.1.2 is the derived name for the compound variable array.i.j. Earlier we set the value of array.1.2 to 10, so that's what SAY displays. What would happen if we hadn't set i and j before telling REXX to SAY array.i.j? In that case i and j would evaluate to their own names in uppercase. This leaves REXX with array.I.J to evaluate. But we haven't set a variable called array.I.J anywhere in LEARN08.REX, so array.I.J evaluates to its name in uppercase -- or ARRAY.I.J. Thus, array.1.2 = 10 SAY array.1.2 "=" array.i.j "Right?" leaves us SAYing this: 10 = ARRAY.I.J Right? Wrong. ________________________________________________________________________ Stem Assignment: As mentioned earlier, the beginning of a compound variable name, up to and including the first period, is called the stem. You can set all possible compound variables derived from a given stem by assigning a value to the stem, for example array. = 0 After setting a stem variable this way, a reference to any compound variable with that stem to which you do not assign another value will return the value assigned via the stem. ________________________________________________________________________ REXX's compound variables are valuable when used as arrays, but are even more powerful than standard arrays because their subscripts do not have to be numeric. This allows you to create lists, trees, and tables that would require complex string manipulation and memory management in other languages. When used with nonnumeric subscripts, REXX's compound variables give you the ability to create data structures that are automatically indexed by their contents. For example, here is a program that uses two-letter state abbreviations to store and retrieve area codes: Personal REXX User's Guide, Version 3.0 5. Learning REXX page 5.13 ======================================================================== /* LEARN09.REX -- use compound variables to find area codes */ areacode. = "unknown" areacode.ME=207; areacode.NH=603; areacode.VT=802; areacode.RI=401 areacode.CT=203; areacode.MA="east 617 and 508, west 413" SAY "What state do you want the area code for?" SAY "(Enter a two-character abbreviation) " PULL state SAY "The area code for" state "is" areacode.state /* END LEARN09.REX */ The first line of LEARN09.REX is an assignment statement that sets all possible compound variables with the stem areacode. The six assignment statements that follow assign area codes for the New England states to the areacode variable, using character strings as subscripts. If you run LEARN09.REX and enter ct at the prompt, the program writes The area code for CT is 203 If you enter ny, the program displays The area code for NY is unknown 5.9. More Operators, Program Flow, Grouping Clauses Earlier we looked at several kinds of REXX operators, the special instructions that tell REXX how to manipulate data in expressions. The concatenation operators let you combine REXX string values, and the arithmetic operators let you perform complex calculations. Let's look at the two remaining kinds of REXX operators: the comparison and logi- cal operators. 5.9.1. Comparison Operators The REXX comparison operators compare two values to each other and return a result of 1 if the comparison is true, or 0 if false. The LEARN10.REX program demonstrates the normal REXX comparison opera- tors: Personal REXX User's Guide, Version 3.0 5. Learning REXX page 5.14 ======================================================================== /* LEARN10.REX -- demonstrate normal comparison operators */ SAY 2 = 2 /* equal */ SAY 2 = '02' /* equal */ SAY 2 = 2.0 /* equal */ SAY "TEST" <> "Test" /* not equal */ SAY 4 > 2 /* greater than */ SAY 1 < 2 /* less than */ SAY 4 >= 2 /* greater than or equal to */ SAY 1 <= 1 /* less than or equal to */ /* END LEARN10.REX */ All of the SAY instructions in LEARN10.REX display 1 on the screen, meaning that the expression is true. Note that character comparisons are case-sensitive: "TEST" and "Test" are not equal. ________________________________________________________________________ Strict Versus Normal Comparison: Because REXX handles all values wheth- er numeric or not as character strings, it needs two sets of comparison operators: strict and normal. The strict operators, which have one of the operator characters doubled (like ==, >>, <<), test whether all characters in two string values are precisely equal (taking into account all characters in the strings, including any leading or trailing blanks). The normal operators, however, will perform a numeric comparison if both terms are numeric. Otherwise, the normal operators compare terms as character strings, ignoring leading and trailing blanks. ________________________________________________________________________ 5.9.2. Logical Operators The final set of REXX operators, the logical operators, take one or two true (1) or false (0) values and combine them in a logical operation to return another true or false value. Often it is the comparison operators that provide the true or false val- ues that the logical operators need to operate on. The REXX logical operators are: & And Returns 1 if both terms are true; 0 otherwise. | Inclusive Or Returns 1 if either term is true; 0 if both are false. && Exclusive Or Returns 1 if only one term is true; 0 if both are false or both are true. \ Not Returns 1 if the term is false; 0 if true. Personal REXX User's Guide, Version 3.0 5. Learning REXX page 5.15 ======================================================================== You'll see the logical operators at work in the programs that follow. 5.9.3. Control Structures and DO Groups REXX has a complete set of control structures. These are built-in lan- guage instructions that let you control the order in which clauses are executed. Control structures are very important: without them you could write only programs that begin execution at the top, proceed down- ward to the bottom, then stop. You can use the REXX control structures to control flow of execution based on conditions you check, or alternatives you provide. You can also use them to loop repetitively through a set of clauses, until a certain condition or count is reached. Before we look at the first REXX control structure, let's consider the simplest form of a REXX "DO group": a set of clauses surrounded by the DO and END keywords. The DO group is also used to create loops in REXX, but in its simplest form it just groups multiple clauses together. A DO group can be used anywhere in a REXX program where normally only one clause would be allowed. Thus you could package three REXX clauses such as x = 1 y = x + 3 SAY y into a DO group like DO x = 1 y = x + 3 SAY y END and use the three clauses anywhere you could normally use just a single clause. We haven't yet seen any instances where we need a DO group, but in the next sections we will. 5.10. Conditional Instructions REXX gives you two fundamental methods for controlling program flow based on tested conditions: the IF and SELECT instructions. Personal REXX User's Guide, Version 3.0 5. Learning REXX page 5.16 ======================================================================== 5.10.1. IF Instruction The syntax for the REXX IF instruction is IF expression THEN instruction [ELSE instruction] The IF instruction tests an expression and executes an instruction (or group of instructions) based on the result. The expression tested must evaluate to either true (1) or false (0). If the expression is true then the instruction immediately following the THEN is executed. If the expression is false, and there is no ELSE por- tion, then the body of the IF is bypassed entirely. /* LEARN11.REX -- show simple IF construct */ SAY "Enter age: " PULL age IF age < 16 THEN SAY "Too young to drive." SAY "Done." /* END LEARN11.REX */ This program prompts the user for an age, and places it into the age variable. If the age is less then 16 the program displays Too young to drive. Done. If the age is greater than or equal to 16, the program just displays Done. The expression age < 16 is an example of the REXX "less than" comparison operator in action. 5.10.2. IF/THEN/ELSE The IF instruction can also contain an ELSE portion. If the tested expression is not true, then the clauses following the ELSE are execut- ed. By nesting IF/THEN/ELSE instructions and grouping clauses with DO groups, you can create more-complex logical tests. Here's an example of IF/THEN/ELSE that also uses DO groups in the THEN and ELSE clauses: Personal REXX User's Guide, Version 3.0 5. Learning REXX page 5.17 ======================================================================== /* LEARN12.REX -- voter registration screening with nested IF's */ SAY "Enter age:" PULL age IF age >= 18 THEN DO status = " vote." msg = "Please proceed to the registration desk." END ELSE DO status = "not vote." msg = "See you when you're 18." END SAY "You can"status SAY msg /* END LEARN12.REX */ LEARN12.REX tests the user's age. If the age given is 18 or more, then the variable status is set to " vote" and the variable msg is set to Please proceed to the registration desk. Else, status is set to "not vote" and msg is set to See you when you're 18.. If you run LEARN12.REX and enter 20, the program displays You can vote. Please proceed to the registration desk. If you run LEARN12.REX and enter 16, the program displays You cannot vote. See you when you're 18. ________________________________________________________________________ THEN and ELSE: The format of IF/THEN/ELSE is flexible. In addition to the format shown in the syntax diagram on page 5.16, you can begin a new line before or after the keyword THEN, and you can also begin a new line after the keyword ELSE. (But you can't have both the THEN clause and the ELSE clause on the same line, unless a semicolon precedes the ELSE.) For a full specification of the syntax of IF/THEN/ELSE, see the entry for IF in Part 2, Section 7 of The REXX Language. ________________________________________________________________________ 5.10.3. SELECT Instruction You can create almost any logical test using the REXX IF instruction and the comparison and logical operators. However, there are certain situ- ations -- such as testing menu choices or long lists of values -- where nested IF instructions are bulky and inefficient. Personal REXX User's Guide, Version 3.0 5. Learning REXX page 5.18 ======================================================================== For situations where you must test among many alternatives, REXX pro- vides the SELECT instruction. The syntax for SELECT is: SELECT WHEN expression THEN instruction WHEN expression THEN instruction WHEN expression THEN instruction . . . [OTHERWISE instructionlist] END Each WHEN expression THEN instruction just like an IF/THEN construction. If the expression evaluates to true (1), then the instruction -- which may also be a set of instructions in a DO group -- is executed. Control then passes to the END, bypassing any other WHEN or OTHERWISE instruc- tions. If the expression evaluates to false (0), then control passes to the next WHEN. If none of the WHENs are true, then there must be an OTHERWISE (or else REXX will report an error). In this case, the instructionlist associated with OTHERWISE is executed. Here's an example of the SELECT instruction in use: /* LEARN13.REX -- use SELECT to find area codes */ NULL = "" SAY "What New England state do you want the area code for?" PULL state SELECT WHEN state = "CT" THEN code = "203" WHEN state = "MA" THEN code = "617, 508 or 413" WHEN state = "ME" THEN code = "207" WHEN state = "NH" THEN code = "603" WHEN state = "VT" THEN code = "802" WHEN state = "RI" THEN code = "401" OTHERWISE code = NULL END IF code <> NULL THEN SAY "The area code for" state "is" code ELSE SAY "The New England states are ME, NH, VT, CT, RI, and MA" /* END LEARN13.REX */ In LEARN13.REX the SELECT instruction executes one of seven alternatives made up of six WHENs and one OTHERWISE. If the user enters a value for Personal REXX User's Guide, Version 3.0 5. Learning REXX page 5.19 ======================================================================== the variable state that is equal to one of the six New England states, then the variable code is set to the appropriate area code. If state doesn't equal one of the known six, then OTHERWISE sets code equal to a null string. At the end of the program, an IF instruction tests whether code is equal to NULL or not to see if the program recognized the state the user entered. If you run LEARN13.REX and reply with ct, the program writes to the screen The area code for CT is 203 5.11. DO Loops After learning how to use REXX for testing conditions and choosing among alternatives, you'll quickly find a need for looping: executing a group of clauses repeatedly until a certain condition or count is reached. The good news is that unlike many other languages, in REXX all loops are implemented with one instruction: DO. The bad news is that DO is the most complicated REXX instruction, and remembering all the variations can be hard at first. You've already seen one simple variant of DO for grouping clauses. We'll divide the remaining variants into three cases -- simple, controlled, and conditional loops -- and explore each separately. 5.11.1. Simple Loops One syntax for the simple DO loop is DO expression instructionlist END In this form of the DO loop, the value of expression is evaluated and the instruction-list is executed that many times. The expression must be a whole number greater than or equal to zero. The other possible syntax for the simple DO loop is DO FOREVER instructionlist END In this form, the instruction list is executed until one of the special REXX instructions -- LEAVE, EXIT, or RETURN -- is executed. Personal REXX User's Guide, Version 3.0 5. Learning REXX page 5.20 ======================================================================== /* LEARN14.REX -- simple DO loop */ DO 4 SAY "hello" END /* END LEARN14.REX */ When this program executes, the instruction within the DO/END is execut- ed four times. The result is: hello hello hello hello 5.11.2. Controlled Loops In addition to simple DO loops, REXX provides controlled DO loops that take advantage of a control variable. The DO loop in LEARN15.REX uses the variable ctrl in order to display to the screen the first ten inte- gers in ascending order: /* LEARN15.REX -- count to 10 with controlled loop */ DO ctrl = 1 TO 10 SAY ctrl END /* END LEARN15.REX */ The syntax for the controlled DO loop is: DO name = initial [TO terminal] [BY increment] instructionlist END In this form of the DO loop, a control variable name gets an initial value initial and is then stepped through a series of values by an amount increment until it reaches an ending value terminal. The step amount can be either positive or negative, so that the loop can step up or step down. The default step is +1. The expressions initial, termi- nal, and increment must all be numbers. Personal REXX User's Guide, Version 3.0 5. Learning REXX page 5.21 ======================================================================== /* LEARN16.REX -- use nested controlled loops to write */ /* a multiplication table to the screen */ limit = 3 DO x = 1 TO limit /* find multiples up to limit */ DO y = 1 TO limit SAY x "x" y "=" x * y END y /* control variable */ END x /* control variable */ /* END LEARN16.REX */ When run, this program displays 1 x 1 = 1 1 x 2 = 2 1 x 3 = 3 2 x 1 = 2 2 x 2 = 4 2 x 3 = 6 3 x 1 = 3 3 x 2 = 6 3 x 3 = 9 ________________________________________________________________________ Loop Style: REXX allows you to change the value of the control variable while within a controlled DO loop, possibly affecting when the loop will terminate. However, in general this is a bad programming practice, because it makes the behavior of the loop difficult to understand. REXX allows you to include a loop's control variable in the loop's END clause, thereby obtaining automatic checking of loop nesting. You can see this in the two nested loops of LEARN16.REX. If the variable you give doesn't match the one at the head of the corresponding DO loop, then REXX reports an error. ________________________________________________________________________ 5.11.3. Conditional Loops The syntax for the conditional DO loop is DO WHILE expression instructionlist END or DO UNTIL expression instructionlist END Personal REXX User's Guide, Version 3.0 5. Learning REXX page 5.22 ======================================================================== REXX evaluates the expression each time around the loop. With WHILE, the loop continues to execute the instruction list as long as the expression evaluates to true (1). With UNTIL, the loop continues to execute the instruction list until the expression evaluates to true (1). In a WHILE loop the expression is evaluated before the instruction list is executed, whereas in an UNTIL loop the expression is evaluated after. Thus if a WHILE loop expression is false when initially tested, the instruction list won't be executed at all. But an UNTIL loop instruc- tion list will always be executed at least once. ________________________________________________________________________ Complex Loop Control: Technically, the WHILE and UNTIL conditional phrases can be added to the simple and controlled loop types that we've already seen. But in actual practice you'll rarely need to mix so many controlling conditions. ________________________________________________________________________ Here is an example of a DO WHILE loop: /* LEARN17.REX -- echo keyboard input to screen */ PARSE PULL text /* get first line of input */ DO WHILE text \== "" /* while input is not null */ SAY text /* echo input to screen */ PARSE PULL text /* get next line of input */ END /* END LEARN17.REX */ LEARN17.REX continues to read in lines of text from the keyboard and echo each line to the screen while the user enters non-null strings. (A null string is entered when the user hits Enter without entering any text on the line). Since the WHILE condition is tested before the instruction list is executed, this program could end immediately if the user's first keystroke is Enter. 5.11.4. Exiting Loops On occasion you need to change the flow of control of a program inside a DO loop. In some other languages this situation is handled with a GOTO instruction, but REXX gives you a more structured method: the ITERATE and LEAVE instructions. Even in situations where you don't technically need ITERATE or LEAVE to accomplish your objective, they may help you avoid a confusing nest of IF instructions. The syntax for ITERATE is: ITERATE [name] Personal REXX User's Guide, Version 3.0 5. Learning REXX page 5.23 ======================================================================== ITERATE causes REXX to stop executing the instruction list within a DO loop, then pass control back up to the DO exactly as if the END clause had been reached. The DO is executed normally, and if its conditions are met, the instruction list is executed again. The syntax for LEAVE is: LEAVE [name] LEAVE causes REXX to immediately exit a DO loop. Control resumes at the instruction immediately following the END corresponding to the exited loop. When giving the ITERATE or LEAVE instructions you can specify the name of the control variable for a currently active loop. If a name is given with ITERATE then REXX steps the identified loop, and any loops inside that one are terminated. If a name is given with LEAVE, then REXX ter- minates the identified loop (and any loops inside it), passing control to the clause following the END for the loop. If no name is given, then ITERATE and LEAVE apply to the innermost active loop. Let's look at a simple REXX program that illustrates ITERATE and LEAVE. LEARN18.REX uses LEAVE to enforce a maximum iteration count, regardless of what the user enters, and it uses ITERATE to skip over odd integers: /* LEARN18.REX -- write even integers up to maximum */ MAXIMUM=10 SAY "Enter count:" PULL count DO i=1 TO count IF i > MAXIMUM THEN LEAVE IF \DataType(i/2,"Whole") THEN /* test for odd integer */ ITERATE SAY i /* display if even */ END /* END LEARN18.REX */ If you run this program and enter 15 for the count, it displays 2 4 6 8 10 Personal REXX User's Guide, Version 3.0 5. Learning REXX page 5.24 ======================================================================== In the second IF test we see the NOT (\) logical operator applied to the result from the REXX built-in function DATATYPE(). We'll discuss the REXX built-in functions in detail in a later section. For now, it's enough to know that DATATYPE() evaluates i/2, telling us if it is a whole number. The program ITERATEs the DO loop if i/2 is not whole (which would mean that i is odd). 5.12. More about PARSE In an earlier section we glanced at REXX's powerful PARSE instruction for assigning data to variables. We saw the PARSE PULL variant for tak- ing input from the keyboard, and we saw how to use simple templates to break up that input by blank-delimited words or literal strings. In this section we will see how to make PARSE take its input from sourc- es other than the keyboard, and how to have it parse what it gets with more advanced templates. In general, when you use the PARSE instruction you must specify a source for the data to PARSE -- such as the keyboard, a variable, or an expres- sion -- and a destination for the parsed data -- a template that con- trols exactly how data is split up among variables. A PARSE template is made up of alternating pattern specifications and a set of variable names. Blanks, literals, and column numbers can all be used to establish patterns. In this section we'll look at the different ways to establish patterns, and how to parse variables and the values of expressions. 5.12.1. Parsing a Variable PARSE can get its input data from a variable. Here is an example of using PARSE to split the contents of a variable into two other vari- ables: /* LEARN19.REX -- break up a variable into words */ name = 'Ann Smith' PARSE VAR name firstname lastname SAY firstname lastname /* END LEARN19.REX */ When run, LEARN19.REX displays Ann Smith In LEARN19.REX, PARSE uses a template consisting of two variables, firstname and lastname, to break up another variable by blank-delimited words. The first word of name goes into firstname, and the remaining Personal REXX User's Guide, Version 3.0 5. Learning REXX page 5.25 ======================================================================== words (in this case only one), go into lastname. The program then SAYs the two variables to the screen so that their contents appear to be together again. The syntax for using PARSE on a variable is PARSE [UPPER] VAR name template 5.12.2. Parsing with Blank-delimited Words Let's take a closer look at how PARSE matches blank-delimited words. The program below demonstrates two useful PARSE abilities: the special treatment of the last variable in a template, and the use of the period (.) as a dummy placeholder. /* LEARN20.REX -- break up file statistics */ taxinfo="NY 000-11-2222 Smith" PARSE VAR taxinfo state id /* id gets '000-11-2222 Smith' */ SAY id PARSE VAR id ss_num . /* period holds place */ SAY ss_num /* END LEARN20.REX */ Running this program displays 000-11-2222 Smith 000-11-2222 The first PARSE instruction in LEARN20.REX demonstrates how PARSE han- dles the last variable in a template. PARSE assigns whatever remains of the input string (possibly several words) to the last variable. In this case, id gets both the social security number and the name from taxinfo. This is because taxinfo consists of three words but there are only two variables in the PARSE template. The second PARSE instruction shows the use of the period (.) in a temp- late. A period can appear wherever a variable can in a template, but any value that would have been assigned to a variable in that position is ignored. In LEARN20.REX the period after ss num causes Smith, the remainder of the input string after the social security number, to be collected and discarded. The net result is that ss num gets assigned just the first word of the value of id. ________________________________________________________________________ Personal REXX User's Guide, Version 3.0 5. Learning REXX page 5.26 ======================================================================== Running Out of String Data: What happens if there are fewer words in the input data than variables in the template? Because REXX always assigns every variable in a template a new value, the unused variables will be set to a null string (""). ________________________________________________________________________ 5.12.3. Parsing with Literal Patterns Besides matching blank-delimited words, PARSE can also use templates that contain literal patterns, where variable names are separated by strings enclosed in quotes. Input is placed into a variable named in the template until the input matches the literal pattern. Any later input is read into the next variable, and so on. /* LEARN21.REX -- break up variable using literal patterns */ SAY "Enter your name and address in the form" SAY " Name, Address :Zip_code" SAY "" PARSE PULL name ',' address ':' zip SAY address /* END LEARN21.REX */ The variable name is assigned all the input up to (but not including) the first comma, address is assigned all input between the first comma and a following colon, and zip is assigned all input after that colon. For example, if you enter rexx learn21 and then type in Ann Smith, 123 Main St. Small Town, CT :06000 for PARSE PULL to use as its input data, LEARN21 will display 123 Main St. Small Town, CT ________________________________________________________________________ Running Out of Pattern Matches: What happens when a pattern you give in a template matches nothing in the input string? In that case REXX con- siders the pattern to match the end of the string. Thus the variable preceding the pattern is assigned the remainder of the string, and any variables following the pattern are set to null. For example, if you run LEARN21 and enter Ann Smith, 123 Main St. Small Town, CT 06000 Personal REXX User's Guide, Version 3.0 5. Learning REXX page 5.27 ======================================================================== with no colon preceding the zip code, the variable address is set to 123 Main St. Small Town, CT 06000 and zip is set to a null string. ________________________________________________________________________ 5.12.4. Parsing with Column Numbers In addition to breaking up an input string based on blank-delimited words or literal patterns, PARSE can break up a string based on numeric column positions, as in the following program: /* LEARN22.REX -- break up variable using column numbers */ info="Smith,A. 111-22-3333 203-555-1222" PARSE VAR info name 16 ssn 31 phone SAY phone /* END LEARN22.REX */ When run, LEARN22.REX displays 203-555-1222 The variable info is broken into the variables name, ssn, and phone as follows: name gets the characters up to position 16, ssn gets the char- acters from position 16 up to column 31, and phone gets the characters from position 31 on. Any time you use unsigned numbers in a template, REXX interprets them as absolute column positions in the input. However, you can also use signed numbers to indicate positions relative to the last pattern match. You can even use positional patterns to make REXX "back up" in the input string. 5.12.5. Parsing an Expression In addition to parsing input from the keyboard or a variable, PARSE can evaluate an expression and parse the resulting string. The syntax for this variant of PARSE is: PARSE [UPPER] VALUE expression WITH template A frequent source of expressions to parse are the REXX built-in func- tions, which we'll discuss in the next section. For now, here's a simple PARSE VALUE example that parses the result returned by the REXX function TIME(), which returns the current time in the format hh:mm:ss. The PARSE VALUE instruction below assigns hh to the variable hours, mm to minutes, and ss to seconds. Breaking up the value of the TIME() func- Personal REXX User's Guide, Version 3.0 5. Learning REXX page 5.28 ======================================================================== tion in this way allows the SAY instruction to display the time in a simpler format. PARSE VALUE TIME() WITH hours ':' minutes ':' seconds SAY hours "Hours" minutes "Minutes" If your computer's clock thinks the time is 11:18am, the preceding two clauses would display 11 Hours 18 Minutes ________________________________________________________________________ Still More About Parsing: PARSE is probably REXX's most powerful instruction. While we've touched on most of the PARSE variants here, we haven't begun to explore them in depth. For more PARSE documentation and examples see The REXX Language, Section 10, "Parsing for ARG, PARSE, and PULL". ________________________________________________________________________ 5.13. Using Built-in Functions REXX is distinguished by its wealth of powerful built-in functions. The newcomer's best policy is to assume that just about any kind of data manipulation is already available within REXX. Before writing a low- level algorithm in REXX, refer to The REXX Language, Part 2, Section 9, "Built-in Functions" to see if REXX has already done the work for you. You can think of the built-in functions as falling into three groups: the string, conversion, and information functions. We'll discuss each of these groups separately. In a later section, you'll see how to define your own functions that work just like the REXX built-in func- tions. First, let's look at how to invoke functions. 5.13.1. Invoking Functions You can think of the REXX built-in functions as "black boxes" that per- form a specialized function quietly and efficiently as long as you sup- ply the arguments for them to work on, and the place to store or use the result they return. All REXX functions are named according to the rules for symbols, and are executed simply by issuing their name followed by a string of arguments enclosed in parentheses. Even if there are no arguments you must include the parentheses after the function name, and the parentheses must follow the function name directly -- with no intervening blank. (There is another way to invoke a REXX routine, using the CALL instruc- tion, when you don't need the returned result. We'll discuss this instruction in the next section.) Personal REXX User's Guide, Version 3.0 5. Learning REXX page 5.29 ======================================================================== You might invoke the built-in REXX function DATE() as follows month=DATE("M") or SAY DATE("N") In the first example above DATE() is passed the argument "M" (for Month) telling the function to return the full name of the current month; and in the second example DATE() is passed "N" (for Normal) telling the function to return the date in the default format. In the first example the result received from DATE() is assigned to a REXX variable, month. In the second example the result is displayed on the screen with SAY. Note that your programs must always be written to do something with the value returned by a function. If nothing is done with a returned value, REXX will pass the returned expression to the environment as a command, which is usually not what you intend. 5.13.2. String Functions If you have worked with string functions in other languages, you may be surprised by the versatility of those built into REXX. REXX has many more string functions than most other languages, and the individual functions have extra arguments (with reasonable defaults) that signifi- cantly increase their power. As a small example, consider the REXX function STRIP(). STRIP can remove leading blanks from a string, or trailing blanks, or both. And it can also be told what character to remove; blanks are merely the default. Some of REXX's helpful string functions are: CENTER() center a string within a length COPIES() return concatenated copies of a string DELSTR() delete a substring from a string LEFT() return characters from left side of string LENGTH() return the length of string POS() find one string in another RIGHT() return characters from right side of string STRIP() remove leading/trailing characters from string Personal REXX User's Guide, Version 3.0 5. Learning REXX page 5.30 ======================================================================== SUBSTR() return substring from a string WORD() return nth blank-delimited word in string These are just the fundamental string functions. There are many more for performing complex tasks such as comparison, translation, and word manipulation. Here is a program that uses some of the string functions to display a banner: /* LEARN23.REX -- prompt user for title, display banner */ WIDTH=40 BORDER=4 BCHAR='*' SPACE=' ' SAY "Enter title: " PARSE PULL title IF LENGTH(title) > WIDTH-BORDER THEN SAY "Sorry, your title is too long" ELSE DO SAY COPIES(BCHAR, WIDTH) SAY BCHAR COPIES(SPACE, WIDTH-BORDER) BCHAR SAY BCHAR CENTER(title, WIDTH-BORDER) BCHAR SAY BCHAR COPIES(SPACE, WIDTH-BORDER) BCHAR SAY COPIES(BCHAR, WIDTH) END /* END LEARN23.REX */ If you run LEARN23.REX and enter a title such as REXX, you will get out- put like this: **************************************** * * * REXX * * * **************************************** Notice how the REXX functions COPIES() and CENTER(), along with the blank concatenation operator, make formatting text displays extremely easy. The string values returned by the functions are automatically concatenated with the BCHAR variable, and displayed by the SAY instruc- tion. Personal REXX User's Guide, Version 3.0 5. Learning REXX page 5.31 ======================================================================== 5.13.3. Conversion Functions The built-in REXX conversion functions let you easily change the format, appearance, and number base of REXX data. Examples of helpful conver- sion functions include C2D() convert an ASCII character to its value in decimal C2X() convert an ASCII character to its value in hexadecimal D2C() convert a value in decimal to an ASCII character D2X() convert a value in decimal to a hexadecimal value FORMAT() round and format a number TRUNC() return the integer part of a number X2C() convert a value in hexadecimal to an ASCII character X2D() convert a value in hexadecimal to a decimal value Here is a program that uses some of the conversion functions: /* LEARN24.REX -- general-purpose number base conversions */ SAY "Enter value to convert:" PULL n /* convert from ASCII if only one character was entered */ IF LENGTH(n) = 1 THEN DO SAY '['n'] ASCII -> Decimal = ' C2d(n) SAY '['n'] ASCII -> Hex = ' C2x(n) END /* convert from decimal if valid number was entered */ IF DATATYPE(n,'N') THEN DO SAY '['n'] Decimal -> ASCII = ' D2C(n) SAY '['n'] Decimal -> Hex = ' D2x(n) END /* convert from hex if valid hex number was entered */ IF DATATYPE(n,'X') THEN DO SAY '['n'] Hex -> ASCII = ' X2C(n) SAY '['n'] Hex -> Decimal = ' X2d(n) END /* END LEARN24.REX */ If you run LEARN24.REX and enter the number 35 to convert, you will get these results: Personal REXX User's Guide, Version 3.0 5. Learning REXX page 5.32 ======================================================================== [35] Decimal -> ASCII = # [35] Decimal -> Hex = 23 [35] Hex -> ASCII = 5 [35] Hex -> Decimal = 53 5.13.4. Information Functions The built-in REXX information functions return values that tell you more about REXX's internal status, or the environment REXX is running in. Examples of helpful information functions include DATATYPE() detect/test REXX data types such as numeric, alphanumeric DATE() return local date in many different formats DIGITS() return the current significant digits used in arithmetic operations RANDOM() return a pseudo-random number TIME() return local time in many different formats Here is a program that uses the REXX built-in functions DATE() and TIME() to display the day and time in a readable format: /* LEARN25.REX -- show readable date and time */ PARSE VALUE DATE() WITH day month year SAY "It's" TIME("C") "on" DATE("W") DATE("M") day"," year"." /* END LEARN25.REX */ LEARN25.REX displays something similar to It's 12:50pm on Thursday August 18, 1988. 5.14. User-defined Subroutines and Functions If you use REXX frequently, or use it for large projects, you will soon want to define your own subroutines and functions. Subroutines and functions make understanding your programs easier by dividing them up into smaller functional units. And they make writing your programs easier by forming general-purpose algorithms that can be re-used in the same program, and in future programs. Before exploring the finer points of writing REXX subroutines and func- tions, let's look at a simple example: Personal REXX User's Guide, Version 3.0 5. Learning REXX page 5.33 ======================================================================== /* LEARN26.REX -- call subroutine and pass it an argument */ CALL FindArea 5 r = 50 CALL FindArea r EXIT FindArea: /* compute area of a circle from its radius */ ARG radius area = 3.141592 * (radius)**2 SAY "A circle with a radius of" radius "has an area of" area RETURN /* END LEARN26.REX */ When run, LEARN26.REX displays A circle with a radius of 5 has an area of 78.539800 A circle with a radius of 50 has an area of 7853.98000 5.14.1. Invoking Subroutines and Functions LEARN26.REX contains an example of a user-defined REXX subroutine FINDAREA. Unlike a function, a subroutine does not directly return a value to the user. You execute a REXX subroutine using the CALL instruction. The syntax for CALL is: CALL name [expression, expression, ... ] where name is the name of the subroutine, and the expressions are optional data arguments for the subroutine to use. Note that any argu- ments of a routine called via the CALL instruction are not enclosed in parentheses. ________________________________________________________________________ Searching For Routines: When you CALL a subroutine or reference a func- tion, REXX searches first for a label defining the named routine in your program. If REXX doesn't find an internal label, then it searches next for a built-in function, and finally for an external routine. For the rules governing how Personal REXX searches for external rou- tines, see Section "External Functions", "Invoking External REXX Func- tions". ________________________________________________________________________ Personal REXX User's Guide, Version 3.0 5. Learning REXX page 5.34 ======================================================================== 5.14.2. Defining Subroutines and Functions You designate the start of a REXX subroutine or function in your program with a label -- a REXX symbol followed by a colon (:). The body of a subroutine or function consists of normal REXX clauses. You designate the end of a subroutine or function with the RETURN instruction. The syntax for RETURN is: RETURN [expression] where expression is required for functions (which always return a value to their caller), but optional for subroutines. When RETURNing from a subroutine invoked with CALL, the special REXX variable RESULT is set to the value of expression.¶ The caller can (but need not) use the value stored in RESULT. When RETURNing from a function, the value of expression is used in the expression from which the function was invoked. 5.14.3. Subroutines Versus Functions Let's look at another version of the last LEARN program that demon- strates the differences between REXX subroutines and functions: /* LEARN27.REX -- have subroutine invoke function */ CALL FindArea 5 r = 50 CALL FindArea r EXIT FindArea: /* subroutine to display area of circle */ ARG radius area = CalcArea(radius) SAY "A circle with a radius of" radius "has an area of" area RETURN CalcArea: /* function to compute area of circle */ ARG radius RETURN 3.141592 * (radius)**2 /* END LEARN27.REX */ ========================= ¶ If no expression was specified, the value of RESULT does not change. Personal REXX User's Guide, Version 3.0 5. Learning REXX page 5.35 ======================================================================== This version behaves exactly as the first one did, but it moves the chore of computing the area of the circle into a separate REXX function. As you can see, there is no difference in the way you define a REXX sub- routine or function. The only difference is in how you invoke the sub- routine or function, and how you handle the result returned. A given REXX routine can be invoked as a subroutine or as a function. For example, CALL name expression1, expression2 or result = name(expression1, expression2) can both be used to invoke the routine NAME. Unfortunately, these two different syntaxes often cause confusion for newcomers to REXX. The thing to remember is that when using CALL to invoke a routine, you don't enclose the arguments of the routine in parentheses. When you invoke a routine as a function, the arguments must be enclosed in parentheses. 5.14.4. EXIT Instruction Notice that both LEARN26 and LEARN27 have a REXX EXIT instruction after the main body of the program and before the label that marks the begin- ning of the first user-defined routine. EXIT causes REXX to uncondi- tionally terminate a program. The syntax for EXIT is: EXIT [expression] where expression is used to set a return code that the program's caller can examine. If the LEARN26 and LEARN27 did not contain their EXIT instructions, then execution would pass from the end of the main program into the user- defined routines. The results would be unexpected, and probably unplea- sant! 5.14.5. Arguments LEARN26 and LEARN27 demonstrate how to pass an argument to a routine and how to retrieve it from within the routine. You pass arguments simply by placing them after the routine's name, with each argument separated from the next by commas. The easiest way to retrieve arguments is to use REXX's PARSE ARG instruction. The syntax for PARSE ARG is: PARSE [UPPER] ARG template Personal REXX User's Guide, Version 3.0 5. Learning REXX page 5.36 ======================================================================== This PARSE instruction works just like the other PARSE variants you've seen except that the data assigned to the template comes from arguments passed to the routine. LEARN26 and LEARN27 use the REXX instruction ARG, which is a shorter form of PARSE UPPER ARG. The syntax for ARG is just: ARG template The routines in the LEARN programs above receive only one argument and thus use simple templates of only one variable. If more than one argu- ment is being passed to a routine, then each argument can be accessed in turn by placing commas in the template. ________________________________________________________________________ ARG() Built-in Function: REXX also offers the ARG() built-in function in addition to the PARSE ARG instruction. ARG() can tell you how many arguments were passed, test for the existence of a specific argument, and return the value of any argument. ________________________________________________________________________ /* LEARN28.REX -- demonstrate REXX argument passing */ CALL Sum 1, 2 /* call as subroutine */ SAY "RESULT="RESULT /* special variable */ our_result = Sum(3, 4) /* call as function */ SAY "our_result="our_result EXIT Sum: ARG first, second SAY "Sum:" SAY " Arguments passed=" Arg() SAY " first =" first"," Arg(1) SAY " second=" second"," Arg(2) RETURN first + second /* return sum of arguments */ /* END LEARN28.REX */ Running LEARN28.REX yields these results: Personal REXX User's Guide, Version 3.0 5. Learning REXX page 5.37 ======================================================================== Sum: Arguments passed= 2 first = 1, 1 second= 2, 2 RESULT=3 Sum: Arguments passed= 2 first = 3, 3 second= 4, 4 our_result=7 5.14.6. Variable Scope When a REXX subroutine or function receives arguments, are they the "real" thing from the main program, or just copies? When a routine assigns values to arguments or variables, what happens to variables of the same name in the main program? By default, a main routine and all subroutines and functions in the same source file share a single pool of variables. If an argument or vari- able has the same name as a variable in the calling routine, then it is that variable. However, by placing the PROCEDURE instruction after the label that defines a subroutine or function, you set up a local variables environ- ment within a routine that is completely insulated from the rest of the program. The EXPOSE option on PROCEDURE can then be used to selectively make outside variables available to a routine. The syntax for PROCEDURE is: PROCEDURE [EXPOSE variablelist] If used, PROCEDURE must be the first instruction after the routine's label. Multiple variables in the EXPOSE variablelist are not separated by commas. The original variable environment of the calling routine is restored upon RETURNing from a called routine that used the PROCEDURE instruc- tion. Any changes made within the called routine to EXPOSEd variables persist, but other variables used in the called routine become unas- signed. Here's an example of how REXX's variable scoping works: Personal REXX User's Guide, Version 3.0 5. Learning REXX page 5.38 ======================================================================== /* LEARN29.REX -- demonstrate REXX variable scoping */ a=1 SAY "Main (j unassigned):" CALL PrintVars CALL Proc1 a SAY "Main (j created, a changed):" CALL PrintVars CALL Proc2 SAY "Main (a changed, j restored):" CALL PrintVars EXIT Proc1: /* everything is accessible */ ARG j SAY "Proc1 (j created equal to a):" CALL PrintVars a = 3 RETURN Proc2: PROCEDURE EXPOSE a /* a from main is accessible, j is local copy */ SAY "Proc2 (a changed, j changed locally):" a = 7; j = 10 SAY "a="a "j="j RETURN PrintVars: SAY "a="a "j="j RETURN /* END LEARN29.REX */ The results from running LEARN29.REX look like this: Main (j unassigned): a=1 j=J Proc1 (j created equal to a): a=1 j=1 Main (j created, a changed): a=3 j=1 Proc2 (a changed, j changed locally): a=7 j=10 Main (a changed, j restored): a=7 j=1 Personal REXX User's Guide, Version 3.0 5. Learning REXX page 5.39 ======================================================================== 5.15. Commands to External Environments REXX was designed in part as a macro or command language. For this rea- son, REXX programs have the ability to easily pass commands to external environments for execution. In theory, any program that has a command language interface could be programmed by its developer to interact with REXX. PC command environments that work with Personal REXX include the DOS command processor, Quercus Systems' REXXTERM communication package, and the KEDIT text editor from Mansfield Software Group. In this section we will see how to pass commands from REXX to DOS, the default active envi- ronment when Personal REXX is executed. Issuing Commands The way you tell REXX to send a command to another environment is very simple. Here is a REXX program that consists entirely of commands to DOS: /* LEARN30.REX -- display DOS information using DOS commands */ 'ver' /* DOS command to display DOS version */ 'path' /* DOS command to display DOS path */ 'vol' /* DOS command to display current volume name */ /* END LEARN30.REX */ Any time REXX sees a clause that consists only of an expression, that expression is evaluated and the resulting string is sent to the active environment as a command. Thus, "commands" are simply character strings that have no intrinsic meaning to REXX. (Notice that in LEARN30 each DOS command is enclosed in quotes. Although this is not strictly neces- sary in this example program, it is a good idea always to enclose in quotes command names that you want to be taken literally.) When an environment returns control to REXX, it sets an integer return code that REXX then places in the special variable RC. Your program can test the RC variable and take some action based on its value. For pro- grams running under DOS, a non-zero return code indicates an error. (However, many DOS commands always have a return code of zero, whether they succeed or not.) ________________________________________________________________________ How DOS Processes Commands: When Personal REXX passes commands to the DOS environment, there are several ways the command could be handled. DOS commands can be internal to COMMAND.COM, or external files in any of the directories in the current DOS PATH. For more detail on how DOS Personal REXX User's Guide, Version 3.0 5. Learning REXX page 5.40 ======================================================================== will handle commands you issue, see Section "DOS Commands", "Executing DOS Commands", in this User's Guide. ________________________________________________________________________ Let's look at a more involved example of using REXX to issue commands to the DOS environment. The LEARN31.REX program reads an ASCII file that contains a list of file names and applies a DOS command (such as DEL or COPY) to each file named. This program would be handy if you wanted to perform a DOS oper- ation on a set of files that couldn't easily be matched with the DOS wildcard characters. (LEARN31.REX uses the REXX file I/O functions, which will be covered thoroughly in a following section.) /* LEARN31.REX -- execute DOS command against list of files */ filelist = 'files.lst' ARG command /* get user's command */ DO WHILE Lines(filelist) > 0 /* loop through file list */ current_fileid = LineIn(filelist) /* get a filename */ command current_fileid /* execute command against it */ END CALL LineOut filelist /* close file list */ /* END LEARN31.REX */ LEARN31.REX contains the first example we've seen of using the ARG instruction to access arguments to a program. Arguments to a program are contained in a single string that the user has typed on the command line, and they behave just like arguments to a routine. Note that REXX treats arguments to a program as one string, so you do not use commas in the PARSE ARG template to access different words in the arguments to a program. Suppose that you run LEARN31.REX with TYPE as the argument: rexx learn31 type and that you have a file called FILES.LST in your current directory that contains the lines: a:chapter1.doc a:chapter2.doc a:chapter3.doc a:chapter4.doc In this case the variable command is assigned the value TYPE. In the DO loop, the assignment statement Personal REXX User's Guide, Version 3.0 5. Learning REXX page 5.41 ======================================================================== current_fileid = linein('files.lst') uses the built-in function LINEIN to read the next line from the file FILES.LST and assign it to the variable current fileid. Then a DOS com- mand is constructed using the variables command and current fileid. The first time through the loop in our example the command that is con- structed is TYPE a:chapter1.doc The body of the DO WHILE loop then keeps executing as long as there are lines remaining to be read in FILES.LST. When the loop is left, the CALL instruction calls the built-in function LINEOUT to close the file FILES.LST. (All files that are opened by a REXX program should be closed before exiting the REXX program.) ________________________________________________________________________ What is a Command, What is REXX?: Newcomers to REXX, especially those using REXX as a command language, may be puzzled about what is processed by REXX, and what is passed to the environment for processing. Keep in mind that any clause that consists only of an expression is con- sidered a command to the environment. This means that REXX will send to the active environment any clause that it doesn't recognize as an instruction or assignment. ________________________________________________________________________ 5.16. Advanced Features of REXX In this section we'll cover a selection of more-advanced REXX features that you may find helpful: numeric operations, debugging, and the INTERPRET instruction. 5.16.1. Numerics and Math REXX is unique in that its mathematical operations are defined so that different implementations of the language on different hardware archi- tectures will yield identical results. The REXX mathematical operations are defined such that no errors are introduced into calculations except those resulting from the final rounding to the precision you have requested. Thus, unlike other lan- guages that may accumulate "round-off" errors that insidiously corrupt your results, REXX puts the accuracy of its mathematical operations entirely in your control. The price paid for this accuracy is slower calculation speed, though you aren't likely to notice much overhead in the vast majority of applications. Personal REXX User's Guide, Version 3.0 5. Learning REXX page 5.42 ======================================================================== 5.16.2. NUMERIC Instruction The REXX instruction NUMERIC controls the way in which REXX carries out arithmetic operations. The most commonly used form of the NUMERIC instruction is: NUMERIC DIGITS expression NUMERIC DIGITS controls the precision to which REXX computes arithmetic expressions. Numeric results will be rounded to the number of digits you specify in expression. The default is nine digits. Lower values are likely to give unreliable results due to round-off error, whereas higher values will require more processing time. /* LEARN32.REX -- demonstrate REXX numeric operations */ NUMERIC DIGITS 30 SAY 5/3 /* writes 1.66666666666666666666666666667 */ NUMERIC DIGITS 10 SAY 5/3 /* writes 1.666666667 */ /* END LEARN32.REX */ ________________________________________________________________________ FORMAT() Built-in Function: If the results provided by REXX's current NUMERIC settings don't appear the way you want, then you can use the built-in FORMAT() function to round and display them in a different for- mat. You can also use FORMAT() to convert results to or from exponen- tial form. Comparing REXX Numbers You can use any of REXX's comparison operators for comparing numeric values. However, if you use the strict comparison operators (the ones with doubled characters), then you are really com- paring the string representations of the numbers. This means that lead- ing and trailing blanks and zeros will be significant. Usually you will want to use the normal comparison operators to compare REXX numbers. ________________________________________________________________________ 5.16.3. Debugging with the TRACE Instruction One of the unique features that makes REXX particularly easy to use is its built-in support for that bleak activity that can consume much of a programmer's time: debugging. REXX offers this support via the TRACE instruction. TRACE gives you the same information you may have obtained in the past by embedding print statements in your programs and making other modifi- cations to them. But TRACE tells you about program execution much more efficiently, and without you having to add debugging statements to your program. Personal REXX User's Guide, Version 3.0 5. Learning REXX page 5.43 ======================================================================== The TRACE instruction sets a tracesetting that controls which clauses REXX will display diagnostic information for during execution. The tracesetting can be set to many different levels of sensitivity: no clauses at all, clauses that generate certain types of errors, or all clauses. (The default tracesetting causes nothing but host commands that result in failure to be traced.) The arguments and output for TRACE are more terse than for the other REXX instructions, because users frequently must work with TRACE manual- ly during interactive debugging sessions. Taking a few minutes now to understand TRACE will quickly be repaid the next time one of your REXX programs doesn't behave as expected. The syntax for TRACE is: TRACE tracesetting The most often used trace settings are N (the default) and R. N causes TRACE to show only failed host commands. R causes TRACE to show each clause of the traced program before execution and the values of any expressions in that clause. You can embed TRACE instructions in your program text, or you can type them in directly to REXX once REXX has begun tracing interactively. The question mark (?) prefix on any alphabetic tracesetting toggles interactive tracing on and off. When REXX is tracing interactively, further TRACE instructions within the program are ignored and execution pauses after most clauses. Once execution has paused you can either enter a blank line to continue execution or type in any clause to be executed by REXX. Clauses you enter will affect your program just as if they were embedded at the point where execution paused. Usually you will just enter SAY instruc- tions to see the values of variables, or TRACE instructions to change the tracesetting. ________________________________________________________________________ Selective Tracing Through Routines: The tracesetting is automatically saved and restored during subroutine calls, which means that you can selectively trace a subroutine without affecting the trace status in the rest of the program. ________________________________________________________________________ All the traced clauses and results are displayed on screen with a three- character prefix. A list of these prefixes and the other tracesettings may be found in the discussion of TRACE in The REXX Language, Part 2, Section 7, "Keyword Instructions". More information on tracing with Personal REXX can be found in Chapter 7, "Tracing and Interactive Debug- ging" of this User's Guide. Personal REXX User's Guide, Version 3.0 5. Learning REXX page 5.44 ======================================================================== Let's look at a quick example of using TRACE to debug a program: /* LEARN33.REX -- use TRACE to find bug */ /* TRACE ?R */ SAY Sum(1, 2) EXIT Sum: ARG i j RETURN i + j /* END LEARN33.REX */ At first glance, LEARN33.REX looks like a reasonable attempt to sum two numbers with a user-defined function SUM(). However, there is a subtle problem that causes REXX to report an error: 11 +++ RETURN i + j 5 +++ SAY Sum(1, 2) Error 41 on line 11 of LEARN33.REX: Bad arithmetic conversion Unfortunately, the two clauses REXX has reported back to us are syntac- tically correct. The problem lies somewhere else, and could be diffi- cult to spot without TRACE. Using a text editor, remove the comment delimiters from /* TRACE ?R */ so that the line now reads TRACE ?R Then try running LEARN33.REX again. What you'll see displayed is: 5 *-* SAY Sum(1, 2) +++ Interactive trace. 'Trace off' to end debug. ? The interactive TRACE shows the initial SAY instruction and the call to the SUM() function. There are no problems here, so press Enter at the question mark to continue execution. What is then displayed is: 9 *-* Sum: ? This is the label for the internal function SUM(). Personal REXX User's Guide, Version 3.0 5. Learning REXX page 5.45 ======================================================================== Now hit Enter again. TRACE shows the ARG instruction within SUM(), and the values it assigns to the variables i and j. Here's a problem! 10 *-* ARG i j >>> "1" >>> "" ? Only the 1 was assigned to i; the 2 disappeared somehow and was not assigned to j. To confirm this, enter a SAY instruction at the question mark to see the value of j: SAY "j="j What's displayed is j= ? indicating that in fact j has a null string as its value. At this point you can temporarily "fix up" the program, if you like, by typing j=2 ? Now hit Enter and the program continues to run clause-by-clause as you hit Enter. To leave the program at any point, type exit at the question mark. If you then look up the ARG instruction in The REXX Language, you'll find that a comma () must be used in a parsing template if you want more than one argument string to be available to a routine. Edit LEARN33.REX again, this time changing the clause ARG i j to read ARG i, j Run the program again. REXX displays 3 on the screen, as it should. Personal REXX User's Guide, Version 3.0 5. Learning REXX page 5.46 ======================================================================== 5.16.4. INTERPRET Instruction The REXX INTERPRET instruction executes clauses that have been built dynamically while a program is running. With INTERPRET it's as if your REXX program had the ability to create its own program, and then execute it. This can be very powerful for handling certain specialized situ- ations. The syntax for INTERPRET is: INTERPRET expression The expression is evaluated, then it is executed exactly as if the eval- uated expression had existed in the program text. Here is a simple application of INTERPRET that gives a user the full power of REXX's expression evaluator in a handy program that acts like a pocket calculator: /* LEARN34.REX -- calculate result from any REXX expression */ ARG calculation INTERPRET "SAY" calculation /* END LEARN34.REX */ You can use LEARN34.REX to calculate the value of a complex expression. For example, suppose you execute LEARN34.REX with Personal REXX by typ- ing rexx learn34 15 + 3.14 * (64.9876/32.89867)**3 The program then displays this result: 39.2039431 Another example of INTERPRET can be found in RXTRY.REX in the \ SAMPLES directory of the Personal REXX distribution disk. You'll probably want to try out RXTRY. After RXTRY starts up, it waits for you to enter a REXX clause and then interprets that clause for you. RXTRY continues to interpret clauses you enter; entering EXIT terminates RXTRY. 5.17. Personal REXX File Input and Output To be most useful to you, this section describes REXX I/O as it is implemented in Personal REXX. I/O operations are necessarily system dependent, so each REXX implementation has to flesh out the I/O frame- work provided by The REXX Language. Personal REXX User's Guide, Version 3.0 5. Learning REXX page 5.47 ======================================================================== The DOS file system forces some minor limitations on the Personal REXX I/O functions. In general, Personal REXX programs can be very portable to other REXX environments. For a complete description of the generic REXX I/O framework, see The REXX Language, Part 2 Section 12, "Input and Output Streams". For more information on the Personal REXX I/O functions see Chapter 6, "Input and Output in Personal REXX" in this User's Guide. 5.17.1. Default I/O Streams REXX assumes a "default character input stream" and a "default character output stream". Usually the default input stream is the user's keyboard and the default output stream is the screen. The fundamental instructions for input and output in REXX -- PULL and SAY -- use the default character streams automatically. PULL takes input from the default character input stream, and SAY sends output to the default character output stream. The Personal REXX instructions SAY and PULL work exactly as described in The REXX Language. The general-purpose REXX file I/O routines discussed below work with any character stream, where you specify the name of a specific stream to use. This might be the name of a disk file, a printer, or the user's keyboard and screen. 5.17.2. I/O Routines REXX allows for character-by-character or line-by-line manipulation of files. The facilities for file input and output in REXX are quite sim- ple, requiring you to know only a handful of built-in routines. To work with character streams other than the default (such as DOS files), you use the REXX built-in LINEIN(), LINEOUT(), LINES(), CHARIN(), CHAROUT(), and CHARS() routines.ý All of these routines take as their first argument the name of the file to be used. If that name is omitted, then the routines use the default character I/O streams. Let's look at a simple example of REXX file I/O that shows off the power and ease-of-use of REXX's I/O routines: ========================= ý If you will be using CMS REXX as well as Personal REXX, please note that as of VM/SP Release 6 CMS REXX does not include the built-in I/O functions discussed here and detailed in The REXX Language. (For com- patibility between CMS REXX and Personal REXX, you can use the less efficient EXECIO command discussed in Chapter 10, "LISTFILE, EXECIO, and GLOBALV".) Personal REXX User's Guide, Version 3.0 5. Learning REXX page 5.48 ======================================================================== /* LEARN35.REX -- write time-stamped note to disk file */ PARSE ARG newline CALL LineOut "notes.doc", Date() Time() newline CALL LineOut "notes.doc" /* close file */ /* END LEARN35.REX */ The first clause of this program receives an argument, the text of a one-line "note", from the user's command line. The second clause uses built-in REXX functions to find the current date and time, then appends them along with the user's note to the bottom of the NOTES.DOC file. The last clause closes the file. For example, you might run LEARN35.REX by entering rexx learn35 Pick up suit at cleaners Line I/O Routines REXX's LINEIN(), LINEOUT(), and LINES() routines are meant for handling files with data stored as lines. For DOS this means standard ASCII files, where lines of text end with the carriage return-linefeed charac- ter sequence. With Personal REXX, the line I/O routines will give unre- liable results if used on files that aren't in standard ASCII format. These are the REXX line I/O routines: LINEIN([file]) Reads one line from file. LINEOUT([file], [string]) Writes string to file, followed by a carriage return-linefeed sequence. If string is not specified, the file is closed. LINES([file]) Tests if end-of-file has been reached, returning 1 if any lines remain to be read from file, or 0 if no lines remain or an end-of- file character has been found. ________________________________________________________________________ Parsing File Input Directly: If you want to PARSE a line of data from a file immediately upon reading it, rather than storing it in an interme- diate variable and then using PARSE VAR, you can use an expression like: PARSE VALUE LineIn(file) WITH template For example, Personal REXX User's Guide, Version 3.0 5. Learning REXX page 5.49 ======================================================================== PARSE VALUE LineIn('notes.doc') WITH notedate notetime notetext ________________________________________________________________________ Opening and Closing Files In Personal REXX you never need to explicitly open a file. The first time you use a file, Personal REXX opens it for you automatically. If you write to an existing file, Personal REXX will normally append what you write to the end of the file. If you want your output to replace the existing file, you need to use the Personal REXX function DOSDEL() to delete the file first. You should always close a Personal REXX file when you are finished with it. You do this by calling the LINEOUT() or CHAROUT() routines, giving only the name of the file as an argument. You can see an example of this in the last line of LEARN35.REX above. Let's look at another file I/O program in Personal REXX: /* LEARN36.REX -- copy one ASCII file to another */ PARSE ARG inputname outputname /* delete old output file so we don't append to it */ CALL DOSDel outputname DO WHILE Lines(inputname) > 0 /* check for end-of-file */ CALL LineOut outputname, LineIn(inputname) /* write line */ END CALL LineOut inputname /* close input file */ CALL LineOut outputname /* close output file */ /* END LEARN36.REX */ This program is invoked with a command line such as learn36 notes.doc notes.old It calls the Personal REXX function DOSDEL() to delete the output file. If the output file existed on disk when the copying began, then the input file would be copied to the end of the file, rather than replacing it. Next, the program enters a DO loop that reads a line from inputname with LINEIN() and writes that line to outputname with LINEOUT(). The loop terminates when LINES(inputname) is equal to 0, meaning there are no more lines in the inputname file. Personal REXX User's Guide, Version 3.0 5. Learning REXX page 5.50 ======================================================================== Finally, the program closes the files it has used by calling LINEOUT() with the file names only as arguments. File Names You need to be consistent when you pass a file name to Personal REXX. If you specify a file differently from one call to the next -- for example with a path prefix one time, and without the path prefix the next time -- Personal REXX may not realize you are referring to the same file. The easiest way to ensure consistency is to assign filenames to a vari- able, and then always use that variable to refer to the file. DOS systems have hardware devices with names that you can treat just like file names. Two of these -- CON for the console or screen, and PRN for the default system printer -- are especially handy. For example, if you enter CON for the output file in LEARN36.REX, the input file will be listed on your screen. If you enter PRN for the output file, the input file will be printed. Let's look at a final application of REXX's line I/O routines to search for character strings within a file: /* LEARN37.REX -- list occurrences of string in file */ PARSE ARG fileid string DO WHILE Lines(fileid) > 0 newline = LineIn(fileid) /* read line */ IF Pos(string,newline) \= 0 THEN DO /* search for string */ SAY newline found = "yes" END END CALL LineOut fileid /* close the file */ IF found \= "yes" THEN SAY "String" string "was not found in" fileid /* END LEARN37.REX */ LEARN37.REX receives an input file name and a search string on the com- mand line. For example, rexx learn37 c:\ autoexec.bat rxintmgr The program loops through the file line by line, using the REXX built-in function POS() to determine if the string is contained within a given line. If so, that line is displayed and a flag called found is set. Personal REXX User's Guide, Version 3.0 5. Learning REXX page 5.51 ======================================================================== When the program is done looping, it closes the file, then checks the flag to see if any strings were found. Character I/O Routines The REXX routines CHARIN(), CHAROUT(), and CHARS() can be used to ran- domly access positions in any DOS file since they treat files as contin- uous streams of characters rather than as lines of ASCII text. Unlike the line I/O routines, the character I/O routines do not treat carriage return, linefeed, or end-of-file characters specially. REXX always remembers the current read and write position in a file. If a start position is not specified in a call to the CHARIN() or CHAROUT() routines, then REXX reads or writes the file at the currently remembered position. These are the REXX character I/O routines: CHARIN([file], [start], [length]) Reads one or more characters from file at position start. If length is not specified, then one character is read. CHAROUT([file], [string], [start]) Writes string to file. If neither string nor start are specified, then the file is closed. If file is omitted from a call to CHAROUT(), then the string is sent to the display. Unlike with the SAY instruction, a carriage return- linefeed pair is not appended to the written string. Thus the cursor remains on the same line, immediately following the string. You will probably use CHAROUT() most often for this ability to write strings on the screen without advancing the cursor to the next line. CHARS([file]) Tests if the end-of-file has been reached, returning 1 if any charac- ters remain to be read from file, or 0 if no characters remain. CHARS() is not sensitive to the ASCII end-of-file character. 5.18. Personal REXX Utility Functions Personal REXX includes a set of built-in utility functions that help you take full advantage of the IBM PC and DOS. Although these functions have the "flavor" of REXX -- being high-level, easy to use, and replete with options -- they are not a part of the standard REXX language. Any programs that rely on these functions will have to be modified to run in another environment. Personal REXX User's Guide, Version 3.0 5. Learning REXX page 5.52 ======================================================================== We won't look at all of the Personal REXX utility functions here. How- ever, we'll discuss the different function groups: Hardware Informa- tion, Hardware Access, Miscellaneous, and DOS, and give example programs that show how to use some of the functions from each group. For complete information on all the Personal REXX utility functions see Chapter 8, "Personal REXX Utility Functions". 5.18.1. Hardware Information Functions The functions in the Personal REXX Hardware Information group return information about the IBM PC hardware. The LEARN38.REX program uses the several Personal REXX hardware informa- tion functions to find out about the host PC. /* LEARN38.REX -- analyze host PC */ SAY "ROM Date :" PCROMDate() SAY "DOS Version:" DOSVersion() SAY "" SAY "RAM:" PCRAM() SAY "EMS:" EMSMem() SAY "" SAY "DRIVE :" DOSDrive() SAY "DIRECTORY:" DOSCD() /* END LEARN38.REX */ The actual results that this program displays are dependent on your par- ticular PC. The results will be something like this: ROM Date : 02/13/87 DOS Version: 3.30 RAM: 640 EMS: 950272 1048576 DRIVE : C DIRECTORY: \PROGDIR 5.18.2. Hardware Access Functions The SAY and PULL instructions allow your REXX programs to write to the screen and read from the keyboard, but these instructions do not let you control such things as the cursor position and color of displayed text. If you want to write programs that take more direct advantage of the PC's video and keyboard hardware, you will rely on the Personal REXX Hardware Access functions. Personal REXX User's Guide, Version 3.0 5. Learning REXX page 5.53 ======================================================================== The functions in the Hardware Access group control the cursor, read key- strokes from the PC keyboard, access memory and I/O ports directly, and write character strings and video attributes to the screen. Here is a program that uses the Hardware Access functions to initialize the screen and then wait for the user: /* LEARN39.REX -- draw border, wait for user to hit key */ CALL ScrClear /* clear the screen */ CALL Cursor 3,5 /* cursor in row 3 column 5 */ CALL Frame 1,1,25,80 /* draw the frame */ CALL InKey /* wait for user to hit key */ CALL ScrClear /* clear the screen */ EXIT Frame: PROCEDURE /* draw border with IBM double-line extended characters */ ARG urow, ucol, lrow, lcol /* upper left & lower right */ /* coordinates of frame */ horiz = D2C(205) /* ASCII 205: horizontal border */ vert = D2C(186) /* ASCII 186: vertical border */ tleft = D2C(201) /* ASCII 201: top left corner */ tright = D2C(187) /* ASCII 187: top right corner */ bleft = D2C(200) /* ASCII 200: bottom left corner */ bright = D2C(188) /* ASCII 188: bottom right corner */ width = lcol - ucol - 1 /* width of horizontal border */ hcol = ucol + 1 /* start of horizontal border */ /* draw top of frame */ CALL ScrWrite urow, ucol, tleft CALL ScrWrite urow, hcol,, width, horiz CALL ScrWrite urow, lcol, tright /* draw sides of frame */ DO row = urow+1 TO lrow-1 CALL ScrWrite row, ucol, vert CALL ScrWrite row, lcol, vert END /* draw bottom of frame */ CALL ScrWrite lrow, ucol, bleft CALL ScrWrite lrow, hcol,, width, horiz CALL ScrWrite lrow, lcol, bright RETURN /* END LEARN39.REX */ Personal REXX User's Guide, Version 3.0 5. Learning REXX page 5.54 ======================================================================== 5.18.3. Miscellaneous Functions The Personal REXX Miscellaneous function group contains a collection of unrelated functions that convert dates, test memory, query the REXX environment, parse filenames, and manipulate strings. Here is a simple program that illustrates the PARSEFN() function for breaking up a file identifier into its component parts, and the UPPER() and LOWER() functions for changing the case of strings: /* LEARN40.REX -- process file name using miscellaneous functions */ filename = "c:\dos\CHKDSK.COM" parsedname = ParseFn(filename) SAY "Drive = " Upper(Word(parsedname, 1)) SAY "Path = " Upper(Word(parsedname, 2)) SAY "Base = " Lower(Word(parsedname, 3)) SAY "Exten = " Lower(Word(parsedname, 4)) /* END LEARN40.REX */ When run, this program displays Drive = C Path = \DOS\ Base = chkdsk Exten = com 5.18.4. DOS Functions The functions in the Personal REXX DOS group give you many of the same file-handling capabilities as DOS's COMMAND.COM shell, including chang- ing drives and directories, modifying file attributes, deleting files, accessing the environment, making and removing directories, and renaming files. Some of the reasons you'd want to use a REXX function instead of the equivalent DOS command are: * With the REXX function you get an indication of success or failure, which is not available from many DOS commands. * You can avoid displaying DOS error messages that you can't normally suppress. * It's more efficient to call a built-in function than to issue a DOS command, since issuing a DOS command from a REXX program involves invoking COMMAND.COM. Personal REXX User's Guide, Version 3.0 5. Learning REXX page 5.55 ======================================================================== Here is a program that uses DOSDIR() and some other REXX features to automatically find all the executable files in the current directory, display a numbered menu of the found files, prompt the user for a file to run, then execute the user's choice: /* LEARN41.REX -- create menu of executable files and run one */ NULL = "" top = 1 CALL BuildList "*.exe" /* find files */ CALL BuildList "*.com" IF top = 1 THEN DO SAY "No executable files in current directory" EXIT END DO i=1 TO top-1 /* display menu */ SAY Format(i,2)":" Left(dirlist.i, Length(dirlist.i)-4) END CALL CharOut , D2C(10)"Enter choice (Hit ENTER to leave):" PULL choice /* get user's choice */ IF choice <> NULL THEN dirlist.choice /* issue command */ EXIT BuildList: PROCEDURE EXPOSE NULL dirlist. top ARG filespec dirlist.top = DOSDir(filespec, "n") DO WHILE dirlist.top <> NULL top = top + 1 dirlist.top = DOSDir(, "n") END RETURN /* END LEARN41.REX */ You run LEARN41.REX by entering rexx learn41 If the current directory contains executable files, then LEARN41 will display a menu something like this: Personal REXX User's Guide, Version 3.0 5. Learning REXX page 5.56 ======================================================================== 1: LIFE 2: NUMLOCK 3: CLEANFF 4: QS 5: DMAP 6: EMAP Enter choice: _ The menu lists the names of all the .EXE and .COM files found in the current directory. After the user types in a number and hits the Enter key, the appropriate program is executed. 5.19. What Next? Now that you've worked through the examples in this chapter, you should be able to write some useful REXX programs. But we've only touched on the many features of REXX here. Be sure to go through The REXX Language (especially Part 2) for more on REXX in general, and to take a look at the other chapters of this User's Guide (particularly Chapter 8, "Per- sonal REXX Utility Functions") for more on Personal REXX. Personal REXX User's Guide, Version 3.0 6. Input and Output in Personal REXX page 6.1 ======================================================================== Chapter 6 Input and Output in Personal REXX _________________________________ 6.1. Introduction The input and output facilities of Personal REXX are based on the REXX input and output model described in section 12 of The REXX Language. You should read the material in The REXX Language first, bearing in mind that within the framework of the input and output model there are implementation-specific differences. This section describes the Person- al REXX input and output model, which is in general accord with the mod- el described in The REXX Language, and in most cases quite similar to that of IBM's OS/2 REXX. The REXX language performs all input and output operations using what is known as streams. In most cases these streams correspond to DOS or OS/2 disk files, but streams can also be devices, pipes, or console input and output.¶ For most of this section we will talk about streams as disk files. In general, operations that can be performed on streams that aren't files are a subset of the operations available for disk file streams. The most common method of doing input and output in a REXX program is through the PULL, PARSE PULL, and SAY instructions, and these instruc- tions work in Personal REXX as described in The REXX Language. PULL and PARSE PULL generally take their input from the standard input stream, which in Personal REXX is the keyboard, unless redirected. The SAY instruction sends data to the standard output stream. In Personal REXX, the standard output stream goes to your display screen, unless redirect- ed. REXX also makes use of an external data queue. In Personal REXX, the external data queue corresponds to the program stack, which is discussed in Chapter 9, "Console Stack and Related Utilities" of this User's Guide. PULL and PARSE PULL attempt to take their input from the program stack, and go to the standard input stream only if the program stack is empty or is not installed. You can place data into the program stack with the PUSH and QUEUE instructions, and the built-in function QUEUED returns the number of lines of data in the program stack. The instructions and functions discussed so far let you read and write to the standard input and output streams and to the external data queue. To deal with any other character streams, you use the REXX built-in functions LINEIN, LINEOUT, CHARIN, CHAROUT, LINES, CHARS, and STREAM. The Personal REXX implementation of these functions fits into the frame- ========================= ¶ Except in some specialized situations Personal REXX cannot be used to do I/O to the serial port because of inadequacies in DOS and BIOS sup- port of it. Personal REXX User's Guide, Version 3.0 6. Input and Output in Personal REXX page 6.2 ======================================================================== work given in The REXX Language. The details are specific to Personal REXX and are given here. The functions all take as their first argument the name for the stream involved. This could be a device name or a file name, possibly involv- ing drive and path information. If the first argument is omitted or is a null string, the functions access the standard input and output streams. They allow for character and line oriented reading, writing, and updating of streams. Many files, including source programs for most programming languages, files that have been created with text editors like KEDIT or EDLIN, and most files that look "right" when displayed with the DOS TYPE command, are in standard ASCII format. In this format, data in a file is organ- ized into lines. Each line ends with a linefeed or carriage return linefeed pair. The file often ends with an end-of-file character (ASCII 26) after the last line. The LINEIN, LINEOUT, and LINES functions are oriented towards handling these standard ASCII files. The CHARIN, CHAROUT, CHARS, and STREAM functions can be used with any file, since they treat a file as a continuous stream of characters. These functions can be used with standard ASCII files, but you must keep in mind when you use them that there will be no special treatment given to carriage returns, linefeeds, or end-of-file characters. On the other hand, LINEIN, LINEOUT, and LINES are never useful when used with files that are not in standard ASCII format. You need not explicitly open a file. Personal REXX will open the file for you when you first try to use it. In situations where it is useful to explicitly open a file, one of the STREAM function's OPEN commands can be used. If you try to write to an existing file, Personal REXX will normally append what you write to the end of the file. If you want your output to replace an existing file, you will need to erase the file first by using the DOSDEL function or to delete the existing contents of the file with the DOSCREAT function. These are discussed in Chapter 8, "Personal REXX Utility Functions" of this User's Guide. When you have finished using a disk file, you should always close it. This can be done using the STREAM function's CLOSE streamcommand, or by using the LINEOUT or CHAROUT functions described below (giving only one argument, the name of the file involved being specified exactly as it was used in previous I/O functions).ý Personal REXX attempts to close files that you have left open, but is not always able to do so. ========================= ý Whenever you read from or write to a file, be sure to be consistent when specifying the filename. If the file is specified in more than one way--for example, with a path prefix one time and without the path prefix later--the result will be unpredictable. The easiest way to ensure consistency is to assign the filename to a variable. Personal REXX User's Guide, Version 3.0 6. Input and Output in Personal REXX page 6.3 ======================================================================== 6.2. I/O Built-in Functions CHARS([name]) Returns the number of characters that remain to be read in the stream name, starting at the current position of the read pointer, and returns 0 if no characters remain, provided name refers to a file. If name refers to a device, CHARS always returns 1. The DOSISDEV function can be used to test explicitly for a device. If name is omitted or is a null string, CHARS returns 1 or 0 depend- ing on whether or not any characters are waiting in the standard input stream. (The program stack is not examined.) If the standard input stream is the keyboard, this will usually be 0. LINES([name]) Returns 1 if any lines remain in the stream name and returns 0 if no lines remain. This function can be used to test if end-of-file has been reached on a file. Since LINES always returns either 0 or 1, it can be used to tell if lines remain in a stream, but cannot be used to tell exactly how many lines remain. If name is omitted or is a null string and the standard input stream is the keyboard, LINES always returns 0. While CHARS returns 0 if no characters remain in a stream, LINES returns 0 if no lines remain in a stream or if the read pointer is positioned at an end-of-file character (ASCII 26). CHARIN([name],[start],[length]) Returns a string of up to length characters read from the stream, name. Less than length characters may be read if end-of-file or an error condition is encountered. If name is omitted or is a null string, CHARIN reads from the stan- dard input stream, ignoring any characters in the program stack. If length is not specified, 1 character is read. If start is not specified, characters are read starting at the cur- rent read position. If start is specified, the read position is first moved to the specified character of the file. (The first char- acter of the file is character number 1). If start is specified and length is 0, the read pointer is repositioned but no characters are read. Start cannot be specified if the stream is a device or the standard input stream. CHARIN does not recognize ASCII 26 as the end-of-file character. Personal REXX User's Guide, Version 3.0 6. Input and Output in Personal REXX page 6.4 ======================================================================== LINEIN([name],[line],[count]) Returns the contents of the line that has been read from the speci- fied stream. A null string is returned if an error is encountered reading the line. All characters up to the next carriage return- linefeed are read. The carriage return-linefeed are not part of the value returned. LINEIN currently works properly only on lines of no more than 1000 characters. If name is omitted or is a null string, LINEIN reads a line from the standard input stream, ignoring any characters in the program stack. This is equivalent to using PARSE LINEIN. In practice, the line within the stream at which you want to start reading is normally omitted, and you begin reading at the current read position. In fact, because of the way the PC's file system is set up, it is not efficient to directly position the read pointer using LINEIN. You can either specify line 1, indicating that the read should start at the first line of the file, or leave the argument out. The count argument can be either 0 or 1. The default, 1, reads in one line. A 0 argument is useful when repositioning the read point- er. For example CALL LINEIN name,1,0 If the read pointer is positioned at an end-of-file character (ASCII 26), LINEIN will return a null string and raise the NOTREADY condi- tion. CHAROUT([name],[string],[start]) Writes string to the specified stream. If all characters are suc- cessfully written, 0 is returned. If some error condition is encoun- tered, CHAROUT returns the number of characters remaining to be writ- ten, and the NOTREADY condition is raised. If name is omitted or is a null string, CHAROUT sends the data to the standard output stream. This is equivalent to writing the data with the SAY instruction, except that a carriage return-linefeed is not appended to the data to be written. This is useful if the standard output stream is the display, because the cursor is not moved to the next line of the display after the data is written. If start is specified, the stream's write pointer is first moved to the specified character of the file. If the start position is omit- ted, you begin to write at the current write position, which is ini- tially the end of the stream. If you omit string but specify a start position, the write pointer is reset to that position in the stream. Start cannot be specified if the stream is a device or the standard output stream. Personal REXX User's Guide, Version 3.0 6. Input and Output in Personal REXX page 6.5 ======================================================================== If neither string nor start is specified, the stream is closed and 0 is returned. No end-of-file character is written at the end of the file. LINEOUT([name],[string],[line]) Writes string to the specified stream, followed by a carriage return- linefeed. If the line is successfully written, 0 is returned. If some error condition is encountered, LINEOUT returns 1. If only name is specified, the stream is closed. No data (including, in particular, the ASCII end-of-file character) is written to the stream. If name is omitted or is a null string, the data is written to the standard output stream, followed by a carriage return-linefeed. This is equivalent to writing the data with the SAY instruction. The line argument is normally omitted, and defaults to the current position of the write pointer. You can specify a 1 for this, which repositions the write pointer to the begining of the file. Due to the nature of the DOS file system, which does not provide efficient access to a particular line within a file, these are the only sup- ported functions of the line option. 6.3. The STREAM Built-in Function The STREAM function performs miscellaneous operations on a stream that you are using in a REXX program. Many of its functions are duplicated in Personal REXX functions described in Chapter 8, "Personal REXX Utility Functions". These other functions, together with the I/O built-in func- tions of the preceding section, generally provide a superset of the capabilities of STREAM. The STREAM function is included in the standard REXX language, but its arguments are not standardized. The version of STREAM implemented by Personal REXX is largely compatible with that of IBM's OS/2 REXX. You should use STREAM in cases where compatibility with other implementa- tions is desirable. However, the fact that individual STREAM commands are not standardized means that compatibility cannot be ensured. STREAM(name,[stream_option],[stream_command]) The first argument, name, identifies the stream to work with. Stream option, which defaults to Status, indicates the type of opera- tion to perform. It can be: S (Status) Returns the current status of the named stream. The status returned can be ERROR if the last operation on the stream led to an error condition, NOTREADY if the last operation on the stream Personal REXX User's Guide, Version 3.0 6. Input and Output in Personal REXX page 6.6 ======================================================================== involved an end of file condition, READY if the last operation on the stream proceeded normally and the stream is ready for addi- tional operations, or UNKNOWN, which normally happens if the stream is not currently opened and REXX has no information about the stream. D (Description) Currently gives the same status information as the S option. C (Command) Is used for issuing a command that affects or queries the state of the stream. When the second argument is C a third argument is required. Stream command must be one of the following: OPEN opens the stream for both read and write access. If this is not possible, the stream is opened for read-only access. You normally don't need to explicitly open streams. If the first reference to a stream is via the LINEIN, CHARIN, LINES or CHARS functions, Personal REXX attempts to open the stream read-only, but will re-open the file for read-write access if LINEOUT or CHAROUT is used later. If the first reference to the stream is by LINEOUT or CHAROUT, Personal REXX attempts to open the stream for read-write access. So, the main reason for explicit- ly opening a file would be to open the file for read-write access when the first operation on the file is going to be a read operation and you don't want to open the file initially just for reading. OPEN READ tells Personal REXX to open the stream and that it will be used only for read access and will not be written to. OPEN WRITE tells Personal REXX to open the stream and that it will be used only for write access and will not be read from. CLOSE You can close the stream using the CLOSE option. This is equivalent to using the LINEOUT or CHAROUT functions to close streams. All files that you use should be closed when you are finished with them so that other tasks within the system can access them. When your program terminates Personal REXX nor- mally attempts to close all streams used by your program. How- ever, this is not always possible and streams should be explic- itly closed. QUERY EXISTS tells whether a file exists; if the file that you specify exists, QUERY EXISTS returns the fully qualified name of the Personal REXX User's Guide, Version 3.0 6. Input and Output in Personal REXX page 6.7 ======================================================================== file. If the file that you specify does not exist, the query will return a null string. QUERY SIZE returns either a null string if the file does not exist, or the size of the file in bytes, as represented in the directory entry for the file. QUERY DATETIME returns the date and time associated with the file in its directory entry or a null string if it doesn't exist. The date and time are in the format: mm/dd/yy hh:mm:ss. Note: the STREAM function's QUERY operations don't actually work with REXX streams, they work with files on disk. So the stream involved need not already be opened, and the act of querying it does not open it. SEEK offset Reposition both read and write pointers. With SEEK you specify the character within the file at which the read and write pointers are to be positioned. SEEK offset positions can be either absolute or relative. Absolute positions are specified as either SEEK n or SEEK =n to position the read and write pointers at the nth character position within the file. Absolute positions can also be specified with respect to the end of the file. SEEK 0 /* check for end-of-file */ call lineout outputname, linein(inputname) end call lineout inputname /* close input file */ call lineout outputname /* close output file */ Personal REXX includes a number of additional functions that are specif- ic to the MS-DOS environment and are not part of the REXX language; they are discussed in Chapter 8, "Personal REXX Utility Functions". Many of the functions will be useful to you in interacting with the DOS file system. The DOSDEL function, used in the example above, is one of these functions. Other functions let you access, create, and remove DOS directories, get more direct access to the PC's cursor position, screen, and keyboard, etc. 6.5. I/O Redirection and REXX Filters The standard input and output streams can be redirected from the REXX or RX command line. The standard input stream is normally the keyboard, but it can be redirected to a file with a command like rexx rexxapp output.dat This causes the operating system to change the standard output stream to the file OUTPUT.DAT and removes >output.dat from the command line. The SAY instruction and the LINEOUT and CHAROUT functions will now write to output.dat instead of the screen. You can also redirect standard I/O streams to a device like the printer. For instance, Personal REXX User's Guide, Version 3.0 6. Input and Output in Personal REXX page 6.9 ======================================================================== rexx rexxapp >prn causes the program to write its output to the printer. A program that reads data from the standard input stream, performs some transformation on the data, and then sends the result to the standard output stream is called a filter. The \SAMPLES directory of the distri- bution disk has several examples of useful filters written with Personal REXX. Here is a simplified version of a filter that uppercases its stan- dard input stream: arg infile outfile call dosdel outfile do while lines(infile) call lineout outfile, upper(linein(infile)) end call lineout outfile call lineout infile Notice that this example is written in such a way that you could supply the names of the input and output streams either as ordinary command line parameters that name files or devices, or with the redirection sym- bols. For instance, the command rexx upper mydata.upr invokes this program with MYDATA.TXT as input and MYDATA.UPR as output. (The input and output files must be different.) The operating system removes the redirected names, so the REXX program does not actually see any arguments. Hence the infile and outfile variables are set to null strings. This causes the LINES, LINEIN, and LINEOUT functions to operate on the standard input and output streams. Some filters (such as a SORT filter) are supplied as part of DOS and OS/2, and you can write your own filters with Personal REXX or in other languages. Input and output can also be redirected to other programs with pipes. Pipes are created by the operating system when the pipe symbol "|" is used on the command line. You can use pipes to connect together multi- ple filters to do sophisticated processing tasks. For example, the fol- lowing command line causes the contents of INPUT.FIL to be sorted into alphabetical order, to have duplicate lines in the sorted result delet- ed, and to have the result written, in uppercase, to the file OUTPUT.FIL: sort output.fil (This example used the SORT filter supplied with DOS and OS/2 and the sample UNIQUE and UPPER filters supplied with Personal REXX.) Personal REXX User's Guide, Version 3.0 6. Input and Output in Personal REXX page 6.10 ======================================================================== Note: Redirection cannot be used with programs started with the Personal REXX Batch Manager (RXBATMGR). Therefore it is necessary to include the rexx command explicitly on the command line. (The rx command could be used instead if REXX.EXE is resident.) Piping is available in both DOS and OS/2 but since DOS is not a multi- tasking system, piping is implemented under DOS by running one filter at a time and using a temporary disk file to hold the intermediate results. OS/2 pipelines are much more efficient, since all of the filters are executed concurrently and data is passed between filters through shared memory, rather than through disk files. Personal REXX User's Guide, Version 3.0 7. Tracing and Interactive Debugging page 7.1 ======================================================================== Chapter 7 Tracing and Interactive Debugging _________________________________ 7.1. The TRACE Instruction (You should read pages 73-76 of The REXX Language and Part 2, Section 14 of The REXX Language for additional discussion of this topic.) REXX's TRACE instruction gives you a great deal of control over the lev- el of detail of information produced in the process of debugging. Information which can be selected for display includes * the source code for all executed statements, including comments * host commands * final results of all expressions * intermediate results of expression evaluation By default, only host commands that result in failures are traced. A failure is defined as a condition that is not expected in the course of normal operation, for example when a command cannot be found or cannot be executed for some other reason. In Personal REXX, failures are con- sidered to occur when a command results in a negative return code. These are the only two such codes which should ever occur: -3 command not found -8 insufficient memory to run command Although tracing of failures is the default, you can request it explic- itly with either trace f or trace n REXX distinguishes a failure of a command from an error. An error is defined to occur whenever a command produces a nonzero return code. Note that under DOS, many commands do not set return codes (which DOS some- times refers to as the "error level"). For instance, the DIR command does not give any indication through a return code if a file is not found. If you want to trace all host commands that result in errors (that is host commands that produce nonzero return codes), you can include the instruction trace e Personal REXX User's Guide, Version 3.0 7. Tracing and Interactive Debugging page 7.2 ======================================================================== However, some commands use the return code to pass back important infor- mation. The MAKEBUF command supplied with Personal REXX is an example: the return code is the number of the buffer created. In this situation, you probably do not want the command traced. The distinction between an error and a failure is also important for the SIGNAL instruction. (See pages 72-73 and 145 of The REXX Language.) Personal REXX has made one small extension to the definition of the TRACE instruction in The REXX Language. In many circumstances, it is undesirable to mix trace output with ordinary program output, or the trace output would be overwritten by full-screen programs like KEDIT. Or there may simply be so much trace output that it scrolls off the top of the screen. Because of this, Personal REXX allows a trace prefix of $ to direct trace output to your printer. Like the ? and ! prefixes, this is a toggle, since using it again in a subsequent TRACE command directs trace output to the monitor. The TRACE command trace $a is very useful for general debugging, as it will give you hardcopy out- put on your printer of all REXX instructions that are executed. Personal REXX also supports the ! prefix, which is present in VM/CMS REXX but is not defined in The REXX Language. This is also a toggle. It is very useful in debugging, because it tells REXX to inhibit the execu- tion of host commands. In conjunction with other trace specifications, this lets you see what commands would be executed, without the risk of actually executing them. (Of course, this will probably affect the logic of your program.) The variable RC will always be set to 0 for an inhib- ited host command. A second use of the ! prefix or turning tracing off with trace o will cancel command inhibition. Commands entered in inter- active trace mode are always executed, regardless of the inhibit status. 7.2. Interactive Debugging The output provided by REXX's trace facility should be sufficient to solve routine debugging problems. But for the more difficult problems, you should not hesitate to take advantage of interactive tracing -- one of REXX's most powerful features. In this mode, the REXX processor will pause for input from the keyboard after it has executed most traced instructions. (The exceptions are listed in The REXX Language, p. 153). When it pauses, you are prompted with ? and can issue any REXX instruc- tion or host command. Typically, you will use SAY to display the values of variables. There is no limitation on the expressions that may be evaluated, so you may invoke subroutines and functions. You can use assignment statements to alter variables. The last traced statement can be re-executed simply by entering $=$ at the prompt. One application of this facility is "unit Personal REXX User's Guide, Version 3.0 7. Tracing and Interactive Debugging page 7.3 ======================================================================== testing" individual subroutines by repeatedly calling them with differ- ent parameter values in this interactive mode. To resume execution, you just enter a null line. Interactive tracing is suspended and normal execution is resumed by entering any trace instruction with a ? prefix, or just trace o 7.3. The /TR Option Another useful debugging feature of Personal REXX is that you can initi- ate tracing from outside the REXX program, without the need for changes to the source code of the program. You can do this by using the /TR option of the REXX command, specifying the TRACE setting that you want to use. For example, if you want TRACE ?A to be in effect when your pro- gram ABC.REX begins execution, you could invoke your program with REXX /TR?A ABC 7.4. Tracing and REXX Command Options Personal REXX 's tracing facilities are affected by several of the REXX command options discussed in Section "REXX Command Options". These options disable certain features of the REXX language to improve per- formance or save memory. Here is how they relate to tracing: * /NS and /NM prevent the display of lines of your source program during tracing. TRACE A yields no output, and TRACE I and TRACE R trace expression values, but not the clauses being executed. * /NT prevents tracing of results and labels. * /O forces /NS to be in effect when the program is subsequently run, and makes /NT the default. Personal REXX User's Guide, Version 3.0 8. Personal REXX Utility Functions page 8.1 ======================================================================== Chapter 8 Personal REXX Utility Functions _______________________________ Personal REXX includes a set of utility functions that allow your pro- grams to take advantage of the full power of the PC. Among the func- tions supplied are functions that give you information about your PC's hardware configuration, allow you to interface with DOS's file system and directory structure, and give you more direct access to your screen, cursor position, and keyboard. These functions are part of Personal REXX running under MS-DOS and are not part of the REXX language. These functions are not likely to be found in other implementations of the REXX language. Some of the functions discussed in this chapter will be of interest only to advanced PC users who are acquainted with some of the more technical details of DOS and the PC. 8.1. Hardware Information Group PCDISK(subfunction,[drive]) Returns information about the installed fixed and floppy disks. Possible subfunctions are: Number Total number of fixed and floppy disks. (With DOS 3.0 or later, it returns the maximum number of drives, as controlled by the CONFIG.SYS LASTDRIVE parameter.) Heads Number of disk read-write heads (surfaces) on specified drive (that is, the number of tracks per cylinder). Cylinders Number of disk cylinders. Sectors Number of sectors per track. Only the first letter of each subfunction needs to be specified. Drive can be specified only for the H, C, and S subfunctions. If drive is omitted for these subfunctions, the current DOS drive is assumed. The H, C, and S subfunctions apply only to hard disks, and the information returned is not always valid on non-IBM machines or with non-IBM hard disks. PCDISPLAY() Returns a string containing three numbers, separated by blanks, giv- ing information about your display and display adapter. The values Personal REXX User's Guide, Version 3.0 8. Personal REXX Utility Functions page 8.2 ======================================================================== returned indicate the display mode, the display type, and the adapter type. The display mode is controlled by function 0 of the BIOS Video Inter- rupt, and is documented in IBM's Technical Reference manuals. Possi- ble display modes include: 2 80 column alphanumeric mode with color burst disabled 3 80 column alphanumeric mode with color burst enabled 7 80 column monochrome The display type is 1 for a monochrome display and 2 for a color dis- play. The adapter type is the value returned by function 1AH of the BIOS Video Interrupt, as documented in IBM's Technical Reference manuals. (Other methods are used to determine the adapter type on systems that don't support this BIOS call.) Values that can be returned include: 1 IBM Monochrome Display Adapter 2 IBM CGA (Color/Graphics Adapter) 4 IBM EGA with color display 5 IBM EGA with monochrome display 6 IBM PGA 7 IBM VGA with monochrome display 8 IBM VGA with color display 11 IBM MCGA with monochrome display 12 IBM MCGA with color display For example, on a PS/2 in 80 by 25 text mode with a VGA and an 8513 color display, PCDISPLAY() is 3 2 8 Because of the variety of possible displays, adapters, and BIOS ver- sions, the values returned by PCDISPLAY() represent Personal REXX's best guess as to your video configuration, but may not be accurate for all configurations. PCEQUIP() Returns the BIOS equipment flags, as a string of 0's and 1's. (Sever- al of the other functions in this group obtain their information by looking at these flags.) PCFLOPPY() Returns the number of floppy disks installed, as indicated in the BIOS equipment flags. PCGAME() Returns 1 if a game port is installed, else 0, as determined from the BIOS equipment flags. Personal REXX User's Guide, Version 3.0 8. Personal REXX Utility Functions page 8.3 ======================================================================== PCKEYBOARD() Returns 0 is the keyboard is the old PC or XT non-"enhanced" keyboard that does not have function keys 11 and 12, separate cursor keys etc. Returns 1 for enhanced keyboards. This is useful for deciding whether to assign program functions to the extended keys. It may also be useful in conjunction with the INKEY function and input functions in the RXWINDOW function package. PCPARALLEL() Returns the number of parallel ports, as determined from the BIOS equipment flags. PCRAM() Returns the amount of RAM storage, as determined from the BIOS, in units of 1024 bytes. Usually does not include memory above 640K. PCROMDATE() Returns the date (mm/dd/yy) of the installed ROM. PCSERIAL() Returns the number of serial ports, as determined from the BIOS equipment flags. PCTYPE() On IBM machines, returns a number that indicates the type of PC. Pos- sible values are: -1 = not known to Personal REXX 0 = IBM PC 1 = IBM PC/XT or Portable 2 = IBM PCjr 3 = IBM PC/AT 4 = IBM XT 286 5 = IBM PC Convertible 25 = IBM PS/2 Model 25 30 = IBM PS/2 Model 30 50 = IBM PS/2 Model 50 55 = IBM PS/2 Model 55 60 = IBM PS/2 Model 60 70 = IBM PS/2 Model 70 80 = IBM PS/2 Model 80 Note: PC compatibles may return other values. PCVIDEO() Returns a number that identifies the initial video mode, as deter- mined from the BIOS. Possible values are: 1 = 40x25 black & white, graphics adapter 2 = 80x25 black & white, graphics adapter 3 = 80x25 black & white, monochrome adapter Personal REXX User's Guide, Version 3.0 8. Personal REXX Utility Functions page 8.4 ======================================================================== The PCDISPLAY function gives more complete information about installed displays and adapters. 8.2. DOS Function Group For several of the functions in this group, there are DOS commands that perform similar tasks. For example, 'cd \barbara' would invoke the DOS CD command to make \BARBARA become the current directory, while call doschdir '\barbara' would invoke a Personal REXX function to do the same thing. Either method can be used; the Personal REXX functions are provided because they are in some cases more efficient than invoking the DOS command, and because they return an indicator of success or failure to your REXX pro- gram. In the above examples, if the subdirectory \BARBARA did not exist, the DOS CD command would give REXX no indication of an error, while the call to DOSCHDIR would set the REXX variable RESULT to 0 to indicate the error. Note: call doschdir \barbara is invalid. Quotes around \barbara are required: call doschdir '\barbara' Note also that DOSCHDIR is a function, so it returns a result. You can either invoke it with a CALL instruction, in which case the result is assigned to the REXX variable RESULT, or you can invoke it as a function and assign the result directly to a variable, as in directory_changed = doschdir('\barbara') What you should not do is invoke it as a function without assigning the result to some variable. For example, doschdir('\barbara') would return either 0 or 1, and REXX would then try to execute a DOS command called 0 or 1, which is probably not what you intended. DOSCD([drive]) Returns the current directory on the current DOS drive if drive is omitted; otherwise, the current directory on the specified drive. Personal REXX User's Guide, Version 3.0 8. Personal REXX Utility Functions page 8.5 ======================================================================== Returns a null string if the specified drive is invalid or not ready. This is one way to test whether a floppy drive has a disk in it. DOSCHDIR(pathname) DOSCHDIR makes pathname, which may include drive and path informa- tion, become the current directory for the current (or specified) drive. DOSCHDIR returns 0 if it encountered any error conditions, or 1 if it was successful. DOSCHMOD(fileid,[turnon],[turnoff]) Is used to change a file's attribute bits. Fileid, which must be given and which may contain drive and path information, specifies the file involved. It can contain no wildcard characters. Turnon, which can be omitted, consists of one or more of H, S, R, or A, allowing you to turn on a file's Hidden, System, Read-only, or Archive bits. Turnoff, which can also be omitted, is specified in the same way, and lets you specify which bits are to be turned off. DOSCHMOD returns 1 if the attributes were successfully changed, and 0 if not (for example, file not found, drive not ready, access denied). For example, to turn on a file's Archive bit and turn off its Hidden and Read-only bits: CALL DOSCHMOD fileid, 'A', 'HR' DOSCREAT(fileid) If fileid, which may contain drive and path information, does not exist, it is "created" as an empty file (0 bytes in length). If fileid already exists, it is truncated to 0 bytes in length, and its existing contents are lost. DOSCREAT returns 0 if it encountered any error conditions, or 1 if it was successful. DOSDEL(fileid) Fileid, which may contain drive and path information, is deleted (erased). Fileid may not contain wildcard characters. DOSDEL returns 0 if it encountered any error conditions, or 1 if it was successful. Personal REXX User's Guide, Version 3.0 8. Personal REXX Utility Functions page 8.6 ======================================================================== DOSDIR([fileid],[output],[search],[mask],[position]) Returns directory information for fileid. If fileid contains drive or path information, the specified drive or directory is searched. Otherwise, the current directory of the current drive is searched. Fileid may contain wildcard characters in the name or extension, in which case the first matching file is located. If fileid is omitted, it is assumed that a previous call was made to DOSDIR specifying a fileid with wildcard characters, and the next matching file is locat- ed. A null string is returned by DOSDIR if fileid was not located. Other- wise, a string containing the following is returned: the name and extension of the file, in the form name.ext the size of the file in bytes the date of the last update of the file, in the form mm/dd/yy the time of the last update of the file, in the form hh:mm:ss a group of characters indicating the file's attributes: = R for a read-only file, = H for a hidden file, = S for a system file, = D if the file is a directory, = A if the file's archive bit is set, = and a dash if none of the above attributes applies. If output is omitted or is null, all of the above information is returned by DOSDIR, in the above order. If specified, output is a string of characters that can be used to limit or reorder the returned information. N causes the file's name and extension to be returned, S returns the size of the file, D the date, T the time, and A the file's attributes. Personal REXX User's Guide, Version 3.0 8. Personal REXX Utility Functions page 8.7 ======================================================================== The order in which the characters appear determines the order in which the information is returned. If search is omitted or is null, DOSDIR searches only for "normal" files: hidden files, system files, and directory files are ignored. If specified, search is a set of characters that can be used to extend the search to special files: H extends the search to hidden files, S to system files, and D to directory files. If fileid is not specified and DOSDIR is searching for the next match of a previously-specified pattern, search is ignored. If specified, mask is a set of characters that can be used to restrict the search to files with particular attribute bits set: R restricts the search to read-only files, H to hidden files, S to system files, D to directory files, and A to files with the archive bit set. With fileid not specified, DOSDIR normally searches for the next file matching the pattern that was last used. The position operand can be used to cause a search for the next file matching a previously used pattern, allowing intervening calls to DOSDIR using other patterns. The DOSDIRPOS function can be used to save the current position in a directory search. Some examples of the use of DOSDIR: (In these examples, assume that the name of a DOS file has been assigned to the variable f.) if dosdir(f) = '' then say f 'does not exist' DOSDIR is frequently used to see if a file exists. (Note that in this example, hidden, system, and directory files are not searched for.) say dosdir(f, 's') Personal REXX User's Guide, Version 3.0 8. Personal REXX Utility Functions page 8.8 ======================================================================== will output the size of the file in bytes (or a null string if the file does not exist). /* this example lists the name.ext and size for */ /* all files in the current directory, including */ /* hidden, system, and directory files */ s = dosdir('*.*', 'nsa', 'hsd') do while s = "" say s s = dosdir(, 'nsa') end DOSDIRPOS() DOSDIRPOS returns a string representing the current DOSDIR directory position status. A later call to DOSDIR can specify the status via the position argument to resume processing a directory search at the current position. DOSDISK(option,[drive]) Returns information about the specified DOS disk (or the current default drive, if the drive argument is omitted). Option can be: Available Returns the number of available clusters on the disk. Bytes Returns the number of bytes per disk sector. Clusters Returns the number of clusters on the disk. Free Returns the number of free (unused) bytes on the disk. Sectors Returns the number of sectors per disk cluster. Total Returns the total number of bytes on the disk. Used Returns the total number of bytes in use on the disk. Returns -1 if the drive is invalid or not ready. DOSDRIVE([newdrive]) The drive letter given as the first character of newdrive becomes the current DOS drive, and the drive letter (A, B, etc.) that was in effect before the change is returned. If newdrive is not specified, DOSDRIVE simply returns the drive letter of the current DOS drive. DOSENV(string) Returns the value of the specified DOS environment string, or a null string if string is not defined. (If RXNEWCOM=YES or OPTIONS NEWCOM is in effect, the value will come from the active copy of the envi- ronment. If RXNEWCOM=NO or OPTIONS NONEWCOM is in effect, if will come from the master copy of the environment.) The VALUE function may also be used to examine and change the values of environment vari- ables. See Chapter 3, "Running Personal REXX" for more explanation of the environment. DOSENVSIZE() Returns the total size of the current DOS environment area and the amount of free space remaining. Both values are in bytes. The values Personal REXX User's Guide, Version 3.0 8. Personal REXX Utility Functions page 8.9 ======================================================================== are returned as two numbers, separated by blanks. This is useful for determining whether there is room to add new data to the environment. DOSFDATE(fileid,[newdate],[newtime]) Changes the date and time recorded as the date/time of the last modi- fication to the file. Newdate is specified in the "standard" date format as returned by the DATE function: yyyymmdd. The date must be on or after January 1, 1980. Newtime is specified as hhmmss (24-hour format, but no punctuation). The appropriate number of digits must be specified for each field. For instance, 1:01AM is 010100. DOSFDATE returns 1 if successful, otherwise 0. DOSFNAME(fileid) Returns the fully qualified name of the fileid that you specify, including a drive specifier, path specification, and name and exten- sion. This function is useful because it fills in any missing drive or path information in fileid, and it converts relative paths to absolute paths that start at the root directory. For example, if the current drive is the C: drive and the current directory is \PROGRAMS, DOSFNAME('abc.def') returns c:\programs\abc.def, DOSFNAME('c:object\xyz.obj') returns c:\programs\object\xyz.obj, and DOSFNAME('..\autoexec.bat') returns c:\autoexec.bat. The fileid that you specify need not actually exist, but a null string is returned if the fileid is invalid. DOSISDEV(fileid) Returns 1 if the specified fileid is a device, such as CON, PRN, LPT1, NUL, CLOCK$, STK, etc., otherwise 0. This may be useful for validating file names supplied to programs. DOSISDEV returns 1 for names such as "PRN.XYZ", which DOS treats as the PRN device rather than a file. DOSISDIR(fileid) Returns 1 if the specified fileid is a directory. Returns 0 if fileid is a file or an invalid name. Fileid should not include a trailing \. DOSMEM() % Returns the size in bytes of the largest block of unallocated DOS memory. This indicates the size of the largest DOS program that can be called from your REXX program. Personal REXX User's Guide, Version 3.0 8. Personal REXX Utility Functions page 8.10 ======================================================================== DOSMKDIR(pathname) Creates a new directory with the specified pathname, which may include drive and path information. Returns 0 if it encountered any error conditions, or 1 if it was suc- cessful. DOSPATHFIND(fileid,[envvar]) Searches your DOS PATH for the specified fileid. If the file is found, its fully qualified name is returned. If the file is not found, a null string is returned. The search process is similar to the process DOS carries out when searching for an executable file. If the fileid contains a drive or path specification, DOSPATHFIND looks only there. Otherwise, DOSPATHFIND looks for the file in the current directory and then in each of the directories specified in your PATH environment variable. The second argument, envvar, is optional. It lets you specify the name of another environment variable, other than the default of PATH, to use to determine the list of directories to search. DOSRENAME(fileid1,fileid2) Renames fileid1 to fileid2. Fileid1 and fileid2 should contain any necessary drive and path information, but should not contain wildcard characters. The DOS rename function is invoked directly, so DOSRENAME can move files from one subdirectory to another on the same disk; with DOS 3.0 or later, DOSRENAME can be used to rename directories. Returns 0 if it encountered any error conditions, or 1 if it was suc- cessful. DOSRMDIR(pathname) Removes the subdirectory with the specified pathname, which may include drive and path information. Returns 0 if it encountered any error conditions (for example, the subdirectory was not empty), or 1 if it was successful. DOSVERSION() Returns the current DOS version number (for example, 3.10). DOSVOLUME([drive]) Returns the volume label of the specified drive, or of the current DOS drive if drive is omitted. Returns null if the label cannot be located (for example, the disk has no label, drive not ready). Personal REXX User's Guide, Version 3.0 8. Personal REXX Utility Functions page 8.11 ======================================================================== 8.3. Hardware Access Group CHARSIZE() Returns the height of the character box in scan lines for the current screen mode. This can be used to provide appropriate values for the CURSORTYPE function. CURSOR([row],[col]) Sets the cursor position to the specified new row and column. If only row or only column are given, only the row or column position of the cursor is changed; if both are omitted, the cursor position is not changed. The initial row and column position of the cursor, before any change, is returned by the CURSOR function. If the cursor is currently in row 6, column 15, c = cursor() sets c to 6 15 and does not affect the cursor location, while c = cursor(10, 22) sets c to 6 15, and moves the cursor location to row 10, column 22. The file SCREEN.REX on the Personal REXX distribution disk is a sam- ple program illustrating the use of the SCRWRITE, INKEY, and CURSOR functions. CURSORTYPE([start],[end]) Returns the current cursor type, and possibly sets new values for the cursor type. The cursor type is a pair of numbers indicating the starting and ending rows within a character box used for display of the cursor. For the monochrome adapter, each character box is 13 pix- els high, the rows are numbered 0 through 12, and the cursor is nor- mally displayed in rows 11 and 12. For the color adapter, each char- acter box is 8 pixels high, the rows are numbered 0 through 7, and the cursor is normally displayed in rows 6 and 7. For example, if you are using a color display with the cursor cur- rently in rows 6 and 7, OLD_TYPE = CURSORTYPE(1, 7) would give you a large block cursor occupying rows 1 to 7, with OLD_TYPE set to 6 7. The CHARSIZE function can be used to get the height of the character box for the current video mode. Personal REXX User's Guide, Version 3.0 8. Personal REXX Utility Functions page 8.12 ======================================================================== DELAY(duration) Causes your REXX program to delay for a specified duration, which you specify in seconds. The DELAY routine is accurate to within about a tenth of a second. For example, CALL DELAY 1.5 will delay for approximately 1.5 seconds. INKEY([wait_option], [keyboard_option]) Reads in a character directly from the keyboard (without echoing it to the display). In most cases, the result is returned as a string of length 1. If a special key is hit (function key, PgUp, etc.), a 2-character string is returned: The first character is normally '00'x, and the second character is the scan code for the key that was hit, as documented in the IBM BIOS Interface Technical Reference.¶ Wait option, which defaults to Wait, can be: Wait INKEY waits until a character is ready. Nowait If no character is ready, INKEY will immediately return a null string. Keyboard option, which defaults to Fold, can be: Enhanced Reads from the keyboard using Enhanced Keyboard BIOS calls, if available on your machine, so that Enhanced Keyboard keys such as F11 and F12 can be processed. Fold Like Enhanced, except that key codes are "folded" so that analogous keys on the numeric and dedicated keypads have the same codes as they did on the original IBM PC. Old Uses old style BIOS calls, as supported on the original IBM PC, to read from the keyboard even if Enhanced Key- board BIOS support is available. The PCKEYBOARD function can be used to determine whether an enhanced keyboard is present. INP(port) Reads 1 byte from the specified hardware port (which must be in the range 0 to 65535). OUTP(port,value) Writes 1 byte to the specified hardware port (which must be in the range 0 to 65535). Value must be in the range 0 to 255. OUTP always returns a value of 0. ========================= ¶ The first character may be 'E0'x for some Enhanced Keyboard key combi- nations. Personal REXX User's Guide, Version 3.0 8. Personal REXX Utility Functions page 8.13 ======================================================================== PEEK(segment,offset) Segment and offset must be in the range 0 to 65535. Returns the val- ue (as a number from 0 to 255) contained in the specified location of your PC's memory. POKE(segment,offset,value) Segment and offset must be in the range 0 to 65535. Stores value (which must be in the range 0 to 255) in the specified location of your PC's memory. POKE always returns a value of 0. SCRBLINK([state]) Returns the current state of video attribute handling. If the state is 1, then video attributes (as described in connection with the SCRWRITE function) above 128 produce blinking text. If the state is 0, such attributes produce a bright background color. This state may be changed by supplying a value of 0 or 1 for state. SCRCLEAR([attr],[char],[row],[col],[height],[width]) Clears the screen, or any rectangular region of the screen. The cleared area can be filled with any desired character and display attribute. Always returns 0. Calling SCRCLEAR with no arguments will clear the screen by filling it with blanks at the default attribute of 7. Attr is the display attribute to use in the cleared area. The default is 7. (See the description of the SCRWRITE function for a discussion of valid attribute values.) Char is the character to use to fill the area. The default is a blank. Row and col define the row and column on the screen of the upper left corner of the rectangular area. The default for each is 1. Height and width define the height and width of the area to be cleared. The defaults are the number of rows and columns remaining on the screen. SCRMETHOD([method]) Returns the existing screen method and optionally allows you to change the screen method. Method can be either D (D,mono)irect, R (R,mono)etrace, or B (B,mono)ios. It is the method used to access the screen by the SCRREAD, SCRWRITE, and SCRPUT functions. With the Direct method, the fastest method, Personal REXX accesses the display buffer directly. Personal REXX User's Guide, Version 3.0 8. Personal REXX Utility Functions page 8.14 ======================================================================== With the Retrace method, Personal REXX accesses the display buffer directly but is somewhat slower because it accesses the buffer only during the retrace interval, as is required for the IBM Color Graph- ics Adapter. The Bios method uses the BIOS to access the display buffer. This is much slower than the other two methods but may be required in some specialized situations. The default screen method is Direct if you have a Monochrome Display Adapter, EGA, or VGA. Otherwise, the default screen method is Ret- race. SCRPUT(row,col,string,[option]) Writes contents of string to screen, starting at row and column. Option can be: T (Text), the default, string has text to be written, attributes don't change; A (Attribute) string has attributes to be written, text doesn't change; B (Both) string has character-attribute pairs. The length of string must be even; LENGTH(string)/2 screen positions are writ- ten. Always returns a null string as its value. SCRREAD(row,col,length,[option]) Returns length screen positions, starting at given row and column. Option can be: T (Text), the default, to read text only from the screen; A (Attribute) to read attributes only; B (Both) to read both (returns 2xlength bytes). SCRSIZE() Returns the number of rows and columns on your PC's screen. The result is normally 25 80, but may be different if you have an EGA or VGA and have a utility that can change the number of rows and/or col- umns. SCRWRITE([row],[col],[string],[length],[pad],[attr]) Writes string to the screen at the specified row and column. String is truncated (or padded with pad) to the given length. Characters are written to the screen using the attribute attr. SCRWRITE does not Personal REXX User's Guide, Version 3.0 8. Personal REXX Utility Functions page 8.15 ======================================================================== affect the current cursor position, and always returns 0 as its val- ue. If row and/or col are omitted, current row and/or column positions of the cursor are used. The default for string is the null string. The default for length is the length of string. The default for pad is a blank. The default for attr is 7. Some examples of SCRWRITE: call scrwrite , , 'hello' writes hello at current cursor position. call scrwrite 1, 1, 'hello' writes hello starting in row 1, column 1. call scrwrite 1, 1, 'hello', 80 writes hello starting in row 1, column 1, and clears the rest of the line. call scrwrite 1, 1, , 2000 clears the screen. call scrwrite 1, 1, , 2000, '+', 99 fills the screen with plus signs, using attribute 99. With the IBM monochrome display, the attribute values that work best for attr are 7 (normal display), 15 (highlighted), 65 (underlined), and 112 (reverse video). With the IBM color display, find the foreground color and background colors that you want in the table that follows, and add them togeth- er. For example, to get yellow text on a red background, add togeth- er 14 -- the value for yellow as a foreground color -- and 64 -- the value for red as a background color -- to get 78. If blinking attributes are enabled, as they are by default, adding 128 will produce blinking text. If blinking attributes are disabled with the SCRBLINK function, adding 128 will produce text with bright background colors. Personal REXX User's Guide, Version 3.0 8. Personal REXX Utility Functions page 8.16 ======================================================================== Foreground Colors Background Colors 0 black 0 black 1 blue 16 blue 2 green 32 green 3 cyan 48 cyan 4 red 64 red 5 magenta 80 magenta 6 brown 96 brown 7 white 112 white 8 gray 9 light blue 10 light green 11 light cyan 12 light red 13 light magenta 14 yellow 15 high intensity white SHIFTSTATE(key,[state]) Returns the current shift state of the NumLock, CapsLock, and Scroll- Lock keys. The shift state can be changed by supplying a value of 0 or 1 for state. Key may be specified as: C - CapsLock key N - NumLock key S - ScrollLock key SOUND([freq],[duration]) Sounds the PC's speaker. Freq is in cycles per second, gets rounded to the nearest integer, and defaults to 880. Duration is in seconds and is accurate to around a tenth of a second, with .2 seconds as the default. For example, CALL SOUND 1000, .5 will sound the PC's speaker at 1000 cycles per second for approxi- mately .5 seconds. 8.4. Miscellaneous Group DATECONV(date,input,[output]) Converts the string date, which is in input format (B, C, D, E, J, N, O, S, or U), to output format (B, C, D, E, J, M, O, S, U, or W). The formats are the same as those used for the DATE() built-in function. Default output format is N. Dates which are not in proper input for- mat convert to a null string. Personal REXX User's Guide, Version 3.0 8. Personal REXX Utility Functions page 8.17 ======================================================================== EMSMEM() Returns, as two words, the number of bytes of Lotus-Intel-Microsoft EMS memory currently unallocated and the total number of bytes of EMS memory on your system. ENDLOCAL() Restores the drive/directory and environment variables saved by the last SETLOCAL call. A 1 is returned if the restore is successful, otherwise 0. FCNPKG(package-name) Package-name is the name of a function package. Result is 0 if package-name is not loaded, 1 if loaded. Packages are sets of optionally loadable REXX functions. RXWINDOW, discussed in Chapter 11, "RXWINDOW Function Package", is the only function package supplied with Personal REXX; FNCPKG('RXWINDOW') would tell you if RXWINDOW is loaded. Result is 2 if package-name is loaded and a resident environment. The specialized concept "resident environment" is discussed in Appen- dix A, "Personal REXX Application Interfaces". LOWER(string) Lowercases the specified string. PARSEFN(fileid) Breaks the given fileid into four components, returned as a string consisting of four uppercase words: * drive specifier (without a colon), * path specifier, * file name, * file extension. Omitted components are returned as -. For example, x = parsefn('\abc\def.ghi') sets x to "- \ABC\ DEF GHI". A null string is returned if fileid contains invalid characters or invalid components (for example, an extension longer than three char- acters). Note that the checking is purely syntactic, and fileid may refer to a file, drive, or directory that does not exist. Personal REXX User's Guide, Version 3.0 8. Personal REXX Utility Functions page 8.18 ======================================================================== PRXVERSION() Returns the current Personal REXX version number, for instance 3.00. (This is distinct from the REXX language version number provided by PARSE VERSION.) SETLOCAL() Saves the current drive/directory and environment variables. Together with ENDLOCAL this function permits arbitrary changes to be made to the current drive/directory and environment variables and for the original state to be restored easily. SETLOCAL/ENDLOCAL pairs may be nested. SETLOCAL returns 1 if the operation is successful, otherwise 0. If SETLOCAL is called and not followed by a matching ENDLOCAL, the initially saved values are restored when the enclosing external pro- cedure terminates. STACKSTATUS() Returns information about the status of the console stack (which is discussed in Chapter 9, "Console Stack and Related Utilities"). STACKSTATUS returns a string consisting of three items: * the character E (stack Enabled), D (stack Disabled), or N (stack Not installed), * the number of the current stack buffer, * the remaining capacity of the stack, in characters. For example, if STACKSTATUS() returns E 1 443, the stack is enabled, you are processing stack buffer 1, and the stack has room for up to 443 additional characters. UPPER(string) Uppercases the specified string. VALIDNAME(fileid,[wildcard]) Returns 1 if fileid is a valid file name, otherwise 0. If fileid includes a drive letter, it must be a valid drive, and the name syn- tax is checked according to the rules of the file system on the spec- ified drive. Otherwise the syntax is checked according to the rules of the file system on the current drive. Names are tested to verify that all parts of the name do not exceed allowed lengths and that characters not allowed in names are not present. Directory names included in the fileid do not need to exist. If the wildcard flag is 1 then "?" and "*" are allowed in file names (but not paths). If it is 0 (the default) then "?" and "*" cannot be used anywhere. Personal REXX User's Guide, Version 3.0 9. Console Stack and Related Utilities page 9.1 ======================================================================== Chapter 9 Console Stack and Related Utilities ___________________________________ 9.1. Installing the Console Stack An auxiliary facility is provided with Personal REXX that implements a console stack which works in much the same way as its equivalent in CMS. The console stack facility can be used with the REXX PUSH, QUEUE, and PULL instructions. Any program that uses the standard DOS or BIOS calls to read from the keyboard will automatically read from the console stack. To use the console stack, from REXX or in any other way, it is necessary to run the STACKMGR command first. This loads a resident DOS extension that handles the BIOS keyboard call (BIOS Interrupt 16). If you expect to use the program stack even occasionally from REXX, you should prob- ably invoke STACKMGR in your AUTOEXEC.BAT so that it is always present. The amount of memory required by the stack manager depends on how much you tell it to allocate for stack memory, which is 8K bytes by default, allowing 4K characters to be stacked. (If EMS is available, the default is 16K bytes, allowing 8K characters.) STACKMGR has one commonly used option: /S The /S option controls the size of the stack. For example, the command stackmgr /s32 reserves 32K bytes of memory for the program stack. Each character stored in the stack requires 2 bytes (character plus scan code), so this size stack would accommodate 16K characters. It is easy to exceed whatever allocation you specify, so you should consider carefully how you might be using the stack: for convenient tempo- rary storage of small amounts of data, or for entire files. The general form of the /S option is /Sn, where n is a number between 1 and 64, specifying nK bytes of stack space, with a default of 8K. If EMS memory is available, the stack is placed in EMS, with the stack size rounded up to a multiple of 16K. Two rarely-used options are provided for special situations: /NX The stack is normally placed in EMS memory, if it is available. The /NX option tells the Stack Manager not to use EMS, even if it is available. This may help performance with certain drivers that emulate EMS in software, and may be necessary if there are compati- bility problems between Personal REXX and your EMS driver. Personal REXX User's Guide, Version 3.0 9. Console Stack and Related Utilities page 9.2 ======================================================================== /K The /K option tells the Stack Manager to use older keyboard BIOS calls, as supported on the original IBM PC, when it needs to read from the keyboard, even if you have an IBM Enhanced Keyboard. /K may be necessary if you have memory-resident software whose key- board handling is incompatible with the Enhanced Keyboard BIOS calls. It is possible that STACKMGR will conflict with other resident utilities in your system. You may have to experiment with different orders of loading such extensions to achieve satisfactory results, and the console stack facility may turn out to be incompatible with some of the programs that you use. 9.2. Using the Console Stack Just as in CMS, the console stack is conceptually divided into a key- board stack and a program stack. Everything the user types at the key- board goes into the keyboard stack. The REXX commands PUSH and QUEUE put lines into the program stack. With special system calls, other programs can also put data in the program stack. Whenever any program makes a request for input that ultimately results in a BIOS 16 call, the program is first supplied with data from the program stack, followed by the key- board stack. The order in which data is retrieved from the program stack depends on whether it was placed there "LIFO" (Last-In-First-Out), or "FIFO" (First-In-First-Out).¶ Both PUSH and QUEUE automatically append a car- riage return character to any supplied data. All data in the stack up to and including a carriage return is considered to be one "line". A line at a time of data (without a carriage return at the end) is retrieved by the PULL (or PARSE PULL) instruction. A line at a time of data (in this case including a carriage return) is retrieved by any program that even- tually uses DOS calls that read up to a carriage return. Programs that use the BIOS calls to read a character at a time will also work. Although PUSH inserts the line into the program stack ahead of any lines already present, the data within the line is in normal order. The PARSE EXTERNAL and PARSE LINEIN instructions can be used to bypass the program stack, and go directly to the keyboard stack. The whole program stack is cleared if Ctrl-Break is used (even if the program that is in control ignores the Ctrl-Break). The stack is also cleared if the REXX program terminates because of an error detected by the REXX processor. You can use the STACKSTATUS function, described in Chapter 8, "Personal REXX Utility Functions", to determine the status of the program stack: whether STACKMGR has been run to install the stack, the current stack ========================= ¶ Data is placed on the stack LIFO with the REXX PUSH instruction, and FIFO with the REXX QUEUE instruction. Personal REXX User's Guide, Version 3.0 9. Console Stack and Related Utilities page 9.3 ======================================================================== buffer number, and the remaining capacity of the stack. 9.3. PRESS Use the PRESS command to place specific keystrokes in the program stack. Unlike REXX's QUEUE and PUSH statements, PRESS does not append a car- riage return, and it also permits a wider range of keystrokes to be placed in the stack. PRESS is a DOS command; it is not built into the REXX processor or accessed as a function. The PRESS command can be used in REXX programs to prepare typed-ahead input for commands that will be called later and that process non-ASCII input such as function keys. Since the program stack uses the BIOS-level program interface, some applications that access the keyboard at a lower level may not work with PRESS. The format of the PRESS command is press keystroke-1 keystroke-2 ... where keystroke-n is either a key name, a (blank-delimited) word, or a quoted string. PRESS also supports delays. Delays are most useful when you are stack- ing input for programs that clear the PC's typeahead buffer. The buffer will appear empty if a program attempts to clear it during the delay period, even though you have stacked additional data for processing after the delay. The syntax here is press delay n where n is a number from 0 to 255 specifying the number of seconds to delay. Anything stacked or typed after the delay was stacked will not be processed for n seconds. For example, if you want to stack F1, a delay of 3 seconds, and then F2, you enter the command press f1 delay 3 f2 The key names recognized by PRESS are listed below. For each valid key name, PRESS inserts the appropriate keystroke FIFO (First-In-First-Out) in the program stack. Any other word that is not recognized as a key name is placed as-is, character by character, in the program stack. Blanks between words are not placed in the program stack. Quoted strings are printable characters enclosed in quotation marks -- either single (') or double ("). They follow the same conventions as Personal REXX User's Guide, Version 3.0 9. Console Stack and Related Utilities page 9.4 ======================================================================== used in REXX -- if either kind of quotation mark must be used in a string that it delimits, it should be doubled. All characters between (but not including) the quotation marks are placed in the program stack as-is. The appropriate scan code for each character is also included. The recognized key names are as follows. They are either simple names, or have a prefix of C- or CTRL-, A- or ALT-, or S- or SHIFT-. Prefixed names other than those listed here are not meaningful combinations as far as the IBM PC BIOS is concerned, and hence cannot be used with PRESS. Simple names: BEL bell (hex 07) BKSP backspace (hex 08) CR carriage return (hex 0D) ENTER carriage return (hex 0D) ESC escape (hex 1B) FF formfeed (hex 0C) LF linefeed (hex 0A) TAB horizontal tab (hex 09) HOME Home key END End key INS Ins key DEL Del key PRTSC PrtSc key with Ctrl held down PLUS the grey + key MINUS the grey - key STAR the PrtSc/* key PGUP PgUp key PGDN PgDn key CURU cursor up CURL cursor left CURR cursor right CURD cursor down CENTER 5 key on Enhanced Keyboard numeric pad NUMENTER Enter key on Enhanced Keyboard numeric pad SLASH / key on Enhanced Keyboard numeric pad Fx where x is from 1 to 12, a function key. Note: Some programs distinguish between an ASCII carriage return (actu- ally Ctrl-M) and the Enter (bent arrow) key. When either CR or ENTER is specified, PRESS supplies the scan code corresponding to the Enter key. Likewise, appropriate scan codes are supplied to identify the PLUS, MINUS, STAR, SLASH, and NUMENTER keys. C- or CTRL- prefix May be used with any alphabetic key. May also be used with Fx, CURL, CURR, PGDN, PGUP, END, HOME, PRTSC, ENTER. (C-ENTER is an ASCII line- feed, but with a different scan code.) Additional combinations valid on the IBM Enhanced Keyboard are also accepted. A few other combina- tions are valid ASCII characters: Personal REXX User's Guide, Version 3.0 9. Console Stack and Related Utilities page 9.5 ======================================================================== C-[ (hex 1B, that is ESC) C-\ (hex 1C) C-] (hex 1D) C-6 (hex 1E) C-- (hex 1F) A- or ALT- prefix May be used with any alphabetic key. May also be used with function keys and numeric keys. The combinations A-- and A-= are also valid. Additional combinations valid on the IBM Enhanced Keyboard are also accepted. S- or SHIFT- prefix May be used with function keys and TAB. (S-TAB is interpreted as back-tab by many programs.) Additional combinations valid on the IBM Enhanced Keyboard are also accepted. 9.4. STACKDRV, the Stack Device Driver A device driver is a program used by DOS to support or simulate PC hard- ware or peripherals. A device driver normally handles one or more named devices, such as CON, PRN, and AUX. Such device names can be used in most DOS commands in place of a file name. For instance, the command copy con prn copies lines typed on the keyboard to the printer. Device drivers are loaded when DOS is first loaded, before the AUTOEXEC.BAT is executed. The CONFIG.SYS file defines which device drivers will be used in addi- tion to several standard ones. A device driver has been provided with Personal REXX to implement a (simulated) device called STK. Any program that writes to this device puts data in the program stack (FIFO). Thus, one way to place a whole file into the stack is to use the command copy file-name stk (This may be slightly faster than using the EXECIO command for the same purpose.) The STK device is probably most useful in connection with redirected output. Any command which sends its output to the DOS standard output file can use such redirection. For instance, the command dir *.* >stk will put the output of the DIR command directly on the stack so that it can be examined with PULL. Personal REXX User's Guide, Version 3.0 9. Console Stack and Related Utilities page 9.6 ======================================================================== Another common use of STK is with the DOS FIND command. Thus, to locate all lines in a file that contain the word Michelle and place them on the stack, you could use the command find "Michelle" phones.doc >stk The Stack Manager must be loaded before STK can be used. You should be sure that enough stack space has been defined with the /S option of STACKMGR to accommodate any output which may be written to STK. Also, STACKDRV.SYS must be specified in your CONFIG.SYS file as device=[drive:][path]stackdrv.sys and the system reloaded before STK can be used. (STACKDRV requires only about 500 bytes of storage.) Note: DOS device drivers preempt a name that could otherwise be used for a file. For STACKDRV this name is STK. In fact, DOS ignores the exten- sion of any file identifier whose name is STK. STK.REX, STK.DOC, etc. are all taken to refer to the stack device driver, just as STK does. Hence, if you install STACKDRV in your CONFIG.SYS, you will not be able to access or create files with a name of STK. Furthermore, various util- ities, including even the DOS DIR command, may mistake STK for a file. Exactly the same problem exists for other DOS device names, such as CON and PRN. There isn't much that can be done about the problem, except to be aware of it. 9.5. DISABLE and ENABLE A DISABLE utility is provided that lets you temporarily "turn off" the program stack. After you run the DISABLE utility, the contents of the program stack remain intact (and can be added to), but any programs that you run will not see the data in the program stack and will always read data directly from the keyboard stack. The ENABLE utility lets you re-enable use of the program stack after it has been turned off by the DISABLE utility. DISABLE and ENABLE are useful if you have data that you want to keep in the program stack but you want to run a program that should take all of its data from the keyboard instead of the program stack. 9.6. MAKEBUF, DROPBUF, SENTRIES, DESBUF, and CONWAIT The commands discussed in this section will be of interest mainly to CMS users. Just as in CMS, the MAKEBUF and DROPBUF commands can be used to further partition the program stack. They work just like their equiva- lents in CMS, as explained below. Personal REXX User's Guide, Version 3.0 9. Console Stack and Related Utilities page 9.7 ======================================================================== The reason for allowing you to partition the program stack into buffers is to make it possible to write subroutines and procedures that utilize the stack without having to worry about disturbing its existing con- tents. When you create a new buffer in the stack, all new data added to the stack by PUSH or QUEUE (or any other means) goes into the current buffer. Any program that reads from the stack always reads the current buffer first, followed by any other buffers, in the reverse order in which they were created. Within each buffer, the data is maintained FIFO or LIFO as specified. The format of the MAKEBUF command is simply makebuf The return code (RC) is set to the number of the buffer that is created. (Note that since this return code will be nonzero, the statement will be traced if TRACE E is in effect.) Initially the stack contains buffer number 0, so the first time MAKEBUF is used, it creates buffer number 1, and so on. There is a limit of 16 buffers in the stack. The DROPBUF command can be used to remove buffers from the stack explic- itly. For instance, dropbuf 4 removes buffer number 4 and all higher-numbered buffers from the stack. If a number is not specified, the current buffer is removed. dropbuf 0 removes all buffers, hence all data, from the stack. Buffers are also removed as soon as all data has been read from them. By using DROPBUF at the end of a routine that has placed data in the stack, you can ensure that the data will not be left around in the stack to confuse other routines or DOS. It is a good programming practice to begin routines that use the stack with MAKEBUF and issue a DROPBUF com- mand before returning. The SENTRIES command is also provided, for compatibility with CMS, to place the number of lines in the program stack into its return code. However, a DOS limitation restricts the maximum return code value from a command to 255. Therefore you should use the REXX built-in QUEUED func- tion, rather than SENTRIES, to determine the number of lines. (QUEUED is also much faster than SENTRIES.) DESBUF and CONWAIT are also included to provide additional compatibility for some existing REXX programs written for CMS. DESBUF does the equiva- lent of DROPBUF 0, while CONWAIT does nothing. Personal REXX User's Guide, Version 3.0 9. Console Stack and Related Utilities page 9.8 ======================================================================== Note that the commands discussed in this section are DOS commands, and are not built into the Personal REXX processor or accessed as functions. Personal REXX User's Guide, Version 3.0 10. LISTFILE, EXECIO, and GLOBALV page 10.1 ======================================================================== Chapter 10 LISTFILE, EXECIO, and GLOBALV _____________________________ In addition to the stack-related utilities described in Chapter 9, "Con- sole Stack and Related Utilities", three additional CMS-like utilities are provided with Personal REXX: LISTFILE, EXECIO, and GLOBALV. LISTFILE, EXECIO and GLOBALV can all be used by REXX programs. LISTFILE can also be quite useful on its own. EXECIO supports a subset of the facilities of the CMS EXECIO command. It is included mainly to provide some degree of compatibility with the CMS EXECIO command, and most of what it does can be done more cleanly and efficiently with Personal REXX's built-in I/O functions, described in Chapter 6, "Input and Output in Personal REXX". All three programs are DOS commands, and are not built into the Personal REXX processor or accessed as functions. 10.1. LISTFILE Use the LISTFILE command to obtain specified information about DOS files. The information that you get from LISTFILE is similar to the information you get from DOS's DIR command, except that the style of LISTFILE's input parameters and output is similar to the style of the CMS LISTFILE command. Useful additional features include the ability to give sorted output, to list only files changed before or after a given date, and to assign directory information to REXX variables. The format of the LISTFILE command is: LISTFILE [filespec ... ] [( options] Options: Header STACK [FIFO|LIFO] FName NOHeader FIFO FType|FExt NOType LIFO Alloc|Size SINCE mm/dd/yy Date ARchive BEFORE mm/dd/yy CHecksum REad-only TODay TRee HIdden SORTa sort-type STem SYstem SORTD sort-type ENVvar varname DIrectory FILEid filespec consists of [d:][path]name[.ext] Personal REXX User's Guide, Version 3.0 10. LISTFILE, EXECIO, and GLOBALV page 10.2 ======================================================================== Note that you can use wildcard characters and can give multiple file- specs. For example, LISTFILE *.C *.H D:\COMMON\*.BAT (SORTA A left parenthesis must precede any options that are specified. Options are separated from each other by blanks. They may be used to control the format and disposition of the output of LISTFILE: HEADER Includes column headings in the output. The format of the header depends on which information is selected. If all information is included, the header is Name Type Size Date Time Checksum. NOHEADER Does not include a header in the output. NOHEADER is the default. NOTYPE Suppresses normal output from LISTFILE as well as the "file not found" message. This is useful if only the return code is needed to determine whether a file exists. ARCHIVE, READ-ONLY, HIDDEN, SYSTEM, DIRECTORY If the ARCHIVE option is specified, LISTFILE will list only files with the Archive bit set in their directory entry (that is, files changed since you last ran BACKUP), if the READ-ONLY option is speci- fied only files with the Read-Only bit set in their directory entry will be listed, etc. You can specify a combination of these options. For example, specifying both HIDDEN and READ-ONLY will list files that are marked either Hidden or Read-Only. STACK [FIFO|LIFO] Specifies that the output should be placed in the program stack. (Personal REXX's console stack feature must be installed for this to work.) The output is stacked either FIFO (first in-first out) or LIFO (last in-first out). FIFO is the default. FIFO Equivalent to STACK FIFO. LIFO Equivalent to STACK LIFO. SINCE mm/dd/yy Includes in the output only those files which have a date on or after mm/dd/yy (U.S. date format). BEFORE mm/dd/yy Includes in the output only those files which have a date before (but not on) mm/dd/yy (U.S. date format). Personal REXX User's Guide, Version 3.0 10. LISTFILE, EXECIO, and GLOBALV page 10.3 ======================================================================== TODAY Equivalent to SINCE . SORTA sort-type Specifies that the output is to be sorted in ascending order on one or more fields. Sort-type specifies the field, and can be one or more of NAME, DATE, SIZE, TYPE, EXT or PATH. Any of these can be abbrevi- ated to its first letter. TYPE and EXT both denote the file exten- sion. Example: SORTA E D sorts the output in order by extension, then date. SORTD sort-type Specifies that the output is to be sorted in descending order on one or more fields. Sort-type is the same as for SORTA. SORTD can be used with SORTA. Example: SORTA E SORTD D sorts in ascending order by extension, then descending order by date. FNAME Specifies that only the file name is to be included in the output. FTYPE Specifies that the file name and extension are to be included in the output. FEXT Equivalent to FTYPE. FILEid Displays files in the form drive:path\name.ext For example, C:\K4\FINDREXX.ASM Several options, including FNAME, FEXT, DATE, and SIZE, are incompat- ible with FILEID, since they imply that the components of the fileid will be displayed in columns and not as a single string. SIZE Specifies that the file size, in bytes, is to be included in the out- put, together with file name and extension. ALLOC Equivalent to SIZE. DATE Specifies that the file date and time are to be included in the out- put, together with file name, extension, and size. Personal REXX User's Guide, Version 3.0 10. LISTFILE, EXECIO, and GLOBALV page 10.4 ======================================================================== CHECKSUM Specifies that a "checksum" of the file is to be computed and includ- ed in the output, together with file name, extension, size, and date. The checksum is computed by shifting and adding file bytes. The resulting 32-bit number is then used to produce a 6-letter checksum. Identical files will have the same checksum, and it is very unlikely (but possible) that different files will have the same checksum. TREE Specifies that the file search should consider not only the specified or current directory, but all of its subdirectories as well. In addi- tion, the TREE option causes the directory in which each file resides to be listed in the output. STEM xxx Causes the output of LISTFILE to be assigned to REXX variables; valid only when issued from a REXX program. The name of the REXX variable is the concatenation of the stem xxx with a number n. N starts at 1 and is incremented to the total num- ber of lines read. For example, 'LISTFILE *.ASM (STEM ASSEMBLER' causes REXX variables ASSEMBLER1 through ASSEMBLERn to be assigned LISTFILE data and ASSEMBLER0 to be assigned n. (Since this command is issued from a REXX program, it is enclosed in quotes.) Similarly, 'LISTFILE \EZVU\*.EXE (STEM EZVU.EXE.' causes REXX variables EZVU.EXE.1 to EZVU.EXE.n to be assigned LISTFILE data and EZVU.EXE.0 is assigned n. Note: xxx is not necessarily a stem in the REXX sense -- that is, a simple symbol ending in . -- though it may be. It may also be a string like a.b.; in this case, names like a.b.1 would be formed and then evaluated in the usual way by REXX -- that is, with possible substitution for b. The STEM option may not be used together with either STACK, LIFO, or FIFO. ENVvar varname LISTFILE lists all files in the current directory that match the specified fileid and then, unless the fileid includes an explicit drive or path specification, in each of the directories listed in the specified environment variable. For example, if you specify the PATH environment variable LISTFILE will search each of the directories in your DOS PATH. If the environment variable is not found, only the Personal REXX User's Guide, Version 3.0 10. LISTFILE, EXECIO, and GLOBALV page 10.5 ======================================================================== current directory is searched. The TREE option is incompatible with, and will take precedence over, ENVVAR. 10.2. EXECIO The EXECIO command can be used to read lines from a file to the program stack or REXX variables, or to write lines from the program stack, the command line, or REXX variables to a file or the printer. EXECIO supports only the DISKR, DISKW, and PRINT functions of the CMS EXECIO command, but it supports almost all the options of these. It is included with Personal REXX mainly to provide a level of compatibility with CMS REXX programs that use the EXECIO command. The format of the EXECIO command depends on the function to be per- formed. To read lines from a disk file to the stack or REXX variables: EXECIO {lines|*} DISKR filespec [linenum] [([options]] Options: FInd /string/ LIFO STEm xxx LOcate /string/ FIFO VAR xxx Avoid /string/ Margins n1 n2 Zone n1 n2 STRIP FINIs NOTYPE To write lines from the stack, REXX variables, or command line to a file: EXECIO {lines|*} DISKW filespec [([options]] Options: Margins n1 n2 CAse [M|U] STRIP STring xxx ... NOTYPE STEm xxx FINIs VAR xxx To write lines from the stack, REXX variables, or command line to the printer: EXECIO {lines|*} PRINT [([options]] Options: Margins n1 n2 CAse [M|U] STRIP STring xxx ... NOTYPE STEm xxx CC {code|DATA} VAR xxx In each of these cases: Personal REXX User's Guide, Version 3.0 10. LISTFILE, EXECIO, and GLOBALV page 10.6 ======================================================================== lines The number of source lines to process. This can be any non-negative integer. During an output operation, an asterisk causes the command to terminate when a null line is read. During an input operation, an asterisk causes the command to terminate when the end of file is reached. linenum The absolute line number within the specified file where a DISKR operation is to begin. The first line of a file is line 1, but the number 0 is also accepted to mean the first line, which is the default if linenum is not specified. DISKW operations always append to the end of the file, regardless of the line number specified. Note: A left parenthesis must precede any options that are specified. Options that may be used to control the operation of EXECIO are: AVOID /string/ Is used in a DISKR operation to limit lines selected to only those which do not contain the specified character string. The ZONE option can be used to change the columns between which the string must not be found. All string comparisons are case sensitive. The first non- blank character after the option is taken as the string delimiter; it need not be /. For the first line that satisfies the condition, the contents of the line are written to the stack or REXX variable, followed by another line which contains two numbers: the number of file lines read and the absolute line number in the file. However, this option causes the default stacking option to be LIFO rather than FIFO, and so the rela- tive and absolute line numbers appear on the stack ahead of the line data. (If FIFO is used explicitly, the line data appears first.) CASE [M|U] Forces lines read from the stack or REXX variables for DISKW and PRINT operations to be converted to uppercase if U is specified. M (mixed case) is the default. Note: This option has no effect on DISKR operations. CC {DATA|char} Specifies that printer carriage control is to be used in the PRINT operation, and where the carriage control character should come from. If CC is not used, a line feed is printed before each line of data. Otherwise, the appropriate carriage control is used. CC DATA means that the first character of each line is interpreted as carriage con- trol. CC char explicitly specifies the carriage control character. The supported carriage control characters are: Personal REXX User's Guide, Version 3.0 10. LISTFILE, EXECIO, and GLOBALV page 10.7 ======================================================================== 0 (zero) Causes one line to be skipped (that is, one blank line printed) before the line of data. - (minus sign) Causes two lines to be skipped (that is, two blank lines printed) before the line of data. 1 Causes a page eject (that is, a form feed character is printed) before the line of data. + Causes overprinting on a printer that supports it (that is, no control characters are printed before the data). any other character Produces "normal" printing -- each line of data is printed as a new line, with no blank lines inserted. FIFO Causes the lines from a DISKR operation to be placed in the program stack first in-first out. This is the default, unless the FIND, LOCATE, or AVOID options are used. FIND /string/ Used in a DISKR operation to limit lines selected to only those which begin with the specified character string. The ZONE option can be used to change the column of the line at which the character string must start. All string comparisons are case sensitive. The first non- blank character after the option is taken as the string delimiter; it need not be /. For the first line that satisfies the condition, the line contents and the relative and absolute line numbers are written to the stack or REXX variables in the manner described for the AVOID option. FINIS Causes a file accessed by DISKR or DISKW to be closed when EXECIO terminates. In fact, because DOS automatically closes all of EXECIO's files when it terminates, the FINIS option is always implied after a DISKR or DISKW operation, even if you do not specify it. LIFO Causes the lines from a DISKR operation to be placed in the program stack last in-first out. This is the default if the FIND, LOCATE, or AVOID option is used. LOCATE /string/ Used in a DISKR operation to limit lines selected to only those which contain the specified character string. The ZONE option can be used Personal REXX User's Guide, Version 3.0 10. LISTFILE, EXECIO, and GLOBALV page 10.8 ======================================================================== to change the columns between which the string must be found. All string comparisons are case sensitive. The first nonblank character after the option is taken as the string delimiter; it need not be /. For the first line that satisfies the condition, the line contents and the relative and absolute line numbers are written to the stack or REXX variables in the manner described for the AVOID option. MARGINS n1 n2 Specifies what part of each line is to be placed on the stack or in REXX variables (DISKR), or to be read from the stack or REXX vari- ables (DISKW, PRINT). The part of the line is that between columns n1 and n2, inclusive. n2 may be *, indicating the end of the line. The default is MARGINS 1 *. For DISKR operations, MARGINS is not applied until after the line is selected, in case FIND, LOCATE, or AVOID is used. You must use the ZONE option to limit the part of the line to be scanned. For all operations, MARGINS is applied before the STRIP option. NOTYPE Suppresses the error message that would normally be issued on a fail- ure to open the input file with a DISKR operation. The return code from the command (28 in such a case) can be used to determine the results of command execution. STEM xxx Causes lines read from a file (DISKR) to be assigned to REXX vari- ables; or lines written to a file or the printer (DISKW, PRINT) to be taken from REXX variables. The name of the REXX variable is the concatenation of the stem xxx with a number n. N starts at 1 and is incremented to the total num- ber of lines read. Note: xxx is not necessarily a stem in the REXX sense -- a simple symbol ending in . -- though it may be. It may also be a string like a.b.; in this case, names like a.b.1 would be formed and then evalu- ated in the usual way by REXX -- that is, with possible substitution for b. For the DISKR operation, the highest value of n is also assigned to the xxx0 variable. When the FIND, LOCATE, or AVOID option is used, only three variables are assigned if the search is successful: * xxx0 will be 2, * xxx1 will be the first line that met the condition, * xxx2 will be the relative and absolute line numbers. Personal REXX User's Guide, Version 3.0 10. LISTFILE, EXECIO, and GLOBALV page 10.9 ======================================================================== The STEM option may not be used with either LIFO or FIFO, or with STRING. STRING xxx Specifies output data explicitly on the command line. The output data begins with the first character following the blank character that follows this option, and continues to the end of the command line. Therefore, STRING must be the last option on the line. If the number of lines to be processed in a DISKW or PRINT operation is greater than 1 (or is *), subsequent lines will be read from the stack until the specified number of lines (total) have been processed, or a null line is read. STRIP Removes all trailing blank characters from lines read from a file (DISKR), or to be written to a file (DISKW) or the printer (PRINT). This truncation occurs after a subportion of the line has been deter- mined by the MARGINS option. VAR xxx Causes one line read from a file to be assigned to the variable xxx (DISKR), or the value of the variable xxx to be written to a file (DISKW) or the printer (PRINT). If xxx is a compound variable, it is evaluated according to the normal REXX rules. The VAR option may not be used with FIND, LOCATE, AVOID, LIFO, FIFO, or STRING. The lines parameter of the command must be 1. ZONE n1 n2 Specifies what part of each line is to be used in handling the FIND, LOCATE, and AVOID options of DISKR -- that is, what part of the line is to be searched. The part of the line is that between columns n1 and n2, inclusive. n2 may be *, indicating the end of the line. The default is ZONE 1 *. Usage notes: * The REXX I/O functions LINEIN, LINEOUT, CHARIN, and CHAROUT often are more efficient methods of doing file I/O, and should be used in pref- erence to EXECIO when possible. * One of the limitations of the Personal REXX EXECIO is that it will not support reading or writing of the next record after each call. With each call EXECIO has to read through the file sequentially in order to get to the next record. * When FIND, LOCATE, or AVOID is used in a DISKR operation, the lines parameter determines the number of lines of the file to be read, not the number of lines actually placed on the stack or in REXX variables. Personal REXX User's Guide, Version 3.0 10. LISTFILE, EXECIO, and GLOBALV page 10.10 ======================================================================== * In the PRINT operation, any tab characters contained in the data are expanded to blanks as if tab stops occurred every 8 columns, the DOS default tab settings. A carriage return character is printed after each line of data. A line feed character is printed before each line of data, unless the CC option is used. * If the STEM or VAR options are used, it is important to enclose the string representing the stem or variable name in quotes -- or prefera- bly to enclose the whole command in quotes. * EXECIO accepts, but ignores, CMS record format and logical record length parameters for DISKR and DISKW. * Be careful when specifying long strings in various EXECIO options (either output strings or search strings) that the total command length does not exceed the DOS limit of 127 characters. The command will be truncated without any error indication. 10.3. GLOBALV When a REXX program finishes executing, the values of all of its vari- ables are lost. The GLOBALV command allows you to create global vari- ables whose values remain in effect as long as necessary, allowing val- ues determined in one REXX program to be accessed by REXX programs that you run later. GLOBALV serves a function similar to that of the GLOBALV command available on CMS. You can also think of it as extending the facilities provided by DOS environment variables. Before you can use GLOBALV, you must first be sure that you have run RXINTMGR, and then you need to run a program called GLVMGR. The syntax for GLVMGR is: GLVMGR [/Snn] [/NX] If you simply run GLVMGR, it will set aside 2K of your PC's memory to hold the values of global variables (along with some internal control blocks). You can tell GLVMGR to set aside a different amount of memory by using the /S option to tell GLVMGR how much memory (from 1 to 64 kilobytes) to set aside. For example, to set aside 4K for global vari- ables, you would issue GLVMGR /S4 GLVMGR supports EMS memory (Lotus-Intel-Microsoft expanded memory). If you have EMS memory and specify the /S option, the amount of memory requested with /S is rounded up to the nearest multiple of 16K. If there is less expanded memory available than requested, then the avail- able amount is used. Personal REXX User's Guide, Version 3.0 10. LISTFILE, EXECIO, and GLOBALV page 10.11 ======================================================================== The /NX option tells the Global Variable Manager not to use EMS, even if it is available. This may help performance with certain drivers that emulate EMS in software, and may be necessary if there are compatibility problems between Personal REXX and your EMS driver. There are two ways to set the values of global variables. You can speci- fy the names and values of the global variables involved on the GLOBALV command line or, in a Personal REXX program, you can give the names of the variables involved and have GLOBALV extract their current values from Personal REXX. GLOBALV can tell you the values of global variables in three ways. It can * display the values of global variables on your console, * put the information into the stack, * or, if you call GLOBALV from a Personal REXX program, assign the val- ues of global variables to REXX variables of the same name. You can control how long the value of a global variable will be retained. Global variables can be retained * until the next time you reboot, * until the end of a session at your PC, which may involve several reboots, or * permanently. Values of global variables are kept by GLOBALV in your PC's memory. In addition, variables retained until the end of a session are stored in a file called SESSION.GLV, and permanent variables are stored in a file called LASTING.GLV. SESSION.GLV and LASTING.GLV are kept in the root directory of whatever drive is the current drive when GLVMGR is run. Whenever you update the value of a "session" or "permanent" global vari- able, GLOBALV appends information to SESSION.GLV or LASTING.GLV to reflect the new value. The first time that you run GLOBALV after reboot- ing your PC, GLOBALV automatically reads SESSION.GLV and LASTING.GLV,¶ and sets its in-memory copy of the values of GLOBAL variables according- ly. GLOBALV has no way of determining when a session at your PC is over. Instead, at the start of what you consider to be a new session, you must erase the SESSION.GLV file. Otherwise, the values you give to session ========================= ¶ In addition, in order to remove any duplicate entries, LASTING.GLV is reorganized when you first run GLOBALV. A LASTING.BAK file with a copy of the unreorganized LASTING.GLV is also created. Personal REXX User's Guide, Version 3.0 10. LISTFILE, EXECIO, and GLOBALV page 10.12 ======================================================================== variables will remain in effect indefinitely, and the distinction between session and permanent variables will be lost. Session variables are in fact rarely used and are included mainly for compatibility with their CMS equivalents. The simplest way to set the value of a global variable is with GLOBALV's SET parameter. GLOBALV SET is followed by the name of a global variable and the value that you want to set. It is used to set the value of in- memory global variables, as opposed to session or permanent global vari- ables. You can set more than one name and value pair. For example, GLOBALV SET HEIGHT 25 GLOBALV SET FIRST_NAME Fred LAST_NAME Jones GLOBALV SET MIDDLE_NAME The first command sets the global variable HEIGHT to 25. The second command sets the variable FIRST NAME to Fred and sets LAST NAME to Jones. For the last variable specified with GLOBALV SET, you do not need to specify a value; in this case the variable will be set to the null string ('\,'). The third command above would set the variable MIDDLE NAME to the null string. When you use the GLOBALV SET parameter, GLOBALV expects the first string of nonblanks that it encounters to be the name of a variable, the second string of nonblanks to be its value, the third string to be the name of another variable, the fourth string its value, etc. Therefore, with GLOBALV SET, values assigned to variables cannot contain blanks.ý (GLOBALV SETL, described below, can be used when your values contain blanks.) For example, GLOBALV SET SENTENCE This is it! does not set SENTENCE to the string This is it!; it sets SENTENCE to This and sets IS to it!. The names of global variables are case insensitive; HEIGHT, HeighT, and height are all considered to name the same variable by GLOBALV. The val- ues of variables can contain any combination of uppercase and lowercase, and are stored by GLOBALV exactly as you supply them. Values set with GLOBALV SET will remain in effect until the next reboot. GLOBALV SETP is used to set permanent global variables, causing LASTING.GLV to be updated. GLOBALV SETS is used to set session global variables, causing SESSION.GLV to be updated. For example, ========================= ý The following characters should not be used as part of the value of a global variable: ASCII 0, ASCII 10 (line feed), ASCII 13 (carriage return), and ASCII 26 (end-of-file). Personal REXX User's Guide, Version 3.0 10. LISTFILE, EXECIO, and GLOBALV page 10.13 ======================================================================== GLOBALV SETP NAME Fred GLOBALV SETS WEATHER sunny The first command sets NAME, as a permanent global variable, to Fred. The second command sets session global variable WEATHER to sunny. GLOBALV SETL (think of it as SET Literal) can be used to set a global variable to a value containing blanks, which cannot be done with GLOBALV SET. The first string of nonblank characters after GLOBALV SETL is the name of the variable. The name is followed, after a single blank character, by the value of the variable. The rest of the command line, including any leading or trailing blanks, is taken by GLOBALV to be the value of the variable. For example, GLOBALV SETL SENTENCE This is it! sets the in-memory global variable SENTENCE to This is it!. To set a session variable to a value containing blanks, you can use either GLOBALV SETLS or GLOBALV SETSL. To set a permanent variable to a value containing blanks, you can use GLOBALV SETLP or GLOBALV SETPL. GLOBALV PUT, which can be issued only from within a REXX program, allows you to take the values of REXX variables and assign them to in-memory global variables. You pass the names of one or more of your REXX vari- ables to GLOBALV. GLOBALV extracts the values of these REXX variables and assigns them to global variables of the same name. (With GLOBALV PUTS you can set session global variables to the values of cor- responding REXX variables, and with GLOBALV PUTP you can set permanent global variables.) For example, /* rexx program using GLOBALV PUT */ name = 'Tom Jones' a.27 = 98.6 'globalv put name a.27' /* at this point, global variables NAME and A.27 are set to */ /* "Tom Jones" and "98.6" */ GLOBALV PUT should be used instead of GLOBALV SET whenever you have to set long values, because DOS commands are limited in length to 127 char- acters. (There are no error indications when a command is too long. It is simply truncated.) GLOBALV LIST, GLOBALV GET, and GLOBALV STACK are used to obtain the val- ues of global variables. In each case, you give a list of one or more global variables. For example, GLOBALV LIST NAME AGE A.27 This causes GLOBALV to display the values of global variables NAME, AGE, and A.27 on your console. Personal REXX User's Guide, Version 3.0 10. LISTFILE, EXECIO, and GLOBALV page 10.14 ======================================================================== GLOBALV STACK NAME AGE A.27 This causes GLOBALV to place three lines into the console stack. The first line contains the value of the global variable NAME, the second contains the value of AGE, and the third contains the value of A.27. Null lines are stacked for global variables that have not been assigned a value. 'globalv get name age a.27' /* issued from a rexx program */ This causes GLOBALV to set the value of the REXX variables NAME, AGE, and A.27 to the values of the corresponding global variables. If the corresponding global variables have not been assigned a value, the REXX variables are set to the null string. You may have a need for different sets of global variables, used for unrelated purposes. For example, you might use one set of global vari- ables to hold default values for options used by one of your REXX pro- grams, and another set of global variables to hold default values for options used by another of your REXX programs. It is useful to be able to access, display, and reset the global variables associated with a particular task as a group. If the groups are kept separate, you can also avoid the problem of two unrelated tasks trying to use variables of the same name for different purposes. For these reasons, GLOBALV keeps track of the "global variable group" in which each global variable belongs. Initially, all GLOBALV operations take place on a global variable group called the UNNAMED group. GLOBALV SELECT groupname tells GLOBALV that future operations should take place on variables in the specified group. GLOBALV SELECT UNNAMED or simply GLOBALV SELECT can be used to make the initial UNNAMED group once again become the default group. For example, GLOBALV SELECT APPL1 Makes APPL1 the default group. GLOBALV SET NAME Ed Sets NAME to Ed in APPL1 group. GLOBALV SET SPEED 20 Sets SPEED to 20 in APPL1 group. GLOBALV SELECT APPL2 Changes default group to APPL2. GLOBALV SET NAME Smith Sets NAME to Smith in APPL2 group. GLOBALV SELECT Sets UNNAMED group as default group. Personal REXX User's Guide, Version 3.0 10. LISTFILE, EXECIO, and GLOBALV page 10.15 ======================================================================== GLOBALV SETL NAME Ed Smith Sets NAME to Ed Smith in UNNAMED. GLOBALV SELECT APPL1 Switches default group back to APPL1. GLOBALV LIST NAME Shows NAME in APPL1 group is Ed. GLOBALV SELECT APPL2 LIST NAME In APPL2 group, NAME is Smith. GLOBALV LIST NAME Shows NAME in APPL1 group is Ed. If you issue GLOBALV SELECT groupname with no further operands, you select the default group used for future GLOBALV commands. This is only the default group, however. You can override the default group for a particular GLOBALV command by preceding the SET, SETL, PUT, GET, STACK, or LIST option with SELECT groupname, and the specified group will over- ride the default group for this particular command. This is illustrated in the second-to-last command in the example above. The default group is APPL1, but it is overridden by the explicit selection of the APPL2 group. The last command in the example above shows that APPL1 is still the default group, and was overridden for only one command. The complete set of options for the GLOBALV command is: Personal REXX User's Guide, Version 3.0 10. LISTFILE, EXECIO, and GLOBALV page 10.16 ======================================================================== GLOBALV INIT SELECT group [SELECT group] SET name1 value1 name2 value2 ... SETS name1 value1 name2 value2 ... SETP name1 value1 name2 value2 ... SETL name value SETLS name value SETSL name value SETLP name value SETPL name value PUT name1 name2 ... PUTS name1 name2 ... PUTP name1 name2 ... LIST name1 name2 ... GET name1 name2 ... STACK name1 name2 ... SELECT group PURGE PURGE GRPLIST GRPSTACK Wherever SELECT group is valid, SELECT with no group name is also valid, in which case UNNAMED is assumed. If any of the SET, SETL, PUT, GET, LIST or STACK options are preceded by a SELECT group phrase, GLOBALV acts on variables in the specified group. Otherwise, GLOBALV acts on variables in the default group. GLOBALV options summary: INIT Causes GLOBALV to reinitialize itself, as if you had rebooted. (INIT is automatically done the first time GLOBALV is called after a reboot.) SELECT group Changes the default group for future GLOBALV commands. SET name1 value1 name2 value2 ... SETS name1 value1 name2 value2 ... SETP name1 value1 name2 value2 ... Sets the value of one or more global variables. None of the values can contain blanks. SET affects global variable values only in memory. Personal REXX User's Guide, Version 3.0 10. LISTFILE, EXECIO, and GLOBALV page 10.17 ======================================================================== SETS affects session global variables, causing SESSION.GLV to be updated accordingly. SETP affects permanent global variables, causing LASTING.GLV to be updated accordingly. SETL name value SETLS name value SETSL name value SETLP name value SETPL name value Sets the value of a single global variable; the value can contain blanks. SETL affects global variable values only in memory. SETLS and SETSL are equivalent, affecting session global variables and causing SESSION.GLV to be updated accordingly. SETLP and SETPL are equivalent, affecting permanent global variables and causing LASTING.GLV to be updated accordingly. PUT name1 name2 ... PUTS name1 name2 ... PUTP name1 name2 ... Valid only if issued from within a REXX program. Global variables are given the same values as the REXX variable of the same name. PUT affects global variable values only in memory. PUTS affects session global variables, causing SESSION.GLV to be updated accordingly. PUTP affects permanent global variables, causing LASTING.GLV to be updated accordingly. LIST name1 name2 ... Displays on your screen the values of the specified global variables. (If no variables are specified, values of all global variables in the current group are displayed.) GET name1 name2 ... Valid only if issued from within a REXX program. REXX variables are given the same value as global variables of the same name. STACK name1 name2 ... Puts the values of the specified variables, one per line, into the console stack. Value of the first variable will be retrieved first from the stack, etc. Personal REXX User's Guide, Version 3.0 10. LISTFILE, EXECIO, and GLOBALV page 10.18 ======================================================================== SELECT group PURGE Causes all global variables in the specified group to be purged, as if you had assigned the null string to each of them with GLOBALV SET. Note that LASTING.GLV and SESSION.GLV are not affected. You must explicitly SELECT the group to be purged; GLOBALV PURGE purges all global variables, and not just the variables in the default group. PURGE Causes all global variables, in all groups, to be purged, as if you had assigned the null string to each of them with GLOBALV SET. LASTING.GLV and SESSION.GLV are not affected. GRPLIST Displays on your screen a list of all currently defined global vari- able groups. GRPSTACK Places the names of all currently defined global variable groups in the stack, one name per line, followed by a null line. Personal REXX User's Guide, Version 3.0 11. RXWINDOW Function Package page 11.1 ======================================================================== Chapter 11 RXWINDOW Function Package _________________________ RXWINDOW is a package of Personal REXX functions that can help give your REXX programs a window interface. Most experienced programmers should find RXWINDOW easy to use. You can program the windows to allow for menu selection or user input of multiple data fields. The functions provided are sufficient for implementing many different styles of user interaction. RXWINDOW is an optional function package; it must be explicitly loaded in addition to any other parts of REXX in order to be used. It typical- ly uses about 60K of memory, and takes advantage of EMS memory if it is available. RXWINDOW supports 25 line by 80 column displays. It can also handle EGA and VGA displays that you have placed into other modes, such as 43-line mode and 50-line mode. In addition to going through the individual function descriptions in this chapter, you should take a look at the example programs provided in the \SAMPLES subdirectory of the Personal REXX distribution disk. See CONTENTS.DOC for a list of the pertinent sample programs. 11.1. Loading the Function Package The RXWINDOW package is loaded with the RXWINDOW command, which has the format: RXWINDOW [options] Options are switches, individual switches being separated by blanks. There are four kinds of switches, as described below: Screen access method: /D -- direct read/write to display buffer /R -- direct read/write to display, with wait for horizontal retrace /B -- read/write access only through BIOS With the Direct method, the fastest method, Personal REXX accesses the display buffer directly. With the Retrace method, Personal REXX accesses the display buffer directly but is somewhat slower because it accesses the buffer only during the retrace interval, as is required for the IBM Color Graph- ics Adapter (CGA). Personal REXX User's Guide, Version 3.0 11. RXWINDOW Function Package page 11.2 ======================================================================== The Bios method uses BIOS to access the display buffer. This is much slower than the other two methods but may be required in some spe- cialized situations. The default screen method is Direct if you have a Monochrome Display Adapter, EGA, or VGA. Otherwise, the default screen method is Ret- race. Storage usage: /Snn -- Reserve nnK of storage for window data. When EMS memory is not available on your system, the default storage allocated for data is 25K, which makes the total storage requirement of RXWINDOW about 60K. If EMS is available on your system the default storage allocated for data is 32K, which makes the total storage requirement of RXWINDOW about 35K in DOS memory below 640K and 32K in EMS memory. The amount of memory specified with the /S option is rounded up to a multiple of 16K when EMS is used. If there is less EMS memory available than the amount requested, the available amount is used. The maximum you can request via /S is 64K. For each open window, storage is required primarily for two buffers -- one to hold the contents of the screen before the window is opened, and another to maintain an image of data currently in the window. To compute the storage requirement for a single window, take the number of characters in the window (height times width), multiply by two to allow for the attribute bytes, and multiply by two again for the second buffer. For instance, a full-screen window of 25 lines by 80 columns would take roughly 8000 bytes (25x80x2x2), plus a lit- tle more for control blocks. Note: Additional storage is required when fields are defined. Fur- ther, fragmentation of available storage can make it impossible to allocate large contiguous buffers. Expanded Memory Usage: /NX -- Window data is normally placed in EMS memory, if it is avail- able. The /NX option tells RXWINDOW not to use EMS, even if it is available. This may help performance with certain drivers that emu- late EMS in software, and may be necessary if there are compatibility problems between Personal REXX and your EMS driver. Miscellaneous: /Q -- Do not issue the normal identification message when loading. Personal REXX User's Guide, Version 3.0 11. RXWINDOW Function Package page 11.3 ======================================================================== 11.2. Windowing Functions This section describes the windowing functions available when RXWINDOW is loaded. The functions are divided into three groups: window control functions, field-related functions, and other I/O functions. 11.2.1. Brief Descriptions Full descriptions of the functions, organized alphabetically, appear later in this section. But first, here is a list organized by window function group, along with a brief description of each function: Window Control Functions W_OPEN() Opens a new window and returns the window handle. W_CLOSE() Permanently closes a window and removes all related information. W_BORDER() Displays a border for a window. W_HIDE() Temporarily suppresses display or updating of a window. W_UNHIDE() Restores a previously "hidden" window. W_MOVE() Changes the screen position of a window. W_KEYS() Alters the behavior of cursor control keys and Enter key during a call to W_READ. W_SIZE() Utility that returns the height and width of a window; analogous to built-in SCRSIZE() function. Field-Oriented Functions W_FIELD() Defines a named input area within a window into which data can be entered. W_UNFIELD() Removes an input field from a window. W_READ() Reads user input from all currently defined input fields. Other Window I/O Functions W_ATTR() Sets the screen attributes of a portion of a line in a window. W_CLEAR() Clears a window or a portion of a window; analogous to built-in SCRCLEAR() function. Personal REXX User's Guide, Version 3.0 11. RXWINDOW Function Package page 11.4 ======================================================================== W_GET() Reads user input from a specified input area in the win- dow. W_PUT() Displays a character string in a window, with optional display attribute and pad character. W_SCRPUT() Writes text and attributes to a window; analogous to built-in SCRPUT() function. W_SCRREAD() Reads text and attributes to a window; analogous to built-in SCRREAD() function. W_SCRWRITE() Writes text to a window; analogous to built-in SCRWRITE() function. 11.2.2. Full Descriptions W_ATTR(window,row,col,length,attr) Sets the screen attributes of a portion of a line in a window. Always returns 1. Window is the window handle as returned by W OPEN. Row and col are the row and column numbers within the window at which the string is to be written. (The upper left corner of the window is 1,1.) Length is the number of character positions affected. The output is truncated at the right edge of the window and does not wrap around. Attr is the display attribute to be used. The default is as defined by the W_OPEN call. W_BORDER(window,[top],[right],[bottom],[left],[attr]) Displays a border for window. Always returns 1. Each side of the window may be defined separately as a double line (2), a single line (1), or no lines (0). Specify top, right, bottom, and left as a number from 0 to 2. The default for each is 2. Attr is the display attribute of the border. The default is as defined by the W_OPEN call. You may change the border of a window at any time. Note that the bor- der is written within the window, on the first and last lines and in the first and last columns. This means that you can write labels or other information on the border. But it also means that character strings and data fields may inadvertently extend into the border. Personal REXX User's Guide, Version 3.0 11. RXWINDOW Function Package page 11.5 ======================================================================== W_CLEAR(window,[attr],[char],[row],[col],[height],[width]) Clears a window or a rectangular region within a window. The region can be filled with any desired character and display attribute. Always returns 1. Window is the window handle as returned by W OPEN. Attr is the display attribute to use in the cleared area. The default is as defined by the W_OPEN call. Char is the character to fill in the area. The default is a blank. Row and col define the row and column within the window of the upper left corner of the rectangular area. The default for each is 1. Height and width define the height and width of the area to be cleared. The defaults are the number of rows and columns remaining in the window. W_CLEAR is analogous to the built-in SCRCLEAR() function. W_CLOSE(window) Permanently closes window and removes all related information. The screen contents under the window are restored to what they were before the window was opened. Any input fields previously defined with W_FIELD are undefined. All buffers and control blocks are released. Always returns 1. You should close a window as soon as you are finished with it in order to allow room for other windows. (Any windows which have not been closed when the REXX processor terminates will be closed at that time. Memory associated with the window will be released, but origi- nal screen contents are not restored.) W_FIELD(window,field_name,row,col,length,[attr],[pad]) Defines a named input area within a window into which data can be entered. Returns 1 if successful, 0 if the field would be positioned outside the window. Window is the window handle as returned by W OPEN. The data is read with the W_READ function. The field is not actually displayed on the screen until W_READ is called. Field name is the name assigned to the field. The same name should not be used for different fields. Alphabetic case is ignored (even if field name is specified as a literal string, as it normally would be). This name is used to associate both input and output data with a particular field via a REXX variable of the same name. Personal REXX User's Guide, Version 3.0 11. RXWINDOW Function Package page 11.6 ======================================================================== Row and col are the row and column numbers within the window at which the string is to be written. (The upper left corner of the window is 1,1.) Length is the number of characters in the field. The field is trun- cated at the right edge of the window and does not wrap around. Attr is the display attribute to be used. The default is as defined by the W_OPEN call. Pad is the character to fill in the area. The default is a blank. This function may fail if insufficient memory is available to store control information, or if you accidentally define a field that falls outside of the window. If W_FIELD fails, a value of 0 will be returned. A value of 1 indicates successful operation. W_GET(window,row,col,length,[string],[attr],[pad],[activate]) Reads user input from a specified input area in a window and returns input string. Window is the window handle as returned by W OPEN. Row, col, and length specify the position and size of the input area. This area will be truncated if necessary at the right edge of the window; it does not wrap around. String, if specified, defines the initial contents of the input area.¶ If no data is actually entered, this value will be returned. Attr is the display attribute to be used. The default is as defined by the W_OPEN call. Pad characters may be used, either in addition to or instead of a display attribute, in order to indicate visually the size of the field. Any pad characters at the end of the string (but not else- where) are removed before the value is returned. The default pad character is a blank. Activate determines which keys are used to indicate that data entry is complete: N (Normal), the default, means that only the Enter and Esc keys fin- ish the operation. When Enter is pressed, the contents of the data field will be returned as a string. When Esc is pressed, a null string will be returned. ========================= ¶ The following characters should not be used as part of the value of string: ASCII 0, ASCII 10 (line feed), ASCII 13 (carriage return), and ASCII 26 (end-of-file). Personal REXX User's Guide, Version 3.0 11. RXWINDOW Function Package page 11.7 ======================================================================== F (Function-keys) means that in addition to the Enter and Esc keys, function keys and other special keys (other than the editing keys described below) also end the operation. Any data entered will always be returned. When W_GET is called, control does not return to the REXX program until data entry is complete. A code for the key that ended the operation will be placed in the REXX variable ACTIVATION KEY; this code is the same as provided by the INKEY function. The name of the key that ended the operation is placed in the REXX variable ACTIVATION KEYNAME. The key names that can be returned in ACTIVATION KEYNAME are: ENTER ESC F1 ... F12 S-F1 ... S-F12 C-F1 ... C-F12 A-F1 ... A-F12 PGUP, PGDN OTHER (for any other activation key) Notes: * A number of editing keys are available for entering input while W_GET is active: Backspace -- delete character to the left of cursor Del -- delete character under the cursor Home -- position cursor at start of input area End -- position cursor at end of input (excluding pad) Cursor Left -- move cursor left Cursor Right -- move cursor right Ctrl-End -- delete from cursor to end of field Ctrl-Home -- delete all characters in field Ctrl-Cursor Left -- position cursor at start of previous word Ctrl-Cursor Right -- position cursor at start of next word Ins -- toggle overtype/insert mode * When W_GET is called, overtype mode is in effect. It is indicated by a line cursor. A box cursor indicates insert mode. If you tog- gle modes with the Ins key, that mode remains in effect as long as the window is open or until Ins is pressed again. * Data entered is removed from the screen when W_GET returns. If you want data to remain displayed, you should call W_SCRWRITE to redisplay the data. * To avoid removal of trailing blanks in the input, specify a null character ('00'x) as the pad character. Personal REXX User's Guide, Version 3.0 11. RXWINDOW Function Package page 11.8 ======================================================================== * W_GET is intended for reading a single data item at a time. If you want to enter several lines of data at a time, use W_FIELD to define the input fields and W_READ to read in the data. W_HIDE(window,[option]) Temporarily inhibits the display of further data written to the win- dow and removes the window from the screen, making whatever was behind the window visible. Optionally, the window can be left visible even though no further data is displayed. Always returns 1. Window is the window handle as returned by W OPEN. Option can be: A (All), the default. All data in the window becomes invisible. N (New). Only new data written to the window is invisible. This is useful for making multiple updates to a window without a "paint- ing" effect being conspicuous. W_KEYS(window,[tab_option],[enter_option],[keyboard_option]) Controls various aspects of cursor and keyboard operations with the W_GET and W_READ functions for the specified window. Always returns 1. Window is the window handle as returned by W OPEN. Tab option can be either: J (Jump) causes the cursor to automatically jump from one field to another when W_READ is used with multiple fields in a window. A jump occurs when a character is typed in the last position of a field, or when the Cursor Left or Cursor Right keys are used at the left or right end of the field. Word tab functions (Ctrl- Cursor Right and Ctrl-Cursor Left) also cause jumps between fields. N (No jump) does not jump the cursor between fields except when the Cursor Up, Cursor Down, Tab, or Shift-Tab keys are used. This is the default. Enter option affects how the Enter key behaves during a W READ: A (Any field) causes the Enter key to act as an activation key when the cursor is in any field. This is the default. L (Last field) causes the Enter key to act as an activation key only when the cursor is in the last field of a window (as defined by the order of W_FIELD calls). When the cursor is in any other field, the Enter key causes it to jump to the next field. Keyboard option can be: Personal REXX User's Guide, Version 3.0 11. RXWINDOW Function Package page 11.9 ======================================================================== E (Enhanced) allows the F11, F12, and dedicated keypad keys on the IBM Enhanced Keyboard to act as activation keys. In addition, the key codes of certain keys on the dedicated keypad of the Enhanced Keyboard (such as PageUp/PageDown) are distinct from codes of keys on the numeric keypad. (There is no effect on the behavior of keys that do not cause activation.) The PCKEYBOARD function can be used to determine whether an enhanced keyboard is installed. F (Fold) is like E, except that key codes are "folded" so that, if you have an Enhanced Keyboard, analogous keys on the numeric and dedicated keypads have the same codes. This is the default option. O (Old) causes RXWINDOW to access your keyboard using "old" style BIOS calls, as supported on the original IBM PC, even if an IBM Enhanced Keyboard is present. W_MOVE(window,row,col) Restores the contents of the screen under the window at its current location, and redraws the window at a new location. Returns 1 if successful, 0 if window would be positioned off screen. Window is the window handle as returned by W OPEN. Row and col are the row and column numbers in the coordinate system of the entire screen of the new upper left corner of the window. The window cannot be moved to a new position if that would cause any part of the window to extend beyond the screen boundaries. W_OPEN(row,col,height,width,[attr]) Opens a new window, and returns the window handle. The window handle must be specified in all of the remaining functions to identify the window in question. A maximum of 20 windows can be open at one time. If W_OPEN fails because the maximum number of win- dows is already open, or there is insufficient memory, a null string will be returned. Row and col are the screen coordinates of the upper left corner of the window. (The upper left corner of the screen is 1,1.) Height and width are the dimensions of the window in character rows and columns. If part of the window would be off the screen, the height and width of the window will be adjusted to fit. (Note that you can open a window larger than 25 x 80, but only if your display is configured so that it uses more than 25 lines and 80 columns.) All parts of the window for which a screen attribute is not explicit- ly provided will use attr. The default for attr is 7. For informa- tion on how to specify attr, refer to the description of the SCRWRITE built-in function in Chapter 8, "Personal REXX Utility Functions". Personal REXX User's Guide, Version 3.0 11. RXWINDOW Function Package page 11.10 ======================================================================== W_PUT(window,row,col,[string],[length],[attr],[pad]) Displays a character string in a window, with optional display attri- bute and pad character. Always returns 1. Window is the window handle as returned by W OPEN. Row and col are the row and column numbers within the window at which the string is to be written. (The upper left corner of the window is 1,1.) String is the character string to be written. If not specified, the null string is assumed. Length is the number of characters to be written. The default is the length of string. The output is truncated at the right edge of the window and does not wrap around. Attr is the display attribute to be used. The default is as defined by the W_OPEN call. The default pad character is a blank. Note: W PUT is included primarily for compatibility with an earlier version of RXWINDOW. W_SCRWRITE, described later in this section, is the preferred method for writing to a window. There are two differ- ences between W_PUT and W_SCRWRITE: W_PUT W_SCRWRITE Output is truncated Output wraps if necessary. at right edge of window Like other windowing functions, Like Personal REXX built-in functions, attr precedes pad. pad precedes attr. W_READ(window,[field_name],[activate]) Reads user input from any currently defined input fields. At least one such field must have been defined. Window is the window handle as returned by W OPEN. If field name is specified, it designates the field in which the cursor is initially to be positioned. Alphabetic case is ignored (even if field name is specified as a literal string, as it normally would be). If a field name isn't specified, the cursor is initially positioned in the first field defined for window. Activate determines which keys are used to indicate that data entry is complete: N (Normal), the default, means that only the Enter and Esc keys fin- ish the operation. Personal REXX User's Guide, Version 3.0 11. RXWINDOW Function Package page 11.11 ======================================================================== If Enter is pressed, the data currently in each field will be assigned to the corresponding REXX variable. If Esc is pressed, W_READ terminates but does not set any REXX variables. F (Function-keys) means that in addition to the Enter and Esc keys, function keys and other special keys (other than the editing keys described in connection with W_GET) also end the operation. Any data entered will always be returned. In addition to the field variables, the following special vari- ables are set: ACTIVATION KEY contains the code for the key that ended W READ, if activate is F. ACTIVATION KEYNAME contains the name, in uppercase, of the key that ended W READ, if activate is F. (See W GET for a list of key names.) ACTIVATION FIELD contains the name, in uppercase, of the field that the cursor was in when the function was terminated, unless activate is N and the Escape key was used. W READ returns 0 if activate is N and the read is terminated by the Esc key. Otherwise, W_READ returns 1. Notes: * While W_READ is active, the user has the same editing keys avail- able as with W_GET. In addition, the Tab and Shift-Tab keys can be used to go to the next or previous fields. The up and down cursor keys have the same effect. See W_KEYS for how you can control the behavior of the editing keys during a W_READ. * At the time W_READ is called, each defined field is filled with the current value of the REXX variable having the same name. The pad character and attribute byte associated with the field are used in displaying this value. If the REXX variable is undefined, only pad characters will be displayed. If field name is the same as a REXX compound variable, the usual rules will be applied to determine the value. For instance, if field name is specified as 'age.person' and the REXX variable per- son has the value fred, then the value of age.fred is used. This will be the same result as if field name had been specified as 'age.fred' (provided fred itself is not a defined REXX variable). * When W READ terminates and the value of field name is set, this value will usually be that of the variable associated with the field. However, because of the REXX compound variable rules, data can be assigned to different variables if this process happens to Personal REXX User's Guide, Version 3.0 11. RXWINDOW Function Package page 11.12 ======================================================================== change any component, except the stem, of a compound name. For instance, if you have a field whose name was specified as 'person' and the REXX variable person is assigned the new value mary, then the data for the age.person field will be assigned to the REXX variable age.mary. (Since the assignments are made in the order the fields are defined, this presumes that the person field is defined before the age.person field.) W_SCRPUT(window,row,col,string,[option]) Displays a string of text, attributes, or both in a window. Always returns 1. Window is the window handle as returned by W OPEN. Row and col are the row and column numbers within the window at which the string is to be written. The upper left-hand corner of the win- dow is 1, 1. String is the string of text, attributes, or both which is to be written. If the string is too long to fit on the line of the window where it starts, it will wrap around to following lines, up to the end of the window. Option can be: T (Text), the default. The string contains only text characters. Attributes already present do not change. A (Attributes). The string contains only attribute characters. Text already present does not change. B (Both). The string consists of character-attribute pairs. The attribute character follows the text character in each pair. LENGTH(string)/2 screen positions are written. W_SCRPUT is analogous to the SCRPUT built-in function. W_SCRREAD(window,row,col,length,[option]) Reads and returns a string of text, attributes, or both from a win- dow. Window is the window handle as returned by W OPEN. Row and col are the row and column numbers within the window at which reading begins. The upper left-hand corner of the window is 1, 1. Length is the number of screen positions in the window to read. If the data to be read extends beyond the end of the line, the function will wrap around to following lines up to the end of the window. Option can be: Personal REXX User's Guide, Version 3.0 11. RXWINDOW Function Package page 11.13 ======================================================================== T (Text), the default. Only text characters are read. A (Attributes). Only attribute characters are read. B (Both). Character-attribute pairs are read. The attribute charac- ter follows the text character in each pair. Length pairs are read, for a total result length of 2 x length. Only data which has been written to the window with RXWINDOW func- tions is read by W_SCRREAD. W_SCRREAD is analogous to the SCRREAD built-in function. W_SCRWRITE(window,row,col,[string],[length],[pad],[attr]) Writes a text string to the screen at the specified row and column of a window. Always returns 1. Window is the window handle as returned by W OPEN. Row and col are the row and column numbers within the window at which the string is to be written. The upper left-hand corner of the win- dow is 1, 1. (Note that, unlike the Personal REXX built-in function SCRWRITE, row and col must be specified with W SCRWITE.) String is truncated (or padded with pad) to the given length. Charac- ters are written to the screen using the attribute attr. Text is not truncated at the right edge of the window, but instead wraps from line to line. The default for string is the null string. The default for length is the length of string. The default for pad is a blank. The default for attr is as defined by the W OPEN call. W_SCRWRITE is analogous to the SCRWRITE built-in function. W_SIZE(window) Returns the height and width of the specified window. Window is the window handle as returned by W OPEN. W_SIZE is analogous the the built-in SCRSIZE() function. W_UNFIELD(window,field_name) Removes an input field from a window. Always returns 1. Window is the window handle as returned by W OPEN. Personal REXX User's Guide, Version 3.0 11. RXWINDOW Function Package page 11.14 ======================================================================== Field name must have been defined previously with W FIELD. The area of the window occupied by the field will be cleared to blanks with the default window attribute. It is not necessary to call W_UNFIELD before closing the window with W_CLOSE. W_UNHIDE(window) Reverses the effect of W_HIDE, making a window and all further updates to it fully visible. Always returns 1. Window is the window handle as returned by W OPEN. 11.3. Specifying Field Names Many people who are just starting to use RXWINDOW have problems with programs that use W_FIELD and W_READ. The problems usually stem from errors in specifying field names passed to these functions. Field names should normally be specified as literal strings. For exam- ple, the program below has a subtle bug: name = 'John' w = w_open(4,3,3,50) call w_border w call w_put w, 2, 3, 'Name:',,15 call w_field w, name, 2, 9, 30, 112 call w_read w call w_close w say 'Name entered =' name say 'John =' john Here, a window is opened that has a single field. The programmer intended for this field to be called NAME, for this field to be initial- ized to John, and for any user input to override this initial value. What happens instead is that the field is named JOHN and no initial val- ue is set. Any user input changes the value of a variable called JOHN; the value of the variable NAME does not change. So, the program always displays Name entered = John The problem is with the clause call w_field w, name, 2, 9, 30, 112 REXX evaluates name, a variable that was previously assigned the value John. The name of the field is therefore JOHN. What's really needed is: Personal REXX User's Guide, Version 3.0 11. RXWINDOW Function Package page 11.15 ======================================================================== call w_field w, "name", 2, 9, 30, 112 REXX evaluates the literal string "name". The name of the field is therefore NAME, as desired. 11.4. Usage Notes * If you have defined overlapping windows, you should work only with the topmost window. For example you should not close or move a window if overlapping windows are defined on top of it. Otherwise, incorrect data may be displayed in the overlapping area. * You cannot conveniently mix window-oriented screen interaction with normal screen I/O. The REXX SAY instruction, the Personal REXX built- in function SCRWRITE, and any program that writes to the screen with normal DOS facilities will probably either overwrite a window or cause unwanted scrolling. There is no way to redirect such output directly to a window. However, the output of many commands can be redirected to a file, and portions of this file could be displayed using the window- ing function package. * If you want to save the contents of the screen before displaying a window or running a program that needs to use the screen itself, a convenient method is to define a window that covers the whole screen (without borders). When this window is subsequently closed, the previ- ous contents of the screen will be restored. Just remember that each such full-screen window requires 8000+ bytes of storage. * Another method of saving and restoring screens is to use the SCRREAD and SCRPUT built-in functions. This takes only 4000 bytes of storage per screen. * REXX programs that use windowing functions can test whether the RXWINDOW package is loaded by using FCNPKG('RXWINDOW') * If you want to unload the function package to utilize the storage for other purposes, you can use the RXUNLOAD command, described in Chap- ter 3, "Running Personal REXX". The format of the command is: RXUNLOAD RXWINDOW Personal REXX User's Guide, Version 3.0 Appendix A: Personal REXX Application Program Interfaces page A.1 ======================================================================== Appendix A Personal REXX Application Program Interfaces ____________________________________________ This chapter is intended for experienced software developers who wish to build Personal REXX interfaces into their programs. Familiarity with IBM's DOS Technical Reference manual is assumed, as is experience with PC Assembler language and with interfacing Assembler or C programs with the 8088/80286 interrupt system. REXX can be used as a command or macro language for any application which has internal commands. Examples of applications which can benefit from this facility include: * Editors * Panel managers * Communications programs * Database managers This appendix describes the interfaces available to application programs and documents the control blocks and interrupt calls involved. A.1. Types of Application Program Interfaces There are several application program interfaces to Personal REXX. Pro- grams also have complete access to the console stack. Details on using the interfaces are given later. The following gives an overview of the available interfaces. A.1.1. Running a REXX Program as a Macro This interface allows you to run a REXX program from an application. REXX programs run in this way are typically called "macros". The application can pass parameters to the REXX program. The REXX pro- gram can return information to the calling application. The application program can optionally establish an "environment" to handle commands issued by the REXX program. Applications can also tell REXX that the application is able to handle service calls from the REXX processor. Such service calls allow the application instead of REXX to perform certain functions needed by the REXX processor, like keyboard and screen I/O or the loading of new REXX programs. Personal REXX User's Guide, Version 3.0 Appendix A: Personal REXX Application Program Interfaces page A.2 ======================================================================== A.1.2. Function Package Interfaces Function packages provide a means of extending the complement of avail- able built-in functions. Function packages must be resident in memory before they are used. They can either be part of an application, or loaded independently as a DOS extension. Functions in function packages can be used like internal and built-in REXX functions. They can be passed parameters and can return results to the caller. A.1.3. Resident Environments Like an application program, a resident environment handles commands passed from a REXX program. Such commands are usually issued with the ADDRESS instruction. Unlike an application program, a resident environ- ment generally remains loaded as a resident extension of DOS and so is available any time during a session. A resident environment is installed like a function package. A resident environment can be used to add new resident commands to the operating system that are available from any REXX program (but not from DOS itself). A.1.4. Shared Variable Interface This interface allows applications to query, set, or drop "exposed" REXX variables. Application programs can also obtain "private" information from REXX, such as the version number and primary argument string. A.1.5. Accessing the Console Stack The console stack (described in Chapter 9, "Console Stack and Related Utilities") can be manipulated from application programs. All stack related features used by REXX can be simulated in application programs, since REXX uses the same interfaces available to application programs. A.2. Examples of Application Program Interfaces A.2.1. Personal REXX Calls to Application Environments The \API directory of the Personal REXX distribution disk contains exam- ples of how application programs can call REXX programs. In these exam- ples, the flow of control looks like this: * User runs MYAPPL.EXE with REXX loaded. * The MYAPPL.EXE program finds the REXX interrupt and ensures that REXX is loaded. Personal REXX User's Guide, Version 3.0 Appendix A: Personal REXX Application Program Interfaces page A.3 ======================================================================== * The MYAPPL.EXE program contains a call to REXX to run an application macro command called MACRO. It specifies an environment name of APPLENV and a default file extension of APL. REXX executes the file called MACRO.APL. Any commands issued from that file are passed back to the application at a special entry point. Or, the macro file could have an explicit ADDRESS APPLENV something instruction in it. * When the application is called by REXX, it is reentered at a location defined by the Environment Block, and it processes the command that is passed from REXX. This could even include another re-entry to REXX with another environment specified. When the application command is complete, control returns to REXX. * When a RETURN or EXIT command is executed to terminate MACRO.APL, REXX finally returns to the application, and the APPLENV environment is forgotten. A.2.2. Function Packages This discussion uses a hypothetical program called TIMERTNS.EXE, which handles certain time conversion functions, including the TIMECONV() function. * The user runs TIMERTNS.EXE from the DOS prompt. * TIMERTNS.EXE finds the REXX interrupt, and uses the REXX interrupt to install a function package. It then issues a DOS terminate-but-stay- resident call (DOS function 31H) to make itself resident in memory. * A REXX program subsequently issues a function call to the TIMECONV() function. * Since TIMECONV() is not an internal or built-in function, REXX calls currently defined function packages to determine whether they can han- dle the function call. (This process is detailed in the section describing the REXX_FCN function call below). * The resident portion of TIMERTNS.EXE handles the call. It has access to the value of any parameters, and returns a result string, like any REXX function. Upon return, it informs REXX that it handled the call. * The REXX program that issued the TIMECONV() function call continues processing, using the value returned by the function. A.2.3. Shared Variable Interface A good example of the use of the Shared Variable Interface is the EXTRACT command that is part of the REXXTERM communication package, which sets REXX variables to contain information about the status of the editor. Assume that a REXXTERM script called SAMPLE1.RXT issues the EXTRACT command. The flow of control looks like this: Personal REXX User's Guide, Version 3.0 Appendix A: Personal REXX Application Program Interfaces page A.4 ======================================================================== * The user runs REXXTERM with REXX loaded. * The user runs SAMPLE1.RXT by issuing the command MACRO SAMPLE1 to doublespace the file. * SAMPLE1.RXT issues the EXTRACT /AREACODE/ command. * REXX passes the command to REXXTERM, because the REXXTERM environment is active. * REXXTERM uses the Shared Variable Interface to set the REXX variable SIZE.1 equal to the default Area Code. * SAMPLE1.RXT can use the SIZE.1 variable like any other REXX variable. A.3. Personal REXX Control Block Overview See Section "Personal REXX Control Blocks" for detailed control block definitions. Argument Block (arg_block) Describes a parameter (argument) to the called program. Each Argument Block contains the address and length of a parameter. Break Block (break_block) Is used to indicate that a Ctrl-Break occurred. One field in the Break Block is used by REXX to inform the calling application that a Ctrl-Break occurred. The other field can be used by an application program to inform REXX that a Ctrl-Break occurred while the applica- tion was handling a command or function issued by a REXX program. Call Block (call_block) Defines the program being called, its parameters, and how information is to be returned. The Call Block can point to an Environment Block, an array of Argument Blocks, and a Break Block. Environment Block (env_block) Informs REXX that an application has a command interface to which REXX can pass commands to be executed by the application. The Envi- ronment Block specifies the name of the environment, the default file extension to be used in searching for macro files, and some internal information (such as the address of the entry point for handling com- mands). Personal REXX User's Guide, Version 3.0 Appendix A: Personal REXX Application Program Interfaces page A.5 ======================================================================== An Environment Block is also used when you define a function package or resident environment to Personal REXX, in which case information such as the name of the function package and the entry point for the function handler is passed. Shared Variable Block (shvblock) Is used by application programs to access the Shared Variable Inter- face. It specifies the function (Set, Fetch, etc.), the variable name, and the value of the variable. A.4. Notes on Using Program Interfaces A.4.1. General Rules * All Personal REXX facilities are called through the REXX Interrupt. Before using REXX, an application program must determine the REXX Interrupt number. The file FINDREXX.ASM on the Personal REXX distribu- tion disk should be included in an assembler program to determine the REXX Interrupt number. High level languages should call an assembler program which uses FINDREXX.ASM. See the distribution disk for exam- ples. * To call REXX, the AH register must contain the REXX function code. Other registers may also need to be set. See the REXX interrupt func- tion definitions below for a list of register conventions for each function. * The functions REXX_CALL, REXX_SHV, and REXX_UNLOAD should be invoked only when you know that the REXX processor is loaded into memory. This can be determined by calling the REXX_VERSION function with AL set to 0. If AL is still 0 on return, the REXX processor is not load- ed. * Likewise, before using any of the functions that access the console stack, an application should determine whether STACKMGR is loaded. This can be done by invoking the STK_STATUS function. If AH is nonzero on return from this function call, STACKMGR is not loaded. * All control block references should be symbolic, using the definitions in the appropriate include files. Include files for Microsoft C and Microsoft Assembler are on the Personal REXX distribution disk. * All unused fields in control blocks should be set to zero before call- ing REXX. This is normally done by zeroing out the entire control block before filling in any of the fields. * All addresses (pointers) in Personal REXX control blocks are double- words in the usual format (that is, segment address in the high order word and offset in the low order word). Personal REXX User's Guide, Version 3.0 Appendix A: Personal REXX Application Program Interfaces page A.6 ======================================================================== A.4.2. Expanded Memory Usage * If expanded memory---the Lotus-Intel-Microsoft Expanded Memory Stan- dard, or EMS---is present in the system, it will be used by REXX (unless you use the /NX option). When it calls the application REXX will not restore the page mapping that was in effect in the applica- tion. It is every application's responsibility to ensure that its EMS page mappings are current after return from REXX. It is not necessary for the application or function package to restore REXX's page mapping before returning to REXX. There is only one exception to this rule: when REXX calls a function package to resolve a function or subroutine reference (as described in Section "Function Package Processing") and the function package does not handle the call then REXX assumes that the EMS page mapping has not been altered. In this case the application normally would not need to use EMS calls, but if it does, it is responsible for restoring REXX's page mapping. * Control blocks and data areas referenced in the control blocks cannot be in expanded memory. A.4.3. Calling REXX from an Application Program * The REXX processor is called to run a program by using the REXX_CALL function. * The call block is required. It describes the program name and the parameter list. * The environment block is optional. It supplies information that is required only if REXX is to call the application. * The application may pass the address of a break block to REXX in either the call block or the environment block. If both contain addresses, the one in the environment block will be used. REXX will set the break_rexx field of the break block if it returns to the application because a REXX program was terminated by Ctrl-Break. * If you want the REXX processor to search for your program using a path other than the DOS-defined path, you can specify it via the env_path_addr and env_path_length fields of the environment block. * REXX redefines the interrupt vectors for interrupts 23H (Ctrl-Break exit address) and 24H (critical error) while it is active, but it restores these to the application's values before returning to the application. * The value returned from a REXX procedure may be a character string of arbitrary length. The value will be placed in the application's buffer pointed to by the ret_addr field of the call block. The application Personal REXX User's Guide, Version 3.0 Appendix A: Personal REXX Application Program Interfaces page A.7 ======================================================================== specifies the length of this buffer in the ret_size field. REXX indi- cates the actual length of the returned value in the ret_count field. A.4.4. Application Handling of Commands Passed from REXX * The application will be called via a far call to the address env_entry_addr in the environment block. * The registers at the time of this call will contain: DS -- data segment from env_dseg in the environment block ES:SI -- address of the environment block ES:AX -- address of the command string CX -- length of command string * The application should make its own copy of the string whose address is passed in ES:AX. The original copy may not be valid if REXX is lat- er called for any reason. * When called, REXX's stack will be active. The application should switch to its own stack as soon as possible. It may use the informa- tion it has placed in env_sseg and env_sp of the environment block for this purpose, or any other reasonable technique for setting up a new stack. * REXX redefines the interrupt vectors for interrupts 23H (Ctrl-Break exit address) and 24H (critical error) while it is active, but it restores these to the application's values before calling the applica- tion. * When returning to REXX, the application can indicate that a Ctrl-Break occurred by setting the break_env field of the break block. * The value in the AX register when the application returns to REXX is taken as the return code and assigned to the RC variable. A.4.5. Function Package Processing * A function package is defined to REXX via the REXX_FCN call, discussed in Section "REXX Interrupt Functions". This call is typically made either at the time a resident function package is loaded or in an application before a call is made to run a REXX program. * The REXX processor need not be resident when you install or uninstall a function package using the REXX_FCN call. * The environment block contains space for an 8-character name for the package. The name should be padded with blanks if shorter than eight characters. The name should be distinct from the names of any other package or resident environment, and from the reserved names DOS and COMMAND. Alphabetic case of characters in the name is not significant. Personal REXX User's Guide, Version 3.0 Appendix A: Personal REXX Application Program Interfaces page A.8 ======================================================================== * REXX makes a copy of the environment block whose address is passed in the REXX_FCN call. Therefore, any subsequent changes made to the block are disregarded. In particular, data areas described by the block, such as the break block, should not be moved or deallocated before the package itself is uninstalled. * The function package will be called via a far call to the address env_entry_addr in the environment block. * The registers at the time of this call will contain: DS -- data segment from env_dseg in the environment block. ES:SI -- address of the environment block ES:BX -- address of the call block * When called, REXX's stack will be active. The function package should switch to its own stack as soon as possible. It may use the informa- tion it has placed in env_sseg and env_sp of the environment block for this purpose, or any other reasonable technique for setting up a new stack. * An application that defines a function package should consider the possibility that the package entry point may be called recursively if there is the possibility of calls to the REXX processor while a func- tion is being handled. This may complicate properly setting up the stack on entry, but is generally manageable by keeping track internal- ly of an appropriate stack pointer value before any call to REXX. * If a function package is part of an application, it is important to realize that REXX does not restore interrupt handlers for interrupts 23 and 24 prior to the package call. Therefore, the application will have to ensure these are properly set up for its requirements while handling a function call. * If a function package does change interrupt vectors 23 and 24, it does not need to restore them before returning to REXX. If it changes any other interrupt vectors, it must restore them, unless the change is intended to be permanent. * When returning to REXX, the function package can indicate that a Ctrl- Break occurred by setting the break_env field of the break block. * The AX register is used on return to REXX to indicate results of the function package call. A value of 1 means the function was not handled by this package. A value of 0 means that the call was successfully handled. Any other value means the call was handled, but that there was an error in the calling sequence. * REXX does not maintain a buffer into which the result to be returned by the function may be placed. Instead, this value is normally held in storage belonging to the function package. The ret_addr field of the Personal REXX User's Guide, Version 3.0 Appendix A: Personal REXX Application Program Interfaces page A.9 ======================================================================== call block should be set to the address of this result, and the ret_count field should be set to its length. * If necessary, you can use DOS function 48H to allocate additional storage to hold long results and indicate this to REXX by placing the negative of the length in the ret_count field. REXX will then release the storage with a DOS 49H function call. Note that this length field is a doubleword (4 bytes). * When the REXX processor is done processing the highest level REXX pro- gram, it makes a call to each function package defined at the time. The length of the function name passed in the name_length field of the call block will be 0. This is done as an indication to the function package that REXX has terminated. At this time, any necessary clean-up can be done by the function package, such as closing files, releasing control blocks, etc. A function package should be coded so it can properly handle 0-length names, even if only to ignore them. No results should be returned to REXX for such a call. A.4.6. Resident Environment Processing * A resident environment is defined to REXX via the REXX_FCN call, as discussed in Section "REXX Interrupt Functions". This call should be made when the resident environment is loaded. The only difference that indicates a resident environment rather than a function package is that the env_flag_resident bit of the env_flag field of the environ- ment block should be set. * The environment block contains space for an 8-character name for the environment. The name should be padded with blanks if shorter than eight characters. The name should be distinct from the names of any other package or resident environment, and from the reserved names DOS and COMMAND. Alphabetic case of characters in the name is not signifi- cant. * REXX makes a copy of the environment block whose address is passed in the REXX_FCN call. Therefore, any subsequent changes made to the block are disregarded. In particular, data areas described by the block, such as the break block, should not be moved or deallocated before the package itself is uninstalled. * The resident environment will be called via a far call to the address env_entry_addr in the environment block. * The registers at the time of this call will contain: DS -- data segment from env_dseg in the environment block. ES:SI -- address of the environment block ES:AX -- address of the command string CX -- length of command string Personal REXX User's Guide, Version 3.0 Appendix A: Personal REXX Application Program Interfaces page A.10 ======================================================================== * When called, REXX's stack will be active. The resident environment should switch to its own stack as soon as possible. It may use the information it has placed in env_sseg and env_sp of the environment block for this purpose, or any other reasonable technique for setting up a new stack. * REXX's interrupt handlers for interrupts 23H and 24H will be in effect at the time of the call to the resident environment. If the command processor needs to handle Ctrl-Break or critical error conditions, it will have to ensure these vectors are properly set up for its require- ments when handling each call. * If a resident environment does change interrupt vectors 23H and 24H, it does not need to restore them before returning to REXX. If it changes any other interrupt vectors, it must restore them, unless the change is intended to be permanent. * When returning to REXX, the resident environment can indicate that a Ctrl-Break occurred by setting the break_env field of the break block. * The value in the AX register when the application returns to REXX is taken as the return code and assigned to the RC variable. A.4.7. Using REXX Service Calls in an Application When an application is using the REXX processor to process a command file, it may be desirable for the application itself to handle utility services for the REXX processor. An example of such services is reading from the keyboard and writing to the screen. REXX reads from the key- board when handling the PULL instruction and writes to the screen when handling the SAY instruction and when there are error or tracing messag- es. This can be very inconvenient for full-screen applications, either because the REXX output disrupts the screen or because it is simply lost. By providing service calls, the application can handle such func- tions in its own way, and thereby provide a much more predictable user interface. There are three possible service calls currently supported: screen out- put, keyboard input, and file loading. An application tells the REXX processor that it can handle these calls by setting appropriate bits in the env_service_type field of the environment block. The bits are named OUTPUT_SERVICE, INPUT_SERVICE, and FILE_SERVICE, respectively. The application must also provide an entry point address to handle these services in the env_service_addr field of the environment block. The REXX processor will handle all services by means of a far call to this address. Which service is requested is defined by the AX register as follows: AH = 1 for output service AH = 2 for input service AH = 3 for file service Personal REXX User's Guide, Version 3.0 Appendix A: Personal REXX Application Program Interfaces page A.11 ======================================================================== AL should be 0 in all cases; in the future, other values of AL may indi- cate different subtypes of service call. ES:SI will always contain the address of the environment block, and DS will contain env_dseg from the environment block. For all other regis- ters the contents depend upon the type of call. The registers for each call type are: output service: S:BX -- address of string to write CX -- length of string to write input service: ES:BX -- buffer to contain data read CX -- length of buffer (on entry), length of data read (on return) file service: ES:BX -- buffer to receive a line CX -- length of buffer (on entry), length of line (on return) DX -- file line number ES:DI -- name of "file" being read (terminated by a null character) The output service function should display the line for the user. The input service function should obtain a line of input by some means and return it to REXX's buffer. The file service function is a little more complicated. Its purpose is to supply the individual lines of a REXX program. These might, for instance, be kept loaded in memory for improved performance. Each line passed to REXX should be terminated with a "newline" character (0AH, a linefeed). On return to REXX, the AX register should contain a return code. AX=0 indicates successful operation. AX=1 indicates end of file. Any other value of AX indicates an error. REXX will always request lines in order, starting with line 1. Processing in the service routines should ordinarily be kept simple for best performance. REXX should not be reentered from a service routine. Other considerations are much the same as with other forms of the REXX API: * When called, REXX's stack will be active. The service routine should switch to its own stack as soon as possible. If the application is such that nesting of calls to REXX is possible, then as with function packages, it is possible that the service routine may be called at different levels of recursion. This entails a little more care than simply using information in the environment block to set up the stack. Personal REXX User's Guide, Version 3.0 Appendix A: Personal REXX Application Program Interfaces page A.12 ======================================================================== * REXX's interrupt handlers for interrupts 23H and 24H will be in effect at the time of the call to the service handler. If it is necessary to handle Ctrl-Break or critical error conditions, the service routine will have to ensure these vectors are properly set up for its require- ments when handling each call. * If a service routine changes interrupt vectors 23H and 24H, it does need to restore them before returning to REXX. If it changes any other interrupt vectors, it must restore them as well. A.5. Personal REXX Interrupt Functions REXX_CALL Run a REXX macro. BX:DX must contain the address of a Call Block. REXX must be loaded to use this function. REXX places the macro's return code at the address specified in the ret_addr field in the Call Block. The call_status field in the Call Block can be used to determine whether a REXX error occurred. If the Call Block points to an Environment Block, the caller becomes eligible to have its commands executed from within REXX programs. When the application's command handler is invoked by REXX, ES:AX points to the command string, CX contains the length, and ES:SI points to the Environment Block. If no Environment Block is specified (address of 0:0), then the default environment available within REXX is called DOS. The DOS environment is always available through the Personal REXX ADDRESS DOS instruction.¶ On return from the call register AX contains a return code which is normally 0. A value of -1 in AX indicates a problem in REXX program initialization, such as insufficient memory. A value of -2 indicates the REXX program could not be found. REXX_SHV Shared Variable Interface Request. BX:DX must contain the address of a Shared Variable Request Block. REXX places return codes in the shvret field in the shvblock. Several functions can be specified in the shvcode field. These are documented in the shvblock detailed description below. REXX must be loaded to use this function, and an error indicator will be returned if a REXX program is not running when the function is invoked (AX will be set to -3) or if you try to set the value of a REXX variable but REXX does not have enough memory to do so (AX will ========================= ¶ The DOS environment cannot be used while your application is loaded unless your application frees enough memory for DOS to use. Personal REXX User's Guide, Version 3.0 Appendix A: Personal REXX Application Program Interfaces page A.13 ======================================================================== be set to -2). REXX_FCN Function Package Call. BX:DX must contain the address of an Environ- ment Block. AL must contain one of the following subfunctions: FCN_INSTALL Installs the function package. On return, AX = 0 if the call was successful, AX = 1 if 10 function packages (the limit) are already installed, AX = 2 if a package with the same name as yours (in the env_name field of the Environment Block) is already installed. FCN_UNINSTALL Uninstalls the function package. On return, AX = 0 for a success- ful uninstall, or AX = 1 if there is no installed function package whose name matches the name in the env_name field of the Environ- ment Block that you pass. When the REXX processor is trying to resolve a function or subroutine reference, it first looks for internal and built-in routines. If the name is not found as an internal or built-in routine, REXX then makes a call to each of the function packages that has identified itself. In each call, ES:BX point to a call block built by REXX, and ES:SI point to the environment block. The application has access to the parameters through the Argument Blocks pointed to by the Call Block. When called, each package must decide whether it will handle the present call. If it does not, then it returns with AX = 1. If it does handle the call, then it should return with AX = 0, together with a result string (if appropriate). Any other return code indicates that the package tried to handle the call but encountered some error con- dition. REXX continues to call known function packages until it gets a return code other than 1. If no function package elects to handle the call, REXX finally attempts to handle the call by loading a REXX program from disk. Note that if a function package is not in a terminate-and-stay- resident program, but is instead built into an application, REXX must be called by the application to unload the function package before the application terminates. REXX_UNLOAD Unload resident REXX processor. BX must contain the segment address of the Program Segment Prefix (PSP) of the calling program. REXX must be loaded to use this function. See the description of the /U parame- ter to the RX command for more information. Personal REXX User's Guide, Version 3.0 Appendix A: Personal REXX Application Program Interfaces page A.14 ======================================================================== REXX_VERSION Returns Personal REXX version number. AL should be set to zero. On return AL contains the major version number and AH contains the minor version number. For example, for Personal REXX version 1.60, the major version number was 1 and the minor version number was 60 (hexa- decimal 3C). If REXX is not loaded, AL will still be 0 on return. STK_WRITE Write to the program stack. Calling conventions are: AL = WRITE_FIFO or WRITE_LIFO DL = character to write DH = scan code (To insert a delay of n seconds into the stack, use DL = n and DH = FF.) On return, AX=0 if successful, AX=1 if stack is full. STK_BYPASS Read directly from keyboard buffer (bypass stack), waiting if neces- sary until a character is available. On return, AL contains a char- acter, AH contains its scan code. STK_READ Same as STK_BYPASS, except that if the keyboard buffer is empty, there is no wait for a character to become available. On return, zero flag is set (1) if no characters are available; else ZF=0, and next character and scan code are returned in AL and AH, respec- tively. STK_MAKEBUF Make a new program stack buffer. Returns -1 in AX if maximum of 16 buffers is exceeded, else returns number of buffer created. STK_DROPBUF Drop a program stack buffer. If AL is DROPBUF_CURRENT, drop the cur- rent buffer. If AL is DROPBUF_BUFFNO, drop the buffer whose number is supplied in DX, and all higher numbered buffers. On return, AX = 0 if successful, else invalid number supplied. STK_USED Count characters in program and keyboard stacks. On return, AX = number of characters in keyboard stack, DX = number of characters in program stack. Personal REXX User's Guide, Version 3.0 Appendix A: Personal REXX Application Program Interfaces page A.15 ======================================================================== STK_SET_STATUS Enable or disable program stack. If AL = SET_DISABLE, the program stack is disabled, and subsequent reads will be directly from keyboard stack. (Data in the program stack is kept, and the program stack can be added to, but it can't be read from until the stack is reenabled.) If AL = SET_ENABLE the program stack is reenabled. STK_SENTRIES Count "lines" in the program stack. On return, AX = number of lines in the program stack (that is number of carriage return characters). The keyboard stack is ignored. STK_STATUS Determine presence of console stack handler. On return, AX = 0 if the console stack facility is installed and enabled. If AX = 1 the program stack is installed but disabled. If AX is unchanged (in par- ticular, AH will be nonzero), the console stack handler is not installed. STK_BUFFNO Retrieve the current program buffer number (determined by MAKEBUF). On return, AX = current program buffer number. STK_FREE Retrieve free space in stack. On return, AX = number of free charac- ters. A.6. Personal REXX Control Blocks This section describes the fields in the control blocks that your appli- cation must use to communicate with Personal REXX. All unused or unde- fined fields in control blocks passed to REXX from your application must be set to 0. You would normally accomplish this by zeroing out the con- trol blocks before you fill in the fields you will use. A.6.1. arg_block (Argument Block) Note: When multiple argument blocks are used (that is, when arg count field in Call Block is greater than one) Argument Blocks must be contig- uous. arg_addr Address of an argument (or 0 for an omitted argument) arg_length Length of the argument Personal REXX User's Guide, Version 3.0 Appendix A: Personal REXX Application Program Interfaces page A.16 ======================================================================== A.6.2. break_block (Break Block) break_env Normally zero. Set to one by the application program if, while it is processing a command or function passed to it from REXX, it senses a Ctrl-Break that it wants REXX to handle. If this field is nonzero when control returns to REXX, REXX will reset it to zero and then terminate the active program with error code 4 (program interrupted). break_rexx Normally zero. Set to one by REXX before it terminates a REXX program with error code 4 (program interrupted). A.6.3. call_block (Call Block) The following documentation refers to fields as being set by the caller or by the callee. When an application calls REXX to execute a REXX pro- gram, the application is the caller, and REXX is the callee. When REXX calls a function package, the roles of the caller and callee are reversed. arg_list_addr Address of a table of Argument Blocks, or zero if no parameters. Set by caller. arg_count Number of arguments (also number of Argument Blocks pointed to by the arg_list_addr field). Set by caller. ret_size Max length of answer. Set by application. ret_addr Address of field to contain answer. Set by application. ret_count Actual length of answer. Set by callee. (See Section "Function Pack- age Processing" for discussion of the use of a negative ret_count.) envblock_addr Address of an Environment Block, or zero if no Environment Block. Set by caller. name_addr Address of program or function name. Set by caller. name_length Length of program name. Set by caller. Personal REXX User's Guide, Version 3.0 Appendix A: Personal REXX Application Program Interfaces page A.17 ======================================================================== break_addr Address of Break Block, or zero if no Break Block. Set by applica- tion. call_status REXX termination code. Set by REXX. Zero if REXX program terminates without errors; otherwise, set to REXX error code. A.6.4. env_block (Environment Block) env_name Name of default environment, padded with blanks (the REXX program can pass commands to other environments with the ADDRESS environment com- mand). When used while installing or uninstalling a function package, env_name holds the name of the function package involved. env_extension Default extension for this environment. Used when calling a REXX pro- gram if the extension is not specified. Also the extension for REXX functions called by REXX programs while environment is active. env_entry_addr Address of environment entry point. REXX does a far call to this address. * to execute commands from the environment. See the description of the REXX_CALL function for details. * to handle function calls. See the description of the REXX_FCN call for details. env_exec_addr Not used by REXX (see note below). env_dseg Address of data segment for environment entry point. Set by applica- tion before calling a REXX program or declaring a function package. REXX loads this value into the DS register before calling the envi- ronment entry point. env_sseg Not used by REXX (see note below). env_sp Not used by REXX (see note below). env_path_addr Pointer to default path for environment. This can be used instead of the PATH= in the DOS environment. Personal REXX User's Guide, Version 3.0 Appendix A: Personal REXX Application Program Interfaces page A.18 ======================================================================== env_path_length Length of default environment path. env_flag The ENV_FLAG_RESIDENT bit is set when defining a resident environ- ment. env_version Should be set to 1 for all newly written applications. env_break_addr Pointer to break block. env_service_type Flag field for indicating service types handled. Possible values are OUTPUT_SERVICE, INPUT_SERVICE, and FILE_SERVICE. env_service_addr Address of service entry point. REXX does a far call to this address. Note: The env exec addr, env sseg and env sp fields are not used by REXX. They are provided to simplify interfaces with high level languag- es. For example, some of the sample C language programs in the \API directo- ry use these fields. The flow of control looks like this: * Before declaring a function package or running a REXX program, the C program sets these fields as follows: env_exec_addr Address of C dispatcher routine env_sseg SS register value for C dispatcher routine env_sp SP register value for C dispatcher routine env_entry_addr Points to an assembler subroutine linked with the C programs * An assembler subroutine receives control when the env_entry_addr rou- tine is called by REXX. The assembler code loads the SS and SP regis- ters with the values in the Environment Block before calling the C dispatcher. * When the C dispatcher returns from the call, the assembler subroutine restores the appropriate registers and returns to REXX. See the examples in the \API directory for details. Personal REXX User's Guide, Version 3.0 Appendix A: Personal REXX Application Program Interfaces page A.19 ======================================================================== A.6.5. shvblock (Shared Variable Request Block) shvnext Used to chain multiple shvblocks together for processing of multiple shared variable requests. Must be 0 for the last (or only) shvblock in the chain. shvuser Used with the SHVNEXTV call to specify the size of the buffer, whose address is passed in shvnam_addr, that will hold the name of the variable returned. shvcode Function code. Valid function codes are given below. shvret Return status. Set by REXX. Return status codes are documented below. shvbufl Maximum length of response. Set by application for functions which return a response. shvnam_addr Pointer to variable name. shvnaml Length of variable name. shvval_addr Pointer to variable value. Address of buffer where Personal REXX is to store value for Fetch functions; address of value when using Set functions. shvvall Actual length of variable value. Set by user when setting a REXX variable. Set by REXX when the value of a variable is fetched. Two Shared Variable Interfaces are available: Symbolic Interface Normal REXX substitution occurs in names of compound variables. Names can be any valid REXX symbol. Direct Interface No substitution or case translation occurs in names of compound vari- ables. Shvcode is set to indicate whether you want to use the symbolic or direct interface, and the action to be performed. Shared variable interface function codes (shvcode): Personal REXX User's Guide, Version 3.0 Appendix A: Personal REXX Application Program Interfaces page A.20 ======================================================================== SHVSET Set variable (direct interface) SHVFETCH Fetch (get) value of variable (direct interface) SHVDROPV Drop variable name (direct interface) SHVSYSET Set variable (symbolic interface) SHVSYFET Fetch (get) value of variable (symbolic interface) SHVSYDRO Drop variable (symbolic interface) SHVNEXTV Fetch next variable. Repeated calls using SHVNEXTV cycle through all currently exposed variables, returning their names and values. Personal REXX maintains an internal pointer that moves to the 'next' variable each time SHVNEXTV is used. The order in which variables are returned is not defined. The internal pointer is reset to the 'first' variable when- ever any Shared Variable function other than SHVNEXTV is used, when- ever a host command is issued, and whenever the value of any variable is changed. shvnam_addr has the address of a buffer for the variable name and shvuser has the length of the buffer. shvval_addr has the address of a buffer for the variable value and shvbufl has the length of the buffer. The actual length of the name is returned in shvnaml and the actual length of the value is returned in shvvall. SHVTRUNC is returned if either the name or the value had to be truncated. SHVLVAR is returned if there are no further variables to return. SHVPRIV Fetch private information. Works like the fetch interface, but only three special items can be obtained. The entire item name should be specified via shvnam_addr and shvnaml (though only the first charac- ter is checked). Valid items are: Arg Fetches contents of ARG(1) Source Returns same info as the REXX PARSE SOURCE instruction Personal REXX User's Guide, Version 3.0 Appendix A: Personal REXX Application Program Interfaces page A.21 ======================================================================== Version Returns same info as the REXX PARSE VERSION instruction Shared Variable Interface return code (shvret) is set to one of the fol- lowing on return: SHVCLEAN No errors. SHVNEWV New variable---did not exist prior to this call. SHVTRUNC Value of variable didn't fit in fetch buffer. SHVBADN Variable name was invalid. SHVBADF Function code (SHVCODE) was invalid. SHVLVAR SHVNEXT was used, but there are no further variable values to return. Personal REXX User's Guide, Version 3.0 Appendix B: Personal REXX Language Summary page B.1 ======================================================================== Appendix B Personal REXX Language Summary ______________________________ This summary is adapted from Robert P. O'Hara and David Roos Gomberg, Modern Programming Using REXX, Copyright 1985, pp. 178-187. Adapted by permission of Prentice-Hall, Inc., Englewood Cliffs, N.J. For a com- plete description of the REXX language, see The REXX Language. In the following syntax descriptions, [item] Item is optional; {one|two} Choose one or two; [item]... Item may be repeated. B.1. Basic Concepts comments /* this is a comment */ numbers Integer or floating point numbers. Some valid numbers are: 12 -3.14 +57 1.86e6 strings Characters enclosed in single or double quotes. A trailing x speci- fies hexadecimal notation. A trailing b specifies binary notation. 'hi!' "O'Grady's dog" "c1"x '1010'b variables Composed of characters from this group, the first of which may not be a digit: a-z, A-Z, 0-9, _@\#\$!?. Compound variables use the period (.) to separate their component parts. Operators and their precedence + - prefix operators: plus, minus  \ ^ prefix operators: not ** exponentiate Personal REXX User's Guide, Version 3.0 Appendix B: Personal REXX Language Summary page B.2 ======================================================================== * / // % multiply, divide, return remainder after division, integer divide + - add, subtract (blank) || (abuttal) concatenate: with a blank, without a blank, without a blank = \= > < \> \< >= <= <> >< normal comparisons == \== >> << \>> \<< >>= <<= strict comparisons & and | or && exclusive or function calls name([expression][,[expression]]...) Invokes a function with expression passed as an argument string (up to 255 argument strings allowed). expressions Consist of strings, variables or function calls, separated by opera- tors and parentheses. B.2. Language Statements expression Issues the value of expression as a command. The variable RC is set to the return code from the command. name = [expression]; Assigns value of expression (or null) to name. ADDRESS [environment [expression]]; ADDRESS [VALUE] expression; Redirects all commands (or the single command expression) to environ- ment, or with VALUE to have expression evaluated as the environment. Personal REXX User's Guide, Version 3.0 Appendix B: Personal REXX Language Summary page B.3 ======================================================================== ARG [template]; Translates arguments to uppercase and parses them according to the template. CALL name [expression][,[expression]]...; Calls the internal routine name, passing each expression as an argu- ment. The variable result may be set by the called routine. CALL {ON|OFF} condition [NAME label] Turns on or off user-defined condition handlers. Control transfers to the label matching condition by a CALL instruction if the condition occurs while the trap is ON. Label may specify an alternative label name. Condition can be ERROR, FAILURE, HALT, NOTREADY, NOVALUE, or SYNTAX. DO [repetitor] [conditional]; [instruction-list] END [symbol]; Groups instructions together and optionally repeats them, where rep- etitor is one of name = expr [TO expr] [BY expr] [FOR expr] FOREVER expr and conditional is either of WHILE expr UNTIL expr and instruction-list is any sequence of instructions and expr evaluates to a number. DROP name [name]...; Drops (resets) the variable(s). If name is enclosed in parentheses, it is treated as a list of names of variables to drop. EXIT [expression]; Leaves the program, returning expression to the caller. IF expression[;] THEN[;] instruction [ELSE[;] instruction] If expression evaluates to 1, executes the instruction following the THEN; otherwise, executes the instruction following the ELSE. INTERPRET expression; Evaluates expression and then executes it as an instruction. ITERATE [name]; Starts next iteration of the (named) DO loop as if the END instruc- tion had been reached. Personal REXX User's Guide, Version 3.0 Appendix B: Personal REXX Language Summary page B.4 ======================================================================== LEAVE [name]; Leaves the (named) DO loop. NOP; A dummy instruction; does nothing. NUMERIC DIGITS [expression]; Specifies arithmetic precision to expression significant digits. NUMERIC FORM [SCIENTIFIC|ENGINEERING]; NUMERIC FORM [VALUE] expression; Specifies the format of exponential numbers. NUMERIC FUZZ [expression]; Specifies that expression digits are to be ignored during numeric comparisons. OPTIONS {NEWCOM|NONEWCOM} Tells Personal REXX to use standard or nonstandard DOS interfaces to COMMAND.COM and the DOS environment. PARSE [UPPER] ARG [template]; Parses the arguments according to the template, optionally first translating them to uppercase. PARSE [UPPER] LINEIN [template]; Parses the input from the default character input stream according to the template, optionally first translating it to uppercase. PARSE [UPPER] NUMERIC [template]; Parses the current NUMERIC setting according to the template, option- ally first translating it to uppercase. PARSE [UPPER] PULL [template]; Parses the next line in the program stack according to the template, optionally first translating it to uppercase. PARSE [UPPER] SOURCE [template]; Parses the program source information according to the template, optionally first translating it to uppercase. PARSE [UPPER] VALUE [expression] WITH [template]; Parses the value of expression according to the template, optionally first translating it to uppercase. PARSE [UPPER] VAR name [template]; Parses the value of name according to the template, optionally first translating it to uppercase. Personal REXX User's Guide, Version 3.0 Appendix B: Personal REXX Language Summary page B.5 ======================================================================== PARSE [UPPER] VERSION [template]; Parses the information describing the language level and language processor date according to the template, optionally first translat- ing it to uppercase. PROCEDURE [EXPOSE name [name]...]; Provides for local variables within an internal routine, and option- ally specifies global variables to be exposed. If name is enclosed in parentheses, it is treated as a list of names of variables to expose. PULL [template]; Translates the next line in the program stack to uppercase and parses it according to the template. PUSH [expression]; Places the value of expression at the top (front) of the program stack. QUEUE [expression]; Places the value of expression at the bottom (back) of the program stack. RETURN [expression]; Returns to the caller of the routine or program, optionally returning the value of expression as a result. SAY [expression]; Displays the value of expression on the screen. SELECT; WHEN expression[;] THEN[;] instruction [WHEN expression[;] THEN[;] instruction]... [OTHERWISE[;] [instruction]...] END; Selects and executes the first expression that evaluates to a 1 and executes its corresponding instruction. If none of the expressions evaluate to 1 then the instructions fol- lowing the OTHERWISE (which must be there) are executed. SIGNAL name; SIGNAL [VALUE] expression; Transfers control to the instruction labeled name; evaluates expres- sion and transfers control to the instruction labeled with that val- ue. SIGNAL {ON|OFF} condition [NAME label] Turns on or off user-defined condition handlers. Control transfers to the label matching condition by a SIGNAL instruction if the condition occurs while the trap is ON. Label may specify an alternative label Personal REXX User's Guide, Version 3.0 Appendix B: Personal REXX Language Summary page B.6 ======================================================================== name. Condition can be ERROR, FAILURE, HALT, NOTREADY, NOVALUE, or SYNTAX. TRACE [[!|?|$] {A|C|E|F|I|L|N|O|R}]; TRACE [VALUE] expression; Controls tracing of program execution (null restores the default). VALUE evaluates expression as the trace setting. ! turns command inhibition on and off, trace according to next character. ? turns interactive debugging on and off (pause after each instruction), trace according to next character. $ turns tracing to printer on and off, trace according to next character. A (All) traces all clauses. C (Commands) traces all commands. E (Error) traces commands with nonzero return codes. F (Failure) traces a host command that fails, also the return code. I (Intermediates) traces intermediate expression evaluation results and name substitution. L (Labels) traces labels. N (Negative) traces commands with negative return codes. This is the default setting. O (Off) no tracing. R (Results) traces all clauses and expressions. B.3. Built-in Functions ABBREV(information,info[,length]) Returns 1 if info is equal to the leading characters of information and info is not less than the minimum length; 0 otherwise. ABS(number) Returns the absolute value of number. ADDRESS() Returns the name of the current environment to which commands are submitted. ARG([n[,option]]) Returns the number of arguments, or the nth argument if n is speci- fied. If option is E, returns 1 if nth argument exists, 0 otherwise. If option is O, returns 1 if nth argument was omitted; 0 otherwise. BITAND(string1[,[string2][,pad]]) Returns the bitwise AND of string1 and string2, padded with pad. BITOR(string1[,[string2][,pad]]) Returns the bitwise OR of string1 and string2, padded with pad. Personal REXX User's Guide, Version 3.0 Appendix B: Personal REXX Language Summary page B.7 ======================================================================== BITXOR(string1[,[string2][,pad]]) Returns the bitwise XOR (eXclusive OR) of string1 and string2, padded with pad. B2X(binary-string) Binary to Hexadecimal. Converts binary-string to its hexadecimal rep- resentation. CENTER(string,length[,pad]) CENTRE(string,length[,pad]) Returns a string of length length with string centered in it, padded with pad (defaults to blank) or truncated as needed. CHARIN([name][,[start][,length]]) Returns a string of up to length characters read from the character input stream name. CHAROUT([name][,[string][,start]]) Returns the count of characters remaining after attempting to write string to the character output stream name. If only name is specified, the file name is closed. CHARS([name]) Returns 1 if any characters remain in the character input stream name; otherwise returns 0. COMPARE(string1,string2[,pad]) Returns 0 if string1 and string2 are the same; otherwise returns the position of the first character that does not match. The shorter string is padded on the right with pad if necessary. CONDITION([option]) Returns information about the current trapped condition. Option can be C (condition), D (description), I (instruction), S (state). COPIES(string,n) Returns n concatenated copies of string. C2D(string[,n]) Character to Decimal. Returns the decimal value of the binary repre- sentation of string. C2X(string) Character to Hexadecimal. Converts a character string to its hexa- decimal representation. DATATYPE(string[,type]) If only string is specified, the returned result is NUM if string is a valid REXX number, CHAR otherwise. Returns 1 if string is of type type, 0 otherwise. Type can be A (alphanumeric), B (bits), L (lower- Personal REXX User's Guide, Version 3.0 Appendix B: Personal REXX Language Summary page B.8 ======================================================================== case), M (mixed case), N (number), S (symbol), U (uppercase), W (whole number), X (hexadecimal). DATE([option]) Returns the local date in the format: dd mmm yyyy, or in the format specified by option: B (Basedate): dddddd. C (days this Century): ddddd. D (Days this year): ddd. E (European): dd/mm/yy. J (Julian): yyddd. M (Month): name-of-month. N (Normal): default format. O (Ordered): yy/mm/dd. S (Sorted): yyyymmdd. U (USA): mm/dd/yy. W (Weekday): day-of-the-week. DELSTR(string,n[,length]) Deletes the substring of string that begins at the nth character and is of length length. If length is not specified, the rest of the string is deleted. DELWORD(string,n[,length]) Deletes the substring of string that starts at the nth word and is of length length blank-delimited words. If length is not specified, the remaining words are deleted. DIGITS() Returns the current setting of NUMERIC DIGITS. D2C(whole-number[,n]) Decimal to Character. Returns a character string of length as need- ed, or of length n, which is the binary representation of the number. D2X(whole-number[,n]) Decimal to Hexadecimal. Returns a string of hexadecimal characters of length as needed or of length n. This string is the hexadecimal representation of whole-number. ERRORTEXT(n) Returns the error message associated with error number n. FORM() Returns the current setting of NUMERIC FORM. FORMAT(number[,[before][,[after][,[expp][,expt]]]]) Rounds and formats number, with before and after specifying the size of the integer and fraction parts. expp specifies the number of places for the exponent and expt specifies the trigger point for use of exponential format. Personal REXX User's Guide, Version 3.0 Appendix B: Personal REXX Language Summary page B.9 ======================================================================== FUZZ() Returns the current setting of NUMERIC FUZZ. INSERT(new,target[,[n][,[length][,pad]]]) Inserts new, padded to length with pad, into target after the nth character. LASTPOS(needle,haystack[,start]) Returns the character position of the last occurrence of needle in haystack; 0 otherwise. The search is started at start, and proceeds right to left. LEFT(string,length[,pad]) Returns a string of length length containing the leftmost length characters of string, padded with pad or truncated on the right as needed. LENGTH(string) Returns the length of string. LINEIN([name][,[line][,count]]) Returns a line read from the character input stream name. Line (which must be 1 if used) specifies the line position in the stream from which to read. Count (which may be 0 or 1) specifies the number of lines to read. LINEOUT([name][,[string][,line]]) Returns count of lines remaining (0 or 1) after attempting to write string to the character output stream name. Line (which must be 1 if used) specifies the line position in the stream at which to write. If only name is specified, the file name is closed. LINES([name]) Returns 1 if any lines remain in the character input stream name; otherwise returns 0. MAX(number[,number]...) Returns the largest number out of the list specified. MIN(number[,number]...) Returns the smallest number out of the list specified. OVERLAY(new,target[,[n][,[length][,pad]]]) Overlays new, padded with pad or truncated to length, onto target starting at the nth character. POS(needle,haystack[,start]) Returns the character position of needle in haystack; 0 otherwise. The search is started at start. Personal REXX User's Guide, Version 3.0 Appendix B: Personal REXX Language Summary page B.10 ======================================================================== QUEUED() Returns the number of lines remaining in the program stack. RANDOM(max) RANDOM([min][,[max][,seed]]) Returns a pseudo-random non-negative whole number in the range 0 to 999, or min to max inclusive. REVERSE(string) Returns string, swapped end for end. RIGHT(string,length[,pad]) Returns a string of length length containing the rightmost length characters of string, padded with pad or truncated on the left as needed. SIGN(number) Returns the sign (-1, 0 or 1) of number. SOURCELINE([n]) Returns the nth line of the program, or the number of lines in the program if n is omitted. SPACE(string[,[n][,pad]]) Formats the blank-delimited words in string with n pad characters between each word. STREAM(name[,operation[,streamcommand]]) Returns information about the stream specified by name or the result of a stream I/O command. Operation can be: C (Command) D (Description) S (State) If operation is C, streamcommand can be: OPEN Open a stream CLOSE Close a steam SEEK Reposition read/write pointers QUERY EXISTS Return full name of stream QUERY SIZE Return stream size QUERY DATETIME Return stream date/time stamp Personal REXX User's Guide, Version 3.0 Appendix B: Personal REXX Language Summary page B.11 ======================================================================== STRIP(string[,[option][,char]]) removes Leading, Trailing, or Both leading and trailing char charac- ters from string when the first character of option is L, T or B respectively. The default is B. SUBSTR(string,n[,[length][,pad]]) Returns the substring of string that begins at the nth character and is of length length, padded with pad if necessary. SUBWORD(string,n[,length]) Returns the substring of string that starts at the nth word and is of length length blank-delimited words. SYMBOL(name) Returns BAD if name is not a valid REXX symbol, VAR if it is the name of a variable, or LIT (literal) otherwise. TIME([option]) Returns the local time in the format: hh:mm:ss, or in the format specified by option: C (Civil) hh:mmxx (where xx is am or pm) E (Elapsed seconds) sssssssss.uuuuuu H (Hours since midnight) hh L (Long) hh:mm:ss.uuuuuu M (Minutes since midnight) mmmm N (Normal -- the default format) hh:mm:ss R (Reset) sssssssss.uuuuuu (and resets elapsed time) S (Seconds since midnight) sssss TRACE([option]) Returns trace actions currently in effect. If option is specified, it must be one of the valid prefixes (?, !, or \$) and/or alphabetic character options (A, C, E, F, I, L, N, O, or R) associated with the TRACE instruction, and alters the trace action even if interactive debug is active. TRANSLATE(string[,[tableo][,[tablei][,pad]]]) Returns a string with characters in string that are in tablei trans- lated to the corresponding character in tableo. (tableo) is padded with pad if needed. If neither translate table is specified, string is translated to uppercase. TRUNC(number[,n]) Returns the integer part of the number, and n decimal places. VALUE(name[,newvalue[,type]]) Returns the value of the symbol name. A new value can be supplied in newvalue. Type may be ENVIRONMENT to access or set system environment variables. Personal REXX User's Guide, Version 3.0 Appendix B: Personal REXX Language Summary page B.12 ======================================================================== VERIFY(string,reference[,[option][,start]]) Returns the position of the first character in string that is not in reference, 0 otherwise. WORD(string,n) Returns the nth blank-delimited word in string. WORDINDEX(string,n) Returns the position of the nth blank-delimited word in string. WORDLENGTH(string,n) Returns the length of the nth blank-delimited word in string. WORDPOS(phrase,string) Returns the word number of the first word of phrase in string. WORDS(string) Returns the number of blank-delimited words in string. XRANGE([start][,end]) Returns a string of all one byte codes between and including the val- ues start and end. X2B(hex-string) Hexadecimal to Binary. Converts hex-string (a string of hexadecimal characters) to binary. X2C(hex-string) Hexadecimal to Character. Converts hex-string (a string of hexadeci- mal characters) to character. X2D(hex-string[,n]) Hexadecimal to Decimal. Converts hex-string (a string of hexadecimal characters) to decimal. Personal REXX User's Guide, Version 3.0 Appendix C: Summary of Personal REXX Utility Functions page C.1 ======================================================================== Appendix C Summary of Personal REXX Utility Functions __________________________________________ C.1. Hardware Information Group PCDISK(subfunction,[drive]) Returns information about the installed fixed and floppy disks, as determined from BIOS. Not reliable on many compatibles. PCDISPLAY() Returns a string containing three numbers, separated by blanks, giv- ing information about your display and display adapter. The values returned indicate the display mode, the display type, and the adapter type. PCEQUIP() Returns the BIOS equipment flags, as a string of 0's and 1's. (This information is also available from other functions in this group.) PCFLOPPY() Returns the number of floppy disks installed, as indicated in the BIOS equipment flags. PCGAME() Returns 1 if a game port is installed, else 0, as indicated in the BIOS equipment flags. PCKEYBOARD() Returns 0 is the keyboard is the old PC or XT non-"enhanced" keyboard that does not have function keys 11 and 12, separate cursor keys etc. Returns 1 for enhanced keyboards. PCPARALLEL() Returns the number of parallel ports, as indicated in the BIOS equip- ment flags. PCRAM() Returns the amount of RAM storage as reported by BIOS, in units of 1024 bytes. PCROMDATE() Returns the date (mm/dd/yy) of the installed ROM. PCSERIAL() Returns the number of serial ports. Personal REXX User's Guide, Version 3.0 Appendix C: Summary of Personal REXX Utility Functions page C.2 ======================================================================== PCTYPE() Returns a number that indicates the type of PC. PCVIDEO() Returns a number that identifies the video mode, as determined by BIOS. C.2. DOS Function Group DOSCD([drive]) Returns the current directory on the default drive (if drive is omit- ted), or on the specified drive. DOSCHDIR(pathname) Makes pathname, which may include drive and path information, become the current directory for the current (or specified) drive. DOSCHDIR returns 0 if it encountered any error conditions, or 1 if it was successful. DOSCHMOD(fileid,[turnon],[turnoff]) Used to change a file's attribute bits. Fileid specifies the file involved, turnon consists of one or more of H, S, R, or A, allowing you to turn on a files Hidden, System, Read-only, or Archive bits. Turnoff specifies which bits are to be turned off. Returns 1 if the attributes were successfully changed, and 0 if not. DOSCREAT(fileid) If fileid, which may contain drive and path information but not wild- card characters, does not exist, it is "created" as an empty file (0 bytes in length). If fileid already exists, it is truncated to 0 bytes in length, and its existing contents are lost. DOSCREAT returns 0 if it encountered any error conditions, or 1 if it was successful. DOSDEL(fileid) Fileid, which may contain drive and path information but should not contain wildcard characters, is deleted (that is erased). DOSDEL returns 0 if it encountered any error conditions, or 1 if it was successful. DOSDIR([fileid],[output],[search],[mask],[position]) Returns directory information for fileid. DOSDIRPOS() Returns a string representing the current DOSDIR directory position status. A later call to DOSDIR can specify the status via the posi- tion parameter to resume processing a directory search at the current position. Personal REXX User's Guide, Version 3.0 Appendix C: Summary of Personal REXX Utility Functions page C.3 ======================================================================== DOSDISK(option,[drive]) Returns information about the specified DOS disk drive. DOSDRIVE([newdrive]) The drive letter given as the first character of newdrive becomes the current DOS drive, and the drive letter (A, B, etc.) that was in effect before the change is returned. If newdrive is not specified, DOSDRIVE simply returns the drive letter of the current DOS drive. DOSENV(string) Returns the value of the specified DOS environment string, or a null string if string is not defined. DOSENVSIZE() Returns the total size of the current DOS environment area and the amount of free space remaining. Both values are in bytes. The values are returned as two numbers, separated by blanks. DOSFDATE(fileid,[newdate],[newtime]) Changes the date and time recorded as the date/time of the last modi- fication to the file. DOSFDATE returns 1 if successful, otherwise 0. DOSFNAME(fileid) Returns the fully qualified name of the fileid that you specify, including a drive specifier, path specification, and name and exten- sion. DOSISDEV(fileid) Returns 1 if the specified fileid is a device, such as CON, PRN, LPT1, NUL, CLOCK$, STK, etc., otherwise 0. DOSISDIR(fileid) Returns 1 if the specified fileid is a directory. Returns 0 if fileid is a file or an invalid name. Fileid should not include a trailing \. DOSMEM() Returns number of bytes of currently unallocated DOS memory. DOSMKDIR(pathname) Creates a new directory with the specified pathname, which may include drive and path information. DOSMKDIR returns 0 if it encountered any error conditions, or 1 if it was successful. DOSPATHFIND(fileid,[envvar]) Searches your DOS PATH for the specified fileid. If the file is found, its fully qualified name is returned. If the file is not found, a null string is returned. Personal REXX User's Guide, Version 3.0 Appendix C: Summary of Personal REXX Utility Functions page C.4 ======================================================================== DOSRENAME(fileid1,fileid2) Renames fileid1 to fileid2. Fileid1 and fileid2 should contain any necessary drive and path information, but should not contain wildcard characters. The DOS rename function is invoked directly. Returns 0 if it encountered any error conditions, or 1 if it was suc- cessful. DOSRMDIR(pathname) Removes the directory with the specified pathname, which may include drive and path information. Returns 0 if it encountered any error conditions, or 1 if it was suc- cessful. DOSVERSION() Returns the current DOS version number (for example 3.10). DOSVOLUME([drive]) Returns the volume label of drive. Returns null if the label cannot be located (for example the disk has no label, drive not ready). C.3. Hardware Access Group CHARSIZE() Returns the height of the character box in scan lines for the current screen mode. CURSOR([row],[col]) Sets the cursor position to the specified new row and col. The ini- tial row and column position of the cursor (before any change) is returned. CURSORTYPE([start],[end]) Returns the current cursor type, and possibly sets new values for the cursor type. DELAY(duration) Delays for specified duration, given in seconds, accurate to around a tenth of a second. INKEY([wait_option],[keyboard_option]) Reads in a character directly from the keyboard (without echoing it to the display). Wait option can be Wait (the default) to wait until a character is ready, or Nowait, to return a null string immediately if no character is ready. Keyboard option affects handling of Enhanced Keyboard BIOS calls. Personal REXX User's Guide, Version 3.0 Appendix C: Summary of Personal REXX Utility Functions page C.5 ======================================================================== INP(port) Reads 1 byte from the specified port (which must be in the range 0 to 65535). OUTP(port,value) Writes 1 byte to the specified port (which must be in the range 0 to 65535). Value must be in the range 0 to 255. OUTP always returns a value of 0. PEEK(segment,offset) Segment and offset must be in the range 0 to 65535. Returns the val- ue (as a number from 0 to 255) of the specified location. POKE(segment,offset,value) Segment and offset must be in the range 0 to 65535. Stores value (which must be in the range 0 to 255) in the specified location. POKE always returns a value of 0. SCRBLINK([state]) Returns the current state of video attribute handling. If the state is 1, then video attributes above 128 produce blinking text. If the state is 0, such attributes produce a bright background color. This state may be changed by supplying a value of 0 or 1 for state. SCRCLEAR([attr],[char],[row],[col],[height],[width]) Clears the screen or a rectangular region of the screen. SCRMETHOD([method]) Returns the existing screen method -- D (Direct), R (Retrace), or B (Bios) -- and optionally allows you to change the screen method. SCRPUT(row,col,string,[option]) Writes to screen, starting at given row and column, contents of string. Option can be T, the default (string has text to be written, attri- butes don't change), A (string has attributes to be written, text doesn't change), or B (string has character-attribute pairs; in this case, LENGTH(string) must be even). Always returns null string as its value. SCRREAD(row,col,length,[option]) Returns length screen positions, starting at given row and column. Option is specified as for SCRPUT. SCRSIZE() Returns the height and width of the screen in rows and columns. Personal REXX User's Guide, Version 3.0 Appendix C: Summary of Personal REXX Utility Functions page C.6 ======================================================================== SCRWRITE([row],[col],[string],[length],[pad],[attr]) Writes the specified string to the screen starting at the specified row and column. The string is truncated (or padded with pad to the given length). Characters are written to the screen using the attri- bute attr. SHIFTSTATE(key,[state]) Returns the current shift state of the NumLock, CapsLock, and Scroll- Lock keys. The shift state can be changed by supplying a value of 0 or 1 for state. SOUND([freq],[duration]) Beeps the PC's speaker. Freq is in cycles per second, gets rounded to the nearest integer, and defaults to 880; duration is in seconds, and is accurate to around a tenth of a second, with .2 as the default. C.4. Miscellaneous Group DATECONV(date,input,[output]) Converts the string date from input format to output format. EMSMEM() Returns (as two words) the number of bytes of EMS memory currently unallocated and total. ENDLOCAL() Restores the drive/directory and environment variables saved by the last SETLOCAL call. A 1 is returned if the restore is successful, otherwise 0. FCNPKG(package-name) Returns status of the function package package-name. LOWER(string) Lowercases the specified string. PARSEFN(fileid) Breaks the given fileid into its component parts. PRXSWAP([type],[location],[fail-on-error]) Controls whether the REXX processor will be swapped out when commands are run. Allows specification of where to swap and how to proceed if a swapping error occurs. PRXVERSION() Returns the current Personal REXX version number, for instance 3.00. Personal REXX User's Guide, Version 3.0 Appendix C: Summary of Personal REXX Utility Functions page C.7 ======================================================================== SETLOCAL() Saves the current drive/directory and environment variables. SETLOCAL returns 1 if the operation is successful, otherwise 0. STACKSTATUS() Returns information about the status of the console stack. UPPER(string) Uppercases the specified string. VALIDNAME(fileid,[wildcard]) Returns 1 if fileid is a valid file name, otherwise 0. If the wild- card flag is 1 then "?" and "*" are allowed in file names (but not paths). If it is 0 (the default) then "?" and "*" cannot be used any- where. C.5. Windowing Functions These functions are available only if RXWINDOW is loaded. W_ATTR(window,row,col,length,attr) Used to set the screen attributes of a portion of a line in a window. W_BORDER(window,[top],[right],[bottom],[left],[attr]) Displays a border for the window. W_CLEAR(window,[attr],[char],[row],[col],[height],[width]) Clears a window or a rectangular region within the window. W_CLOSE(window) Permanently closes a window and removes all related information. W_FIELD(window,field_name,row,col,length,[attr],[pad]) Defines a named input area within a window into which data can be entered. W_GET(window,row,col,length,[string],[attr],[pad]) Reads user input from a specified input area in the window. W_HIDE(window,[option]) Temporarily suppresses display or updating of the specified window. W_KEYS(window,[tab_option],[enter_option],[keyboard_option]) Alters cursor movement and Enter key action during a W_READ opera- tion. W_MOVE(window,row,col) Moves the window to the specified row and column. Personal REXX User's Guide, Version 3.0 Appendix C: Summary of Personal REXX Utility Functions page C.8 ======================================================================== W_OPEN(row,col,height,width,[attr]) Opens a new window, and returns the window handle. W_PUT(window,row,col,[string],[length],[attr],[pad]) Displays a character string in a window, with optional display attri- bute and pad character. W_READ(window,[field_name],[activate]) Reads user input from any currently defined input fields. W_SCRPUT(window,row,col,string,[option]) Writes a string of text, attributes or both to the window. W_SCRREAD(window,row,col,length,[option]) Returns a string of text, attributes or both from the window. W_SCRWRITE(window,row,col,[string],[length],[pad],[attr]) Writes a string to the specified window. W_SIZE(window) Returns the height and width of the specified window. W_UNFIELD(window,field_name) Removes an input field from a window. W_UNHIDE(window) Reverses the action of a previous call to W_HIDE. Personal REXX User's Guide, Version 3.0 Appendix D: Commands and Environment Variables page D.1 ======================================================================== Appendix D Commands and Environment Variables __________________________________ D.1. Personal REXX Commands Here is a summary of the components of Personal REXX, and the commands and options associated with each of the components: REXX Interrupt Manager -- discussed in Chapter 3, "Running Personal REXX". RXINTMGR [/F] Loads REXX Interrupt Manager. /F option forces takeover of REXX Interrupt even if it is already in use. Personal REXX Processor -- discussed in Chapter 3, "Running Personal REXX". REXX [options] program-name [argument-string] Runs REXX program program-name. REXX /R Makes the Personal REXX processor resident. RX [options] program-name [argument-string] Runs REXX program program-name when the Personal REXX processor is resident. RX /U Unloads resident Personal REXX processor. Options for REXX and RX commands: /O Convert REXX source program to REXX object code, appending object code to source file. /TRcc Run program with specified trace setting cc in effect. /M, /NM Use (or do not use) Statement Mapping Table. /S, /NS Retain (or do not retain) REXX source in memory. /T, /NT Generate (or do not generate) object code for result and label tracing. /X, /NX Use (or do not use) EMS memory, if available. Personal REXX User's Guide, Version 3.0 Appendix D: Commands and Environment Variables page D.2 ======================================================================== Stack Manager -- discussed in Chapter 9, "Console Stack and Related Utilities". STACKMGR [/Sn] [/NX] [/K] Load the Stack Manager. /Sn Specifies size of stack in 1K units, where 1<=n<=62 and n defaults to 8 (16 in EMS). /NX Place stack in DOS memory, even if EMS is available. /K (Rarely used.) Use old style IBM PC BIOS calls when read- ing from the keyboard. CONWAIT Provided for compatibility with CMS. Does nothing. DESBUF Provided for compatibility with CMS. Equivalent to DROPBUF 0. DISABLE Temporarily disables program stack. DROPBUF [n] Removes buffer n and all higher-numbered buffers from the program stack. If n is omitted, the current buffer is removed. ENABLE Re-enables previously disabled program stack. MAKEBUF Creates a new buffer in the program stack, with return code set to the new buffer number. PRESS keystroke ... Places specified keystrokes into the program stack. PRESS ... DELAY n ... Places delay of n seconds into the program stack. SENTRIES Sets return code equal to number of lines in the program stack. Provided for compatibility with CMS. STACKDRV.SYS Device driver for stack device STK. Loaded via CONFIG.SYS. CMS-like utilities -- discussed in Chapter 10, "LISTFILE, EXECIO, and GLOBALV". Personal REXX User's Guide, Version 3.0 Appendix D: Commands and Environment Variables page D.3 ======================================================================== EXECIO parameters Provided for CMS compatibility. Does I/O to disk files, stack, and printer. GLOBALV parameters Manipulates Global Variables. GLVMGR [/Sn] [/NX] Loads the Global Variable Manager. /Sn Specifies size of Global Variable storage area in 1K units, where 1<=n<=62 and n defaults to 2 (16 in EMS). /NX Place storage area in DOS memory, even if EMS is avail- able. LISTFILE filespec options Lists information about DOS files. REXX Batch Manager -- discussed in Chapter 3, "Running Personal REXX". RXBATIN.BAT Batch file used by RXBATUTL while configuring RXBATMGR.COM. RXBATMGR Load REXX Batch Manager. RXBATUTL Command used once to configure RXBATMGR.COM. RXWINDOW Function Package -- discussed in Chapter 11, "RXWINDOW Function Package". RXWINDOW [/Snn] [/D|/R|/B] [/NX] [/Q] Load RXWINDOW function package. /Snn Reserve nnK bytes of storage for window data. Default is 25K (32K in EMS). /B Read/write access only through BIOS. /D Direct read/write to display buffer. /R Direct read/write to display, with wait for horizontal retrace. /Q Don't issue the normal identification message when load- ing. /NX Place buffers in DOS memory, even if EMS is available. Personal REXX User's Guide, Version 3.0 Appendix D: Commands and Environment Variables page D.4 ======================================================================== RXUNLOAD Utility -- discussed in Chapter 3, "Running Personal REXX". RXUNLOAD program-name Where program-name is the name of the resident program. Currently this may be one of the following: GLVMGR Global variable manager. REXX REXX processor. RXBATMGR REXX batch manager. RXINTMGR REXX interrupt manager. RXWINDOW REXX window function package. STACKMGR REXX stack manager. RXINFO Utility -- discussed in Chapter 3, "Running Personal REXX". RXINFO program-name Displays information about a REXX program that has been pre- converted to object code via the /O option. D.2. Personal REXX Environment Variables Here is a summary of the environment variables that can be used with Personal REXX. They are discussed in detail in Chapter 3, "Running Per- sonal REXX". SET RXCMD=YES or NO (Defaults to NO) Controls whether the REXX command, when it cannot locate a REXX pro- gram with the name you request, will then look for COM, EXE, or BAT files with that name. SET RXFLAGS=flags Alternate method of specifying REXX command options. SET RXINT=nn (Defaults to 60) Where nn specifies the REXX Interrupt, should be in the range 60--67, and is specified in hexadecimal. SET RXISA=mm (Defaults to 20) Where mm specifies the size of REXX's Internal Storage Area. mm is expressed in 1K units and should be in the range 10--40. SET RXNEWCOM=YES or NO Controls whether or not a new copy of COMMAND.COM is loaded to pro- cess commands. Personal REXX User's Guide, Version 3.0 Appendix D: Commands and Environment Variables page D.5 ======================================================================== SET RXSWAP=type,[device] Provides default settings for the PRXSWAP built-in function, which controls swapping of the REXX language processor. SET RXTRACE=cc (Defaults to N) Where cc controls the trace setting that will be in effect whenever you start to run a REXX program. Overridden by /TR option of REXX command. Personal REXX User's Guide, Version 3.0 Appendix E: Error Messages and Return Codes page E.1 ======================================================================== Appendix E Error Messages and Return Codes _______________________________ E.1. Messages 1 through 51 Error messages numbered in the range 1 through 51 are issued only by the REXX processor. Most of these messages are discussed in detail in The REXX Language, pages 157-164. Error messages in the range 1 through 51 are those that the REXX proces- sor can encounter while actually running a REXX program. The ERRORTEXT built-in function gives your program access to the text of these messag- es. Error 1: File table full More than 15 files have been opened with the I/O built-in functions (CHARS, CHARIN, CHAROUT, LINES, LINEIN, LINEOUT). You should close files with CHAROUT or LINEOUT (even files used only for input) as soon as possible. Error 3: Program is unreadable An I/O error occured trying to read the REXX program. Error 4: Program interrupted Ctrl-Break has been hit. Your program can trap Ctrl-Break by using SIGNAL ON HALT, as described in pages 145-149 of The REXX Language. Error 5: Machine resources exhausted Personal REXX issues this message when it has run out of memory. The message is usually accompanied by an indication of the type of memory involved, which may give you an idea of how to resolve the problem. For example, if ISA memory is full, you can use the RXISA environment variable to increase the size of the REXX ISA. For some general hints on reducing the memory requirements for REXX programs, see Sec- tion "Performance Hints". Error 6: Unmatched "/*" or quote You have probably forgotten the closing */ at the end of a comment, or the closing quote at the end of a string. Error 7: WHEN or OTHERWISE expected Error 8: Unexpected THEN or ELSE Error 9: Unexpected WHEN or OTHERWISE Personal REXX User's Guide, Version 3.0 Appendix E: Error Messages and Return Codes page E.2 ======================================================================== Error 10: Unexpected or unmatched END Error 11: Control stack full Error 12: Clause longer than 1000 characters The internal representation of a clause in a Personal REXX program cannot be longer than 1000 characters. Error 13: Invalid character in program Error 14: Incomplete DO/SELECT/IF Error 15: Invalid hexadecimal or binary string Error 16: Label not found Error 17: Unexpected PROCEDURE Error 18: THEN expected Error 19: String or symbol expected Error 20: Symbol expected Error 21: Invalid data on end of clause Error 22: Invalid character string Error 24: Invalid TRACE request Error 25: Invalid sub-keyword found Error 26: Invalid whole number Error 27: Invalid DO syntax Error 28: Invalid LEAVE or ITERATE Error 30: Name or string longer than 250 characters Personal REXX limits the length of literal strings, variable names, and label names to 250 characters. Error 31: Name starts with number or "." Error 32: Invalid use of stem Error 33: Invalid expression result Error 34: Logical value not 0 or 1 Personal REXX User's Guide, Version 3.0 Appendix E: Error Messages and Return Codes page E.3 ======================================================================== Error 35: Invalid expression Error 36: Unmatched "(" in expression Error 37: Unexpected "," or ")" Error 38: Invalid template or pattern Error 39: Evaluation stack overflow Error 40: Incorrect call to routine This error most often occurs when you pass the wrong number of argu- ments to a built-in function, or when you pass arguments to a built- in function that are invalid for that function. Error 41: Bad arithmetic conversion Error 42: Arithmetic overflow/underflow The most likely reason for this error is an attempt to divide by 0, or the exponent of the number required more than 9 digits. Error 43: Routine not found Error 44: Function did not return data Error 45: No data specified on function RETURN Error 48: Failure in system service This usually indicates that you have used the PUSH or QUEUE instruc- tion and either you have not used the STACKMGR command to install the Personal REXX console stack, or the stack has been installed but is now full. Error 49: Interpretation error This indicates that an internal error within Personal REXX has been detected. You have either encountered a bug in Personal REXX, or some other program has overlaid part of Personal REXX's memory. Error 50: Error in called routine Your REXX program invoked another REXX program, either as a function or via a CALL instruction, and the called program terminated with a REXX error. Error 51: Line is longer than 250 characters A line of your REXX source program is longer than the limit of 250 characters. You should split the line into two shorter lines, using a comma as a continuation character. Personal REXX User's Guide, Version 3.0 Appendix E: Error Messages and Return Codes page E.4 ======================================================================== E.2. Messages 101 through 170 There are two situations in which errors in the range 101 through 170 are issued. An error may have been detected by some part of the Personal REXX product other than the REXX processor (for example, by the LISTFILE command). Or, the REXX processor may have detected an error that pre- vents it from beginning execution of a REXX program (for example, the program cannot be found). Note that the text of these error messages cannot be accessed by the built-in REXX function ERRORTEXT. Error 101: RXINT environment setting invalid You have set the RXINT environment variable to an invalid value. If you want to use some interrupt other than interrupt hexadecimal 60 as the REXX interrupt, you must set the RXINT environment variable to a valid two digit hexadecimal value, from 60 to 67. See the discussion of the REXX interrupt in Chapter 3, "Running Personal REXX". Error 102: REXX interrupt in use by another program The REXX interrupt, which defaults to interrupt hexadecimal 60 unless you specify otherwise with the RXINT environment variable, is cur- rently controlled by some program other than RXINTMGR. See the dis- cussion of the REXX interrupt in Chapter 3, "Running Personal REXX" for a discussion of how to tell Personal REXX to use a different interrupt. Error 103: REXX Interrupt Manager not loaded The REXX Interrupt Manager must be loaded into your PC's memory before you can use Personal REXX. To load it into memory, use the RXINTMGR command. (If you are sure that you have already run the RXINTMGR command since your PC was last rebooted, you probably own some other program that makes use of the REXX interrupt. See the dis- cussion of the REXX interrupt in Chapter 3, "Running Personal REXX" for a discussion of how to tell Personal REXX to use a different interrupt.) Error 104: REXX Interrupt Manager already loaded You are trying to load the REXX Interrupt Manager into memory, but the REXX Interrupt Manager is already loaded. Error 105: No REXX program specified You have issued the REXX command without specifying the name of the REXX program that you want to run. Error 106: REXX processor is already resident You have issued the command REXX /R to make REXX resident in your PC's memory, but REXX is already resident. Personal REXX User's Guide, Version 3.0 Appendix E: Error Messages and Return Codes page E.5 ======================================================================== Error 107: Personal REXX has not been made resident You have issued the RX command to tell the resident REXX processor to run a REXX program or to unload the REXX processor from memory, but REXX has not been made resident. Error 108: Error unloading REXX processor You have issued the command RX /U to unload the REXX processor from memory, but the processor could not be unloaded. Error 109: Stack Manager not loaded You are trying to use some command that needs to access Personal REXX's console stack facility, but the STACKMGR command has not been used to load the Stack Manager into memory. Error 110: Stack Manager already loaded You have issued the STACKMGR command to install the Stack Manager, but the Stack Manager has already been installed. Error 111: Global Variable Manager already loaded You have issued the GLVMGR command to install the Global Variable Manager, but the Global Variable manager has already been installed. Error 112: REXX not active You are trying to use the GET or PUT parameters of the GLOBALV com- mand to access Personal REXX variables, but no REXX program is cur- rently running. Error 113: GLOBALV storage exhausted The Global Variable Manager has used all of the memory in its storage area. By default, the Global Variable Manager sets aside a 2K storage area. The size of the storage area is controlled by the /S option of the GLVMGR command. (You can also get this message if you are using GLOBALV GET to set the value of a REXX variable, but REXX does not have enough available memory.) Error 114: Missing or invalid option You have either forgotten to specify a required option, or have spec- ified an option but have spelled it wrong. Error 115: GLOBALV Manager not loaded You are trying to use the GLOBALV command, but have not used the GLVMGR command to load the Global Variable Manager into memory. Error 116: Invalid REXX variable name used You are using the GLOBALV GET or PUT parameter to access Personal REXX variables, but you are using a name that is not valid as the name of a REXX variable. Error 117: Stack full The console stack has no room for more data. The size of the console stack is controlled by the /S parameter of the STACKMGR command. Personal REXX User's Guide, Version 3.0 Appendix E: Error Messages and Return Codes page E.6 ======================================================================== Error 118: Required parameter omitted The number of lines to process, type of operation, or fileid was omitted from the parameters passed to EXECIO. Error 119: Unsupported EXECIO request You are trying to carry out an EXECIO operation that is valid for the CMS version of the EXECIO command, but is not supported by the cur- rent version of the Personal REXX EXECIO command. Error 120: Invalid parameter You have passed a parameter to a Personal REXX utility program that is not recognized as valid by that program. Error 121: Unable to open input file: filename An input file could not be located, or some error was encountered in trying to open it. Error 122: Error using console stack This message usually means that the stack is full. See the descrip- tion of Error 117. Error 123: Unable to open output file: filename Some error condition was encountered in trying to open an output file. For example, the file may be read-only. Error 124: Unsupported EXECIO option You are trying to use some option of the EXECIO command that is valid for the CMS version of the EXECIO command, but is not supported by the current version of the Personal REXX EXECIO command. Error 125: Invalid EXECIO option An option that you specified is not recognized as a valid option by EXECIO. Error 126: Error positioning at end of file The EXECIO command is attempting to add data to the end of a file, but has encountered some error condition while looking for the end of the file. Error 127: Input error on file: filename DOS reported that an I/O error occurred while reading from this file. Error 128: Output error on file: filename DOS reported that an I/O error occurred while writing to this file. Error 129: Value missing after option option An option that you specified (for example, the AVOID option of EXECIO), requires a value but you did not specify one. Personal REXX User's Guide, Version 3.0 Appendix E: Error Messages and Return Codes page E.7 ======================================================================== Error 130: Conflicting options You have specified two mutually exclusive options for a Personal REXX utility. For example, the VAR and FIFO options of EXECIO conflict. Error 131: VAR option with lines $>$1 is invalid The VAR option of EXECIO can only be used to process 1 line of data. (The STEM option can be used to handle multiple lines of data.) Error 132: Truncated Data being passed from a REXX variable to a Personal REXX utility was longer than the utility can handle and was truncated. Error 133: Invalid variable name The name of a variable being used to pass data to or from REXX by a Personal REXX utility was an invalid REXX variable name. Error 134: Value not valid for option option An option that you specified (for example, the AVOID option of EXECIO), requires a value but the value you specified was invalid. Error 135: File(s) not found This message is issued by the LISTFILE command when no files are found that match the filename pattern that you specified. Error 136: Error opening file: filename An input file could not be located, or some error was encountered in trying to open it. Error 137: Error reading file: filename DOS reported that an I/O error occurred while reading from this file. Error 140: Batch Manager not initialized - use RXBATUTL Before you can use RXBATMGR, it must be configured for your version of DOS by running the RXBATUTL program. Error 141: Wrong version of DOS - use RXBATUTL Your copy of RXBATMGR is configured for a different version of DOS than you are currently using. Use the RXBATUTL program to reconfigure it for your version of DOS. Error 142: Batch Manager is already loaded You have issued the RXBATMGR command to install the REXX Batch Manag- er, but the REXX Batch Manager has already been installed. Error 143: Could not find RXBATIN.BAT When you run the RXBATUTL program, both RXBATIN.BAT and RXBATMGR.COM must be in the current directory. Error 144: Unable to run RXBATIN.BAT While initializing RXBATMGR.COM, RXBATUTL needs to run RXBATIN.BAT, but DOS reported some unexpected error condition to RXBATUTL when asked to do so. Personal REXX User's Guide, Version 3.0 Appendix E: Error Messages and Return Codes page E.8 ======================================================================== Error 145: Unable to open RXBATMGR.COM RXBATUTL encountered an unexpected error condition while attempting to initialize RXBATMGR.COM. Error 146: Error reading RXBATMGR.COM RXBATUTL encountered an unexpected error condition while attempting to initialize RXBATMGR.COM. Error 147: Error writing RXBATMGR.COM RXBATUTL encountered an unexpected error condition while attempting to initialize RXBATMGR.COM. Error 148: RXBATMGR.COM file not recognized You are trying to run RXBATUTL to initialize RXBATMGR.COM, but RXBATMGR.COM is not organized as RXBATUTL.COM expects. You are prob- ably intermixing incompatible versions of RXBATMGR.COM and RXBATUTL.COM from different releases of Personal REXX. Error 149: Unable to initialize RXBATMGR.COM RXBATUTL encountered an unexpected error condition while attempting to initialize RXBATMGR.COM. Error 150: Error setting REXX variable A Personal REXX utility tried to set the value of a REXX variable, but was unable to, probably because REXX was out of memory. Error 151: REXX program filename could not be found You asked Personal REXX to run a REXX program, but REXX could not find the program, either in the current directory or in any of the directories in your PATH. Error 153: File filename is empty The file that should contain your REXX program is an empty file. filename Error 154: Storage capacity exceeded at line nnn of file Personal REXX has run out of memory while trying to load your REXX program. See the description of Error 5 for some possible solutions. Error 156: Recursion in error handler, processor terminating This indicates that an internal error within Personal REXX has been detected. You have either encountered a bug in Personal REXX, or some other program has overlaid part of Personal REXX's memory. If this message is preceded by other REXX error messages, try to resolve the problem that led to the earlier messages. Error 157: Incompatible version of RXINTMGR loaded The version of RXINTMGR that you have loaded is either too old or too new to work with REXX or the Personal REXX utility that you are try- ing to use. You have most likely intermixed files on your disk from two different versions of Personal REXX. Personal REXX User's Guide, Version 3.0 Appendix E: Error Messages and Return Codes page E.9 ======================================================================== Error 159: Unknown or unsupported display adapter installed RXWINDOW does not recognize the display adapter on your system and cannot properly support it. Error 160: Function package already loaded You are trying to load a Personal REXX function package such as RXWINDOW, but the function package is already loaded. Error 161: Unable to install function package You are trying to load a Personal REXX function package such as RXWINDOW, but an unexpected error has been encountered. Error 162: Memory-resident program not specified You did not tell the RXUNLOAD utility the name of the memory-resident program that it should unload. Error 163: DOS version must be 3 or higher The RXUNLOAD utility will only work with DOS version 3.0 or higher. Error 164: Memory-resident program not found The RXUNLOAD utility was unable to locate the memory-resident utility that you want to unload. Error 166: Memory-resident program owns vectors - cannot unload The RXUNLOAD utility cannot unload a memory-resident program because the the program has taken over control of some of your machine's interrupt vectors and RXUNLOAD cannot properly reset the values of these vectors. This is usually because another resident program load- ed later has taken over one of the same vectors. Error 167: Out of memory A Personal REXX utility has run out of memory and is unable to con- tinue. Error 168: Error loading object code from filename An unexpected error was encountered while Personal REXX tried to load object code from the specified file. Error 169: Error accessing EMS memory Personal REXX has encountered an unexpected error accessing your sys- tem's LIM (Lotus-Intel-Microsoft) expanded memory. There may be some incompatibility between Personal REXX and your version of the Expand- ed Memory Specification software. Error 170: Invalid DELAY You used the DELAY option of the PRESS command, but the delay you specified was invalid. Specify a number from 0 to 255 indicating the number of seconds to delay. Personal REXX User's Guide, Version 3.0 Appendix E: Error Messages and Return Codes page E.10 ======================================================================== Error 171: File has no appended REXX object code You are trying to use the RXINFO utility to get information about the REXX object code appended to a file, but the REXX /O option has not been used to append object code to the file. Error 172: Object code from incompatible version of REXX ignored You are trying to run a REXX program with REXX object code appended to it, but the object code was created by either an earlier or later version of Personal REXX and is not compatible with the current ver- sion. Personal REXX ignores the incompatible object code. Your source code is converted to object code and then executed. Error 173: /T option required for TRACE R or TRACE L You are trying to trace results or labels in a REXX program that was converted to object code with /NT in effect. /T is required if you want to trace results of labels. Error 174: Invalid option flag You specified an invalid option for a Personal REXX command. Error 175: Fileid not specified You tried to run a Personal REXX utility but did not specify a required fileid parameter. E.3. Return Codes Whenever a program run by DOS terminates, it can set a return code. This return code must be in the range 0 to 255 and can be tested in a BAT file by using IF ERRORLEVEL. Programs commonly set this return code to indicate whether they succeeded or, if not, what type of error condi- tion they encountered. Since DOS does not require it, many programs do not set a return code. In fact, most DOS programs do not set a return code. Programs that do not set a return code always appear to have ter- minated with a return code of 0, regardless of any error conditions they encountered. Whenever a REXX program executes a DOS command, the return code from the command (which will always be in the range 0 to 255) is placed into the REXX variable RC. The REXX program can then make decisions based on the value of RC. If a DOS command could not be run because it could not be found, RC is set to -3. If it could not be run because there was not enough memory to run it, RC is set to -8. For any commands handled by COMMAND.COM (including all internal commands like COPY and DIR, and any commands involving piping or redirection), DOS will always give a return code of 0. Personal REXX User's Guide, Version 3.0 Appendix E: Error Messages and Return Codes page E.11 ======================================================================== E.3.1. Return Codes from REXX Programs When a REXX program terminates, it can set a return code to pass infor- mation back to its caller; the return code is specified via the EXIT instruction. For example, EXIT 209 would set a return code of 209. The way a return code is set after a REXX program has been run depends on how the REXX program was invoked. If one REXX program invokes another REXX program, RC within the calling REXX program is set when the called program finishes. If a REXX program is invoked via the REXX or RX com- mands, the DOS return code is set. In the first case, when a REXX program has been invoked by another REXX program, RC in the invoking program is set as follows: * If the program ended normally, but either there was no EXIT instruction or an EXIT instruction specified no return code, the Return Code is 0. * If the program ended normally with an EXIT instruction that speci- fied a return code, the return code (which can be in the range 0 to 32767; DOS's limit of 0 to 255 does not apply in this case) speci- fied on the EXIT instruction is used. * If the program ended due to an error, with a REXX error message in the range 1 to 51, RC is set equal to 20000 plus the error message number (for example, with error message 11, the return code is 20011). If the program could not be run due to an error in the error message range 101 to 170, RC is set equal to 20255. In the second case to be considered, the REXX program is invoked not by another REXX program, but via the REXX or RX commands. In this case, a return code in the range 0 to 255 must be returned to DOS. The return code is determined as follows: * If the program ended normally, but either there was no EXIT instruction or an EXIT instruction specified no return code, the return code is 0. * If the program ended normally with an EXIT instruction that speci- fied a return code, the return code specified on the EXIT instruc- tion is used. DOS return codes must be in the range 0 to 255. If the program specifies a return code outside of this range, the specified value is divided by 256 and the remainder is used as the return code. Personal REXX User's Guide, Version 3.0 Appendix E: Error Messages and Return Codes page E.12 ======================================================================== * If the program ended due to an error, with a REXX error message in the range 1 to 51, the return code is set to the error message num- ber. If the program could not be run because it could not be found (error message 151), the return code is 253. If it could not be run due to any other error numbered in the range 101 to 170, the return code is 255. E.3.2. Return Codes from Other Components of Personal REXX Return codes from the REXX and RX commands are set according to the rules given in the last section. Other commands supplied with Personal REXX set the DOS return code as follows: RXBATMGR, RXINTMGR, STACKMGR, RXBATUTL, RXUNLOAD, RXINFO, DISABLE, ENABLE, DROPBUF, GLVMGR, DESBUF, CONWAIT, and PRESS set a return code of 255 if they encounter an error, and 0 if they complete successfully. GLOBALV Sets a return code of 0 if it completes successfully, and if an error is encountered the return code is set to the error message number. RXWINDOW Sets a return code of 0 if it loads successfully, and if an error is encountered the return code is set to the error message number. SENTRIES Sets a return code of 255 if an error is encountered (for example, Stack Manager not installed); otherwise, the return code is set equal to the number of lines in the program stack. MAKEBUF Sets a return code of 255 if an error is encountered (for example, Stack Manager not installed); otherwise, the return code is set equal to the number of the stack buffer created by MAKEBUF. LISTFILE Gives a return code of 0 on successful completion, 24 if the parame- ters to LISTFILE are invalid, 28 for File(s) not found, and 36 for an error encountered reading a file or accessing the stack. EXECIO Return codes from EXECIO are 0 for normal completion, 2 if end-of- file was reached during a DISKR operation before the specified number of lines had been read, 24 if the EXECIO command was invalid (for example, invalid or missing parameters), 28 if an input or output file could not be opened for some reason, and 36 if an error was encountered reading or writing a file or accessing the console stack. Personal REXX User's Guide, Version 3.0 Index page 1 ======================================================================== Index _____ ABBREV function ... B.6 CMS ... 2.3 ABS function ... B.6 compatibility with CMS ADDRESS function ... B.6 REXX ... 4.3 ADDRESS instruction ... 3.19, B.2 CMS-like utilities ... 2.5, 9.6, Application Program 10.1 Interface ... A.1 Color display attributes for call REXX program from ... A.2 SCRWRITE function ... 8.15 control blocks ... A.4 Command options, REXX ... 3.3, D.1 examples ... A.2 COMMAND.COM flow of control ... A.2 interface with ... 3.6 function packages ... A.3 nonstandard interface ... 3.7, interrupt functions ... A.12 3.22 shared variable Comments, not required ... 4.3 interface ... A.3 COMPARE function ... B.7 ARG function ... B.6 Compatibility ... 4.1 ARG instruction ... B.3 extensions to Personal Attributes for color display with REXX ... 4.5, 8.1 SCRWRITE function ... 8.15 implementation limits ... 4.2 AUTOEXEC.BAT with CMS REXX ... 4.3 and RXBATMGR ... 3.23 with IBM OS/2 REXX ... 4.3 and RXINTMGR ... 2.4, 3.1, 3.14 with REXX 4.0 ... 4.4 and STACKMGR ... 2.4, 9.1 Components of Personal examples ... 3.14 REXX ... 2.3 using Personal REXX CONDITION function ... B.7 with ... 3.29 CONFIG.SYS and STACKDRV.SYS ... 9.5 BAT files Conflicts ... 3.23 out-of-order execution ... 3.10 interrupts ... 3.7 use of ... 3.10, 3.29 resident utilities ... 9.2 Batch Manager Console stack See "REXX Batch Manager" See "Stack" BITAND function ... B.6 Control blocks ... A.4 BITOR function ... B.6 CONWAIT command ... 9.6 BITXOR function ... B.7 COPIES function ... B.7 Blinking text ... 8.13 Copy ASCII file to another ... 6.8 Bulletin board ... 1.2 Ctrl-Break B2X function ... B.7 and Application Program Interface ... A.4 CALL instruction ... B.3 Cursor CENTER function ... B.7 control of ... 8.11 Character input stream ... 6.1 CURSOR function ... 8.11 Character output stream ... 6.1 CURSORTYPE function ... 8.11 CHARIN function ... 6.1-6.3, B.7 C2D function ... B.7 CHAROUT function ... 6.1-6.2, 6.4, C2X function ... B.7 B.7 CHARS function ... 4.4, 6.1-6.3, DATATYPE function ... B.7 B.7 DATE function ... 4.4, B.8 CHARSIZE function ... 8.11 DATECONV function ... 8.16 Closing a disk file ... 6.2 Debugging ... 7.1 Personal REXX User's Guide, Version 3.0 Index page 2 ======================================================================== Defaults DOS commands ... 3.18 COMMAND.COM interface ... 3.6 efficient calling ... 3.19 DOS environment ... 3.8 limit on length of ... 10.10, environment variables ... 3.5 10.13 memory use ... 3.3, 3.6 limitation on using commands REXX Interrupt ... 3.6 that stay resident ... 3.29 swapping ... 3.16 quotes around ... 3.18 trace setting ... 3.5-3.6 return codes from ... 3.21, E.10 DELAY function ... 8.11 search order for ... 3.19 DELSTR function ... B.8